Site Selections and Preparation
This section provides instructions for selecting a location and preparing the site to install the Log
Grate
1. Select a suitable location that ensures the Log Grate is sitting on a hard level surface for
optimum flame effect
2. Allow for approximately 5cm of clearance behing the unit ( from the frame to the back of the
mantle) and 20cm directly above the back log to allow for removal of the Refill Container.
3. Carefully unpack all of the components from the box.
Caution:
Handle the logs carefully, that are fragile and can easily crack or break if dropped.
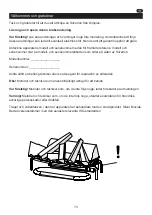
4. Unpack the transducer (contained within the water reservoir) which has been wrapped to protect
it during shipping. See Fig. 1.
To access the transducer;
•
Remove the top cover by turning the retaining tabs on both ends of the water reservoir.
•
Remove any packaging material.
•
Install the transducer so that it is sitting level in the circular holding area in the resevoir.
•
Orientate the transducer wire so that it does not sit directly above the Emitter and the wire
passes through the slit in the side of the tank.
•
Reinstall the top cover and ensure both retaining tabs have been turned so that they are pointing
inwards.
Note:
Completely assemble the unit before filling the water
3
Each log is a separate component that needs to be placed on the grate. Position each log so that
the hook and loop pad on the backside of the log lines up with the corresponding hook and loop
pad on the log grate. These pads assist with securing the logs to the grate. See Fig.A - Fig.J
Note:
Each of these logs are hand made, and as such, the hook and loop pads on the logs and
grate may not align perfectly, therefore, we have included additional pads should you need to
reposition them.
Each of the logs contain LED lights to create a flickering effect. During the assembly, each log
requires the electrical connectors on the log and grate to be connected as they are being placed.
In some cases, these wires can have tie wraps added to prevent the wires from being seen after
final assembly. (not included)
Caution:
Handle logs carefully, they are fragile and can easily crack or break, if dropped.
Log Grate Assembly
8. USAGE
Do not burn wood or other materials in the log grate
Summary of Contents for Silverton SVT20
Page 2: ...GB 1 NO 7 SE 13 FI 19 DK 25 PL 31 RU 38 ...
Page 47: ...Log Grate Assembly 1 2 3 Fig A Fig B Fig C Fig D Fig E Fig F ...
Page 48: ...4 5 Log Grate Assembly 6 7 Fig G Fig H Fig I Fig J ...
Page 49: ...Fig 1 Fig 2 Fig 3 ...
Page 50: ...Fig 4 Fig 5 CODE ...
Page 51: ......
Page 52: ......

