【
3-13
】
BRAKE
Installation
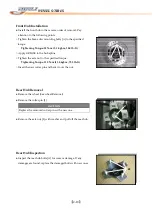
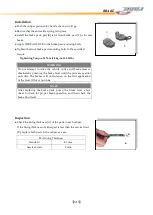
● Push the caliper piston in by hand as f
ar as it will go.
● Be sure that the anti
-rattle spring is in place.
● Install the
brake pads, pad [B] is for front brake, pad [C] is for rear
brake.
●
Apply THREAD LOCK to the brake pad mounting bolts.
● Tighten
the front brake pad mounting bolts to the specified
torque:
Tightening Torque: 18N-m (1.8kg-m, 13.0ft-lb)
Inspection
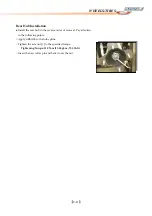
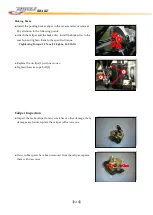
● Check the lining thickness [A] of the pads in each caliper.
★
If the lining thickness of either pad is less than the service limit
[B], replace both pads in the caliper as a set.
WARNING
Do not attempt to drive the vehicle until a full brake lever is
obtained by pumping the brake lever until the pads are against
each disc. The brakes will not function on the first application
of the lever if this is not done.
Pad Lining Thickness
Standard
4.5 mm
Service Limit
2 mm
NOTE
After replacing the brake pads, pump the brake lever a few
times to check for proper brake operation and then check the
brake fluid level.
A
B
Summary of Contents for DL-702 2008
Page 1: ...FOREWORD INDEX 0 0...
Page 41: ...3 11 BRAKE...
Page 180: ...6 70 ENGINE Install the starter motor...
Page 201: ...7 21 COOLING AND LUBRICATION SYSTEM Engine Lubrication System Chart...
Page 202: ...7 22 COOLING AND LUBRICATION SYSTEM Engine Lubrication System 1 2 3 1 2 3 1 2 3...
Page 203: ...7 23 COOLING AND LUBRICATION SYSTEM 1 2 3...
Page 235: ...7 32 ELECTRICAL SYSTEM Wiring Diagram...
Page 236: ...7 33 ELECTRICAL SYSTEM Wiring Diagram...
Page 237: ...7 34 7 34 ELECTRICAL SYSTEM ELECTRICAL SYSTEM...
Page 238: ...7 35 ELECTRICAL SYSTEM NOTE...
Page 240: ...9 2 PERIODIC MAINTENANCE...
Page 246: ...9 8 PERIODIC MAINTENANCE Intake Side...
Page 247: ...9 9 PERIODIC MAINTENANCE Exhaust Side Side...
Page 270: ...9 32 PERIODIC MAINTENANCE 1 2 3 4 18 19 12 16 17 21 13 14 15 22 23 5 6 7 8 9 12 10 11 20...

