1
10
0
© 2005 Directed Electronics—all rights reserved
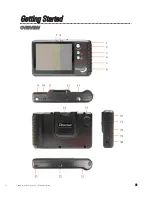
1. Strap Hole
Attach the hand-strap here.
2. Navigation key
The 4-way Navigation key for menu selections.
3.
/
2
Press to stop or go-back from action.
4.
Press to stop and display menu, or go to the previous menu.
5. LCD Display
Show menus and selection playing.
6. Hold Handle
The hold handle of the PMP3520.
7. Power LED
This LED is illuminated when the PMP3520 is powered
on, and flashes when charging the battery.
8. Record LED
This LED is illuminated when recording.
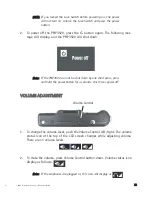
9. Power On/Off
Press to power On/Off.
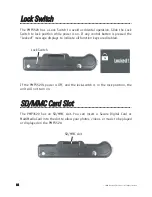
10. Lock Switch
When this Switch is locked, all key press commands are
disabled. Including power On/Off switch.
11. MIC
Built-in microphone for voice recording.
12. Volume Control
Push it to the right to increase volume, to the left to
decrease volume. Press it down to mute.
13. REC[
●
]
Press to start or stop recording.
14. SD/MMC slot
Insert SD/MMC card to retrieve data.
15. Speaker
Built-in speaker.
16. AV Line-In Jack
Plug AV cable here to enable AV Line-In recording.
17. Earphone Jack
Plug the earphones here.
18. AV Line-Out Jack Plug the AV cable here to connect the PMP3520 to an
external display (TV).
19. USB Connector
Connect the mini USB connector of the supplied USB
cable here, and the other end to PC host/OTG equipment.
20. DC-In Jack
Plug in the supplied AC Adapter here to recharge the
battery.
21. Battery cap
Press the latch and push the cap forward to replace the
rechargeable battery.
22. Tripod Screw Hole Secure a tripod here to hold the PMP3520.
23. IR Receiver
Implements commands from remote control.


