Connect Your DIRECTV Plus HD DVR To Your Home Network
®
WIRED CONNECTION
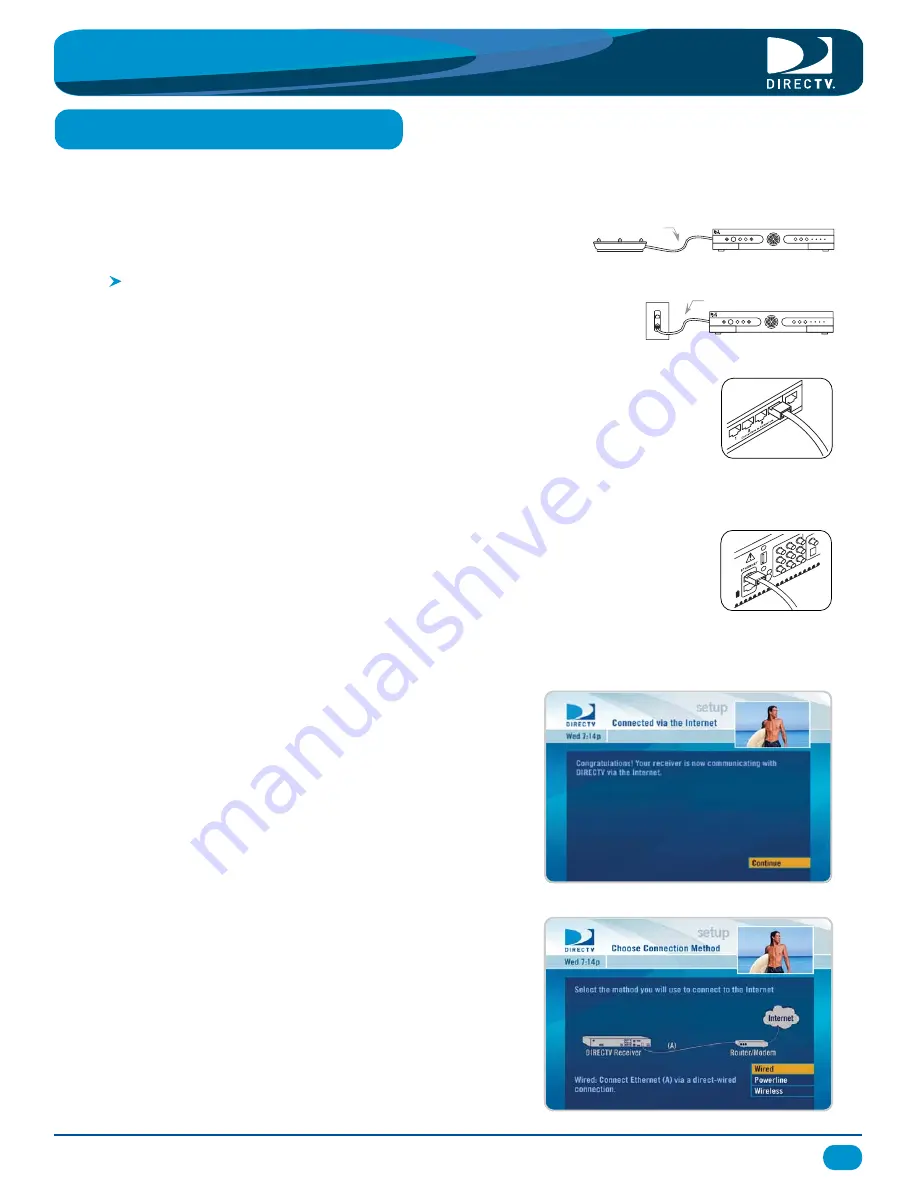
A wired connection is a direct or indirect connection between your DSL/cable router and your DIRECTV Plus HD DVR via an
Ethernet cable. Note that your equipment may look different.
Router
Ethernet Cable
HD DVR
Direct Connection
Indirect Connection
HD DVR
Ethernet Cable
®
If you can access your router, make sure that that it is providing Broadband to the Ethernet jack
that you are connecting your HD DVR to.
Step 1
Plug one end of the Ethernet cable into the Ethernet port located on the back of your HD DVR.
(Note: You may have one or two Ethernet ports, depending on your model. If you have 2, use the
TOP Ethernet port.)
Ethernet cable
plugs into HD DVR.
Step 2
3
Step 3
Go to your
DIRECTV Plus HD DVR:
Press Menu On Your DIRECTV Remote>
Select Help & Settings>
Select Setup>
Select Network>
Choose Connect Now
If your HD DVR immediately recognizes the network connection
you will receive this Congratulations screen.
(See Figure A.)
Verify that You are Connected!
®
Figure A
Figure B
If your HD DVR does not immediately recognize the network
connection, you will get the option to choose your
Connection method. You should choose Wired.
(See Figure B.)
Network Your DIRECTV Plus HD DVR -
QUICK START GUIDE
®
Ethernet cable
connects to an unused
port on the router.
Along with the requirements listed on page 2, you will need:
Cat5 Wiring in your home.
This means that you have Broadband ready Ethernet jacks that
you can plug into in different areas of your home
Connect the other end of the Ethernet cable into an Ethernet Adapter device
(Wall Mount or Power Strip), and plug the Ethernet Adapter device into a wall outlet.


