11
1.
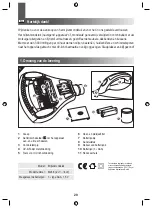
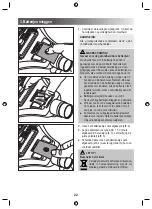
Check the contents for completeness and dam
-
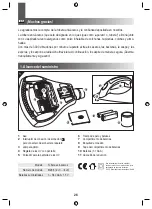
age according to the scope of delivery (Fig. 1)
immediately after unpacking.
NOTE:
Immediately contact your dealer if you have found
damage resulting from transport.
WARNING!
Batteries may cause health hazards!
The fluid in batteries is hazardous to health. If
swallowed, there is a danger of suffocation and
poisoning! In addition, batteries might explode if
used incorrectly.
X
The nozzle and batteries must not fall into the
hands of children. Keep the nozzle and bat
-
teries safe and inaccessible to children. But
if batteries are swallowed, consult a doctor
immediately!
X
Keep batteries away from moisture.
Never insert or use wet batteries.
X
Never attempt to recharge, solder, or open
the supplied batteries! Never short-circuit a
battery‘s positive and negative contacts.
X
Avoid all contact with any leaking battery fluid.
Immediately dispose of defective batteries
according to applicable environmental laws.
2.
Open the battery compartment as shown (Fig. 2).
3.
Insert the batteries (3x type AAA, 1.5 V) as shown
(Fig. 3). When doing so ensure they are inserted
the right way around (Fig. 3).
4.
Slide the battery compartment cover back on as
shown (Fig. 4) until you can feel and hear it click
into place.
CAUTION!
Protect the environment!
Dispose of used batteries in an environ
-
mentally friendly manner in accordance
with local environmental regulations.
Ø 32 mm
Ø 35 mm
5
7
Ø 35 mm
Ø 35 mm
6
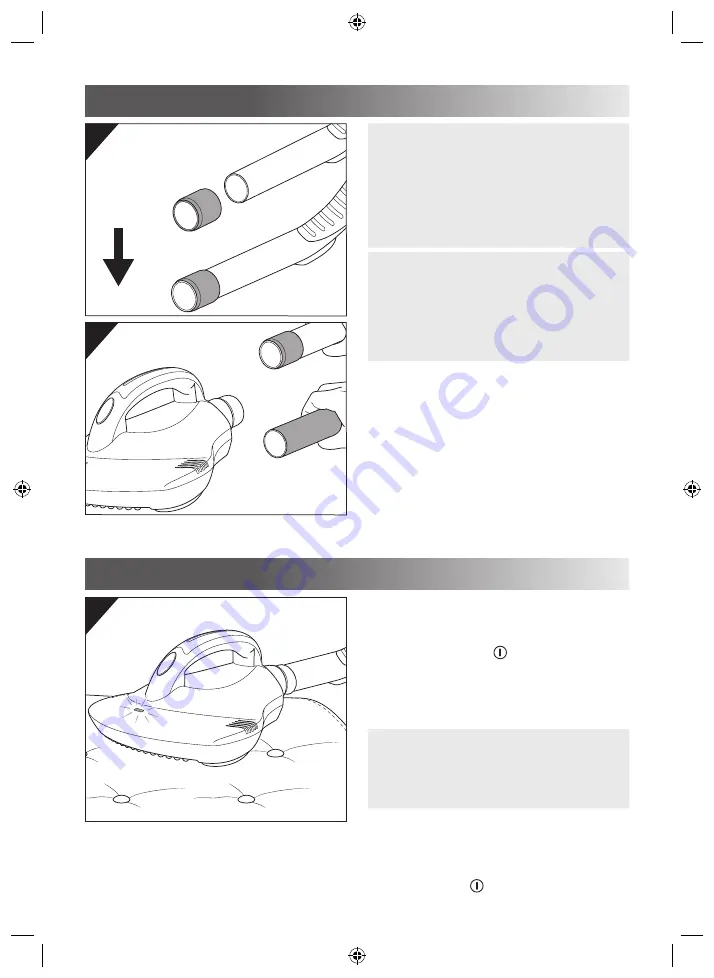
4. Attaching nozzle
5. Vacuuming
NOTE:
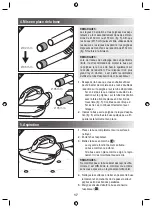
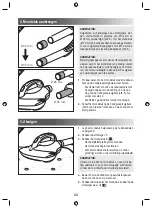
Suction tubes and handles of vacuum cleaners
are predominantly manufactured in diameters of
32 mm and 35 mm (Fig. 5). So that you can use
the nozzle (Ø 35 mm) in either case, there is an
adapter supplied for suction tubes/handles of 32
mm Ø (Fig. 5).
NOTE:
For cleaning tasks at close range, we recommend
mounting the nozzle (and if necessary the adapt
-
er) onto the handle. For work where you require
a greater reach, the suction tube of your vacuum
cleaner is preferable.
1.
Check to see if you can safely slide the nozzle
onto the handle/suction tube without the adapter.
–
If not, slide the adapter with the rounded edge
towards the opening onto the handle/suction
tube (Fig. 5). Proceed to step 2.
–
If you can, go straight to step 2.
2.
Slide the nozzle onto the handle/suction tube
(Fig. 6) and twist it a little so that it is tight.
1.
Put the nozzle completely onto the substrate to
be treated.
2.
Switch the vacuum cleaner on.
3.
Switch on the nozzle ( ).
–
The operating light goes on.
–
The nozzle starts to vibrate.
–
If the nozzle is in place as required, then UV
rays will now be emitted.
NOTE:
Trust that the nozzle is now emitting UV rays. It is
very difficult to check without subjecting yourself to
the UV radiation.
4.
Move the nozzle up and down the surface to be
treated slowly and in straight lines, being careful
not to miss anywhere.
5.
Then switch off the nozzle followed by the
vacuum cleaner ( ).


