background image

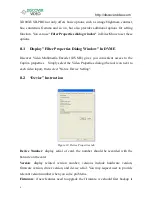
and then upgrade the firmware. 

Notes

: The different versions of the firmware and hardware cannot be mixed together, 

or  else  it  will  get  error  when  upgrade.  Additionally,  do  not  power  outage  in  the 

process  of  firmware  upgrade,  otherwise  it  will  lead  to  upgrade  firmware  fail,  then 

XI100XUSB will not work. You have to return back to factory for being repaired.                                                                                                                                                                                                                                                                                                                                                                                                                                                                                                                                                                                                                                           

8.3


"Advanced Settings" Instruction   


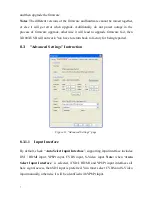
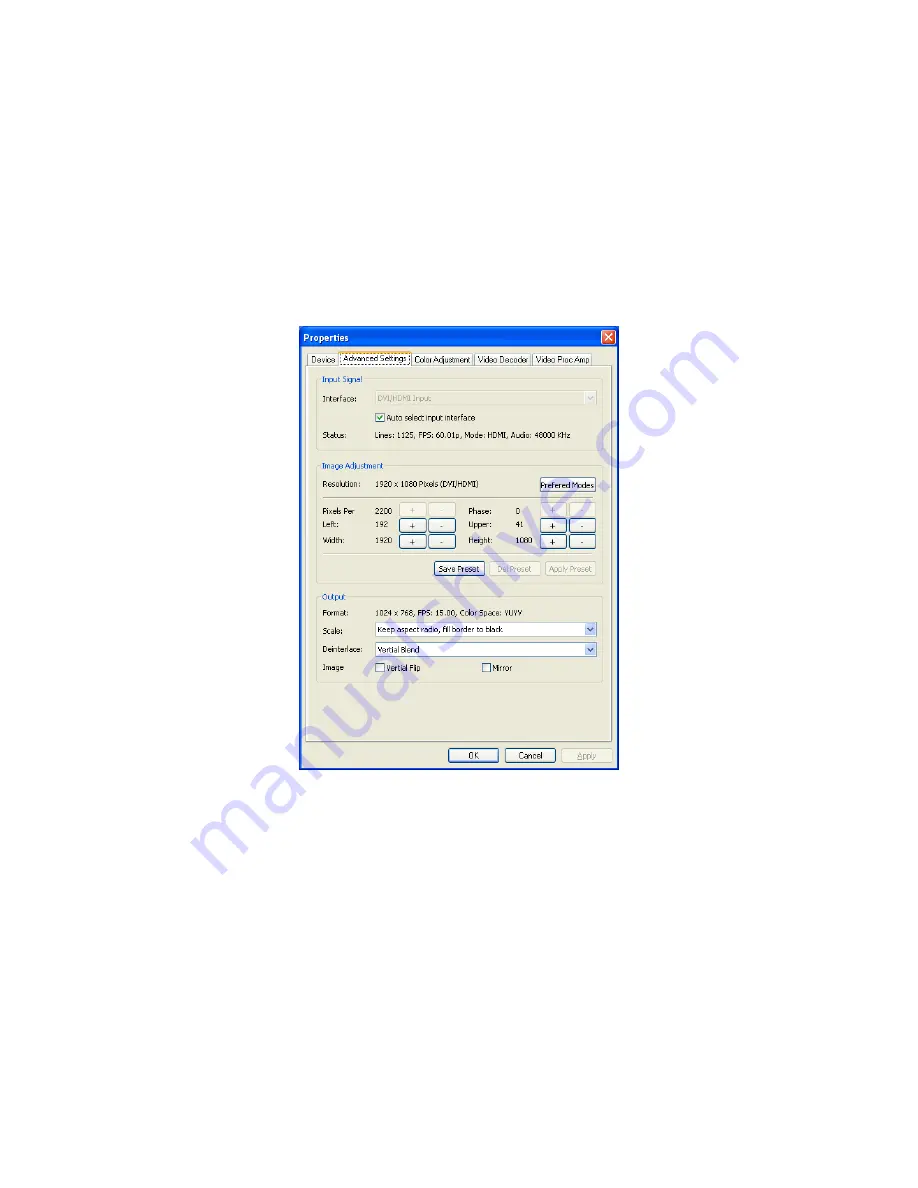
Figure 11, "Advanced Settings" page 

8.3.1.1


Input Interface 

By default, check “

Auto Select Input Interface

”, supporting input interface includes: 

DVI  /  HDMI  input,  YPbPr  input,  CVBS  input,  S-Video  input. 

Note: 

when  “

Auto 

Select  Input  Interface

”  is  selected,  if  SDI,  HDMI  and  YPbPr  input  interfaces  all 

have  signal access, then SDI input is preferred. You  must  select  CVBS and  S-Video 

input manually, otherwise it will be identified with YPbPr input. 


Summary of Contents for Captiva USB-PRO

Page 1: ...http discovervideo com Discover Video LLC i CAPTIVA USB PRO All in One HD USB3 0 Capture Box User s Guide July 2013...

Page 2: ...posite CVBS signal 4 6 7 S Video signal 5 7 Connection of Audio Signal 5 8 Video Capture Device Instruction 5 8 1 Display Filter Properties Dialog Window In DVME 6 8 2 Device Instruction 6 8 3 Advance...

Page 3: ...and one stereo analog audio signal Video input can connect with SDI HDMI DVI Component YPbPr VGA Composite CVBS or S VIDEO The user s guide will provide with instruction for proper use of the capture...

Page 4: ...osoft Windows Vista Microsoft Windows Server 2008 Microsoft Windows 7 Microsoft Windows Server 2008 R2 5 Hardware and Driver Installation Install the Captiva USB Pro by inserting the USB 3 0 cable the...

Page 5: ...3 6 2 DVI D DVI I Signal Figure 2 6 2 DVI D DVI I signal connection sketch map 6 3 HDMI Signal Figure 3 HDMI signal connection sketch map 6 4 VGA Signal Figure 4 VGA signal connection sketch map...

Page 6: ...Component Signal Figure5 first YpbPr signal connection sketch map Figure6 second YpbPr signal connection sketch map Note Second YpbPr signal should be chosen manually 6 6 Composite CVBS signal Figure7...

Page 7: ...h map Notes The audio signal input is up to Line in level standard if you need to connect microphone you must use an amplifier or mixer that provides line level output 8 Video Capture Device Instructi...

Page 8: ...access to the Captiva properties Simply select the Video Properties dialog the tool icon next to each video input then select Native Device Setting 8 2 Device Instruction Figure 10 Device Properties...

Page 9: ...to return back to factory for being repaired 8 3 Advanced Settings Instruction Figure 11 Advanced Settings page 8 3 1 1 Input Interface By default check Auto Select Input Interface supporting input i...

Page 10: ...time you can adjust 1 pixel Image clipping Through adjust image width height left margin and top margin to achieve desired requirement Increasing reducing width of image starts from right increasing...

Page 11: ...to delete preset you saved click Apply Preset to apply the saved preset to current settings 8 3 2 Image Output Display output format of current image set image zoom scale deinterlace and image flippin...

Page 12: ...Capture Device Instruction Captiva USB PRO support embedded HDMI and SDI in LPCM audio based on the Microsoft DirectShow interface After installation in operating system the relevant audio devices wi...

Page 13: ...Control window 2 Open Options menu select Properties menu item 3 In Mixer select Digital In XI100XE PRO Box 1 or Line In XI100XUSB PRO Box 1 click OK button 4 Corresponding volume control project will...

Page 14: ...lick button select Recording devices in pop up menu 2 In pop up list which displays recording device select HDMI In or Line In click Properties button system will pop up device properties dialog windo...

Page 15: ...variety of 3rd party audio and video capture software which is based DirectShow interface and audio capture software which is based DirectSound interface such as Discover Video Multimedia Encoder Wind...

Reviews: