background image

13

4. Connect DC plug of the AC adaptor to the DC IN jack on the
back of the unit. It will start charge the Ni-MH battery
automatically.
5. While charging, the Charging green LED in front of the unit
will be on.

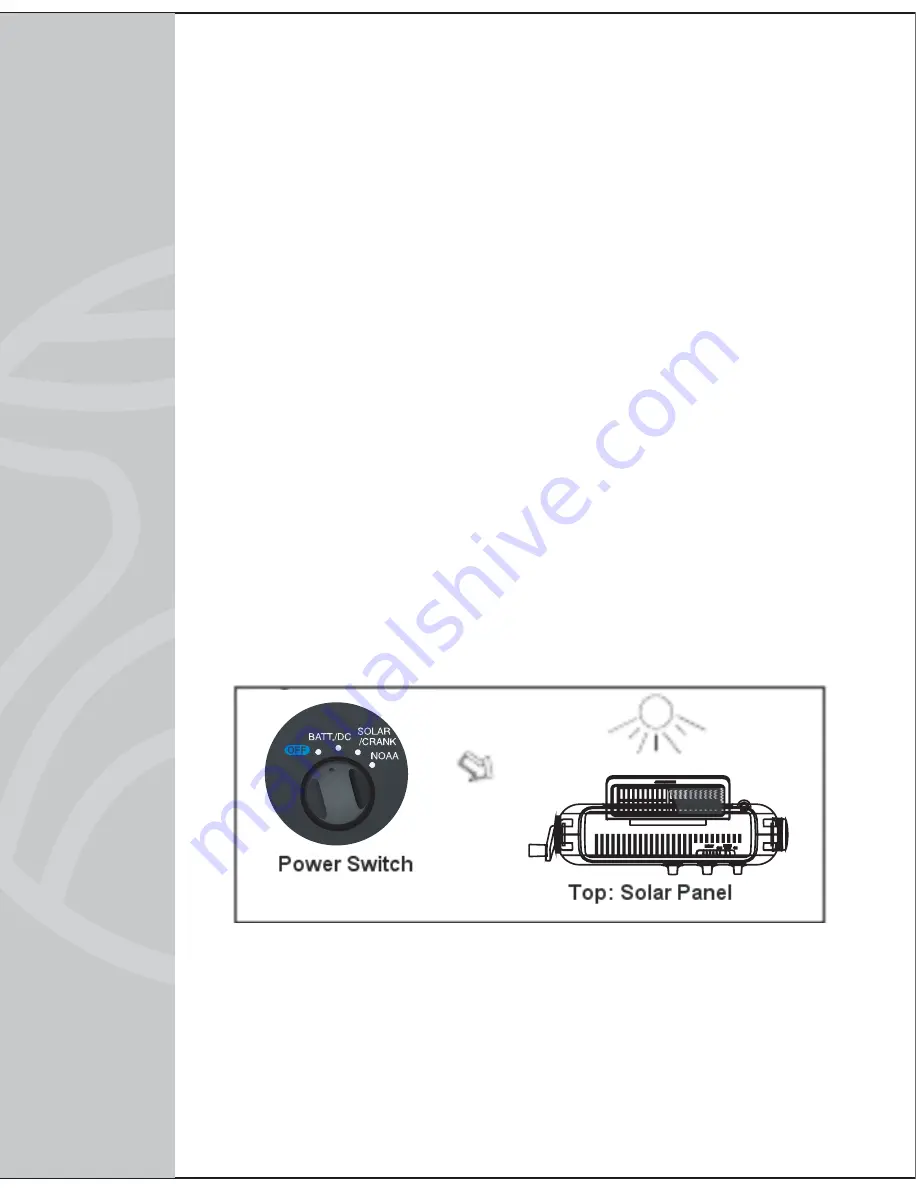
The solar panel on the back of the unit can rotate a full 180
degrees to let you angle it for optimal charging.
1. Set the Power Source Selector to "OFF" position.
2. Put the unit in the sunlight , rotate the panel to make sure
the solar panel of the unit is irradiated by the sunlight. The unit
will charge the rechargeable battery automatically.

NOTE: 1. Before the first use, we recommend to charge the
Ni-MH batteries for 4 hours the maximum. Please do not
charge the battery longer than recommendation as it will
shorten the battery life.
2. Unplug the adaptor from the radio when not in use to
avoid overcharging of the rechargeable batteries.

4. SOLAR CHARGING

NOTE: 1

The unit will also charge from indoor light and lamps but at a

slower rate.

2

Battery charging LED will not lignt in solar

charging mode.

13

Summary of Contents for D105X

Page 1: ...INSTRUCTION MANUAL SELF POWERED AM FM SW NOAA WEATHER RADIO D105X ...

Page 2: ...owed 5 Do not use this apparatus near water The appliance should not be used near water for example near a bath tub washbowl kitchen sink laundry tub in a wet basement or near a swimming pool 6 Clean only with dry cloth The appliance should be cleaned only as recommended by the manufacturer 7 Do not install near any heat sources such as radiators heat registers stoves or other apparatus including ...

Page 3: ...rdance with the instructions may cause harmful interference to radio communications However there is no guarantee that interference will not occur in a particular installation If this equipment does cause harmful interference to radio or television reception which can be determined by turning the equipment off and on the user is encouraged to try to correct the interference by one or more of the f...

Page 4: ...nters everywhere and apply these pads to the bottom of the unit before you place the product on any fine wooden furniture 10 11 4 3 2 1 5 6 7 8 9 12 3 1 Hand Crank 2 Battery Level Indicator 3 Tuning Charging Indicator 4 Reading Lamp 5 Solar Panel 6 Reading Lamp Flash SOS Light Selector 7 Flashlight 8 Dial Pointer 9 Speaker 10 Weather Channel Selector 11 WX FM AM SW1 SW2 Band Selector 12 Power Sour...

Page 5: ... 16 17 18 13 Carrying Strap 14 Telescopic Antenna 15 Tuning Knob 16 Volume Knob 17 Battery Compartment 18 Connector Rubber Dust Cover 19 20 21 22 19 Charger IN OUT Switch 20 USB Jack 21 Earbuds Jack 22 DC IN Jack ...
Page 6: ...ttery compartment and plug the rechargeable battery into the socket as shown 5 RECHARGEABLE BATTERY 3 6V AA SIZE UM 3 AA SIZE UM 3 AA SIZE UM 3 2 Close the Battery Door 3 Set the Power Source Selector to the OFF position 4 Lift the Crank Handle outward until it is fully extended Rotate the Crank the TUNING CHARGING Indicator will light 5 Set the Power Source Selector to SOLAR CRANK position to tur...

Page 7: ...r the battery pack being charged Charge batteries on a fireproof surface away from flammable items or liquids Batteries should NEVER be left unattended while charging Only adults should charge the batteries Follow the manufacturer s instructions for charging the product and do not charge longer than recommended Unplug the charger when the battery is charged Recycle Rechargeable Batteries Recycle y...

Page 8: ...mix old and new batteries Do not mix alkaline standard carbon zinc or rechargeable nickel cadmium batteries Only batteries of the same or equivalent type as recommend are to be used If the unit is not to be used for an extended period of time remove the battery Any old or leaking battery can cause damage to the unit and may void the warranty Do not dispose of batteries in fire batteries may explod...

Page 9: ...2 Open the Connector Rubber Dust Cover on the back of the unit set the Charger IN OUT Switch to IN position 3 Firmly and securely insert the DC plug of the adapter into the DC IN Jack on the unit the batteries are automatically disconnected Set the Power Source Selector to BATT DC position Note The CHARGE Indicator will light once the AC Adaptor is plugged into the AC outlet regardless of the sett...

Page 10: ...s low the BATT LOW red LED will be on you are recommended to charge the rechargeable batteries LISTEN TO RADIO 1 Set the Power Source Selector to BATT DC or SOLAR CRANK position to turn the unit on 2 Set the Band Switch to select AM FM SW1 SW2 band 3 Rotate the tuning Knob to select the desired radio station the Red tuning LED will light if the station is properly tuned and signal is strong enough...

Page 11: ...0 162 475 162 500 162 525 162 550 CH2 CH3 CH4 CH5 CH6 CH7 Note with regard to the NOAA Weather Band You need to identify which band receives your local weather band report When you change locations either to another city or state you may need to choose a different band to get the local report in that location HINTS FOR BEST RECEPTION To insure maximum weather band reception the Telescopic Antenna ...

Page 12: ...NOAA position and the unit will go on automatically after 3 times Beeper alarm when there is an alert from the National Weather Service 3 Set the Power Source Selector to OFF position to turn off the NOAA Alert It is recommended to use the AC adaptor to power the radio when you turn on the NOAA Alert 1 NOAA Weather band is a service broadcast of the U S Government and available in all 50 states Pu...

Page 13: ...te electricity for emergency 1 Install the Ni MH batteries correctly 2 Set the Power Source Selector to OFF position 3 Open the Connector Rubber Dust Cover set the Charger Switch to IN position 4 Use a standard USB to USB cable not included plug one end with USB into the computer USB port Plug the other end into USB jack of the unit It will start charge the Ni MH battery automatically when your co...

Page 14: ...te the panel to make sure the solar panel of the unit is irradiated by the sunlight The unit will charge the rechargeable battery automatically NOTE 1 Before the first use we recommend to charge the Ni MH batteries for 4 hours the maximum Please do not charge the battery longer than recommendation as it will shorten the battery life 2 Unplug the adaptor from the radio when not in use to avoid over...

Page 15: ...Mini USB cable not included to connect the unit and your external device which has a Mini USB port 3 Plug the end with USB to USB Jack of the unit plug the other end with Mini USB to Mini USB port of your external device 4 Set the Charger IN OUT Switch to OUT position 5 Set the Power Source Selector to OFF Position 6 Follow below procedures to charge your external device Turn the hand crank to sta...

Page 16: ...lar panel is a 5 LED Reading Lamp The lamp can be rotated 180 degrees to let you tilt it to one of many desired positions 1 Set the Reading Lamp Flash SOS Light Selector on the top of the unit to Position to turn on the lamp 2 Set the Light Selector to OFF position to turn off the lamp The LED flashlight is built into the side of the unit above the tuning knob To use the flashlight set the Light S...

Page 17: ...s Please note that excessively high volume may still block outside sounds Read this Important Information before Using Your Earbuds CARE AND MAINTENANCE 1 Do not subject the unit to excessive force shock dust or extreme temperature 2 Do not tamper the internal components of the unit 3 Clean your unit with a damp never wet cloth Solvent or detergent should never be used 4 Avoid leaving your unit in...

Page 18: ...ME control Tune the station properly Extend and rotate the FM antenna Relocate the position of the unit Select AM FM or WB as desired Power is not on The built in rechargeable battery pack is low The batteries are exhausted Recharge the built in rechargeable battery pack Replace all the batteries SPECIFICATION Power requirement DC Input 3 X AA UM 3 Batteries or Built in DC 3 6V 600mAH Ni MH rechar...

Page 19: ...arranty gives you specific legal rights and you may also have other rights which varies from state to state TO OBTAIN SERVICE please pack the unit carefully and send it prepaid by secured parcel post or UPS to SPECTRA at the address shown below It would be helpful if you include a note explaining how the unit is defective IF THE UNIT IS RETURNED WITHIN THE WARRANTY PERIOD shown above please includ...

Page 20: ...V080811 ...

Reviews: