4
5
Inspired by
7) The eyepiece can be rotated to
different positions by loosening the
eyepiece position lock (E) and
turning the eyepiece base
(F) directly.
8) The microscope will power off
automatically after one hour
of idle time.
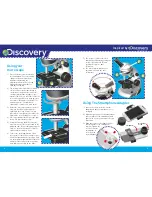
1) Loosen the screw at the back of the
adaptor and put the smartphone on it,
facing up.
2) Adjust the position of the horizontal arm
to fit the width of the smartphone and
tighten the screw just enough to keep it
in position.
3) Align the centre of the adaptor hole of
the swing arm to the smartphone
camera. Tighten the
screw so that the
smartphone is
securely held
in the adaptor.
1) Press the power switch to turn on
the illuminators. For slide viewing,
change the bottom illuminator
brightness by turning the
adjustment knob (A). Use the top
illuminator adjustment (B) for
solid object viewing.
2) The rotating colour/light filter (C) makes it
easier to observe the prepared slide. A
coloured filter heightens the contrast of
colour prepared slides. A range of light
aperture (hole) sizes is available to alter the
focus of the light. When the large aperture
is used the slide appears very bright. The
smallest aperture is helpful when
examining a certain area in more detail.
3) Rotate the lens turret until the shortest
objective lens (60X) aligns with the
opening in the stage (it will click into
place when it is aligned). Check that the
light can be seen through the eyepiece
4) Place a prepared slide on the stage and
fasten it in place with the clips.
5) Using the focusing knob (D), lower the
objective lens as close as possible to the
prepared slide. Next, looking through the
eyepiece, turn the knob anti-clockwise
slowly until the image is clear.
6) To increase the magnification, rotate
the lens turret until the next largest lens
(120X) is aligned with the specimen. Only
use the highest magnification (200X) after
using the other two, otherwise you may
have difficulty focusing on the slide.
Using your
microscope
B
A
C
D
E
F
Using The Smartphone Adaptor
Swing Arm
Retaining
Screw


