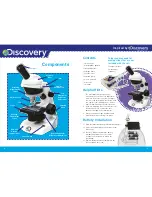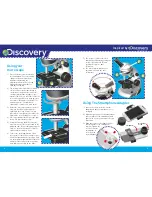
Use your tweezers and the vials to
collect very small specimens from
your garden or home. Items that are
good to look at under a microscope
are pieces of bath sponge, leaves,
plant roots, flower stems, sand, dirt,
fabric fibres, salt and seeds. Please
note that if the specimen is not thin it
can only be inspected using the
microscope upper illuminator. Light
from the bottom illuminator will not
shine through thick specimens.
If the sample is very thin and clear a
drop of dye may make details show
6
7
Inspired by
1. Wipe a blank slide clean, as dirt or
grease may affect the viewing of
your specimen.
2. Prepare a thin sample. You may
have to ask an adult to slice
something for you, as knives and
scissors can be sharp. Cross-
sections of stems, roots and pieces
of leaves are really interesting
under the microscope. When any
kind of cutting is involved, adult
supervision is essential.
3. Pick up your sample with the
tweezers and put it on the centre
section of the slide. Add one drop
of water or, if needed, you can now
4) Loosen the small retaining screw
at the top. Attach the adaptor-
smartphone assembly to the
microscope eyepiece as shown.
The adaptor should be fully
inserted into the eyepiece for best
results. Tighten the retaining
screw.
5) With the camera app opened,
re-adjust the smartphone camera
position by slightly loosening the
main adaptor screw if necessary.
The image circle should be at the
centre of the screen. Adjust the
focus knob until the image is clear.
Making A Temporary Slide
CAUTION!
DYES AND FOOD
COLOURING CAN STAIN.
ALWAYS FOLLOW THE SAFETY
INSTRUCTIONS ON DYE AND FOOD
COLOURING BOTTLES. WE
RECOMMEND THAT CHILDREN WEAR
OVERALLS AND/OR OLD CLOTHES AND
THAT YOU COVER FURNISHINGS,
CARPETS AND WORK SURFACES.
ALWAYS FOLLOW THE SAFETY
INSTRUCTIONS ON DYE BOTTLES.
WHEN USING DYES, ADULT
SUPERVISION IS
ESSENTIAL.
more clearly. Methylene blue dye (not
included) can be obtained from an
aquarium supply store.
How To Prepare
A Slide
Using The Smartphone
Adaptor (cont...)
1. Start with a clean slide and slide
cover. Make sure your hands are
clean and dry when handling the
slide covers.
2. Follow Steps 2 and 3 as before.
3. Before placing the slide cover over
your specimen add several drops
of transparent glue (not included).
Caution! Always follow the safety
instructions on glue bottles.
4. Place the slide cover gently over
the sample and carefully squeeze
out any air bubbles.
Making A Permanent Slide
– Only adults should replace batteries.
– Do not mix battery types or old and new
batteries.
– Do not use rechargeable batteries.
– Non-rechargeable batteries are not to be
recharged.
– Batteries are to be inserted with the
correct polarity.
Important Information
– Safe Battery Usage
5. Place your new slide in a safe
place and let it dry for a day before
you observe it under the
microscope.
IMPORTANT:
Wash your hands before
and after every project using warm
water and soap. Also, wash any of the
tools and accessories that have been
used to prepare specimens. Be
careful when handling the slides and
slide covers. Make sure an adult
knows what you are doing and is
available to help you.
add a drop of dye/food colouring
using your pipette.
4. Gently place a slide cover
(see-through plastic
label) over the
sample, being
careful not to allow
in any air bubbles.
5. Remove any excess water or
dye/food colouring with a piece of
paper towel (not included) by
pressing it down gently over the
slide cover.
6. Observe your slide.
– Do not short-circuit the supply terminals.
– Remove exhausted batteries from the toy.
– When the toy is not in use, remove
batteries to prevent possible leakage.
– Use only recommended or
equivalent battery types.
– Do not dispose of batteries in fire:
batteries may explode or leak.
TAKE
A CLOSER
LOOK AT THE
WORLD


