background image

4

121150

I

NSTALL AN

A

TTENUATOR

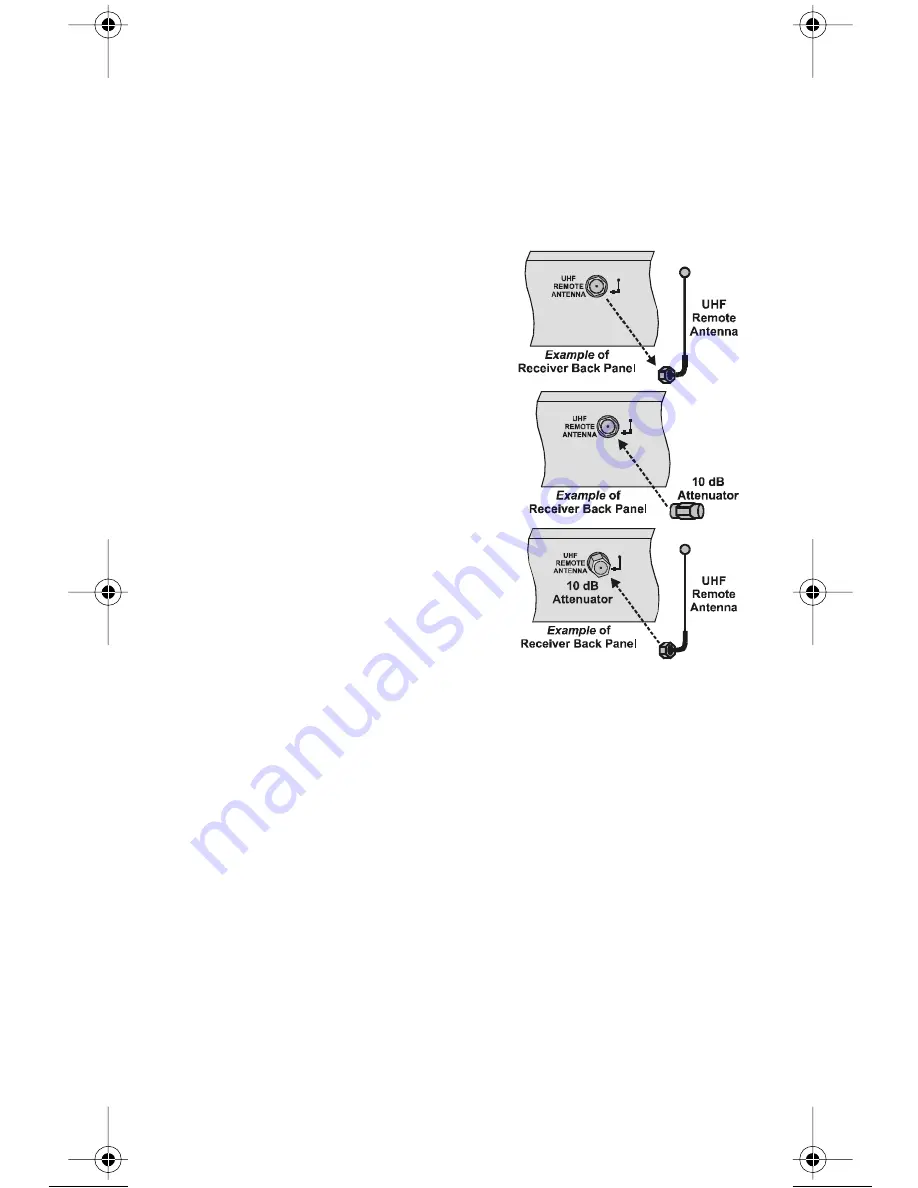
Stray UHF signals can block signals from the remote control
to the receiver. To prevent blocks, you can install a 10 dB attenuator
(you can buy one from a consumer electronics parts store).

Note

: This will help keep out stray UHF signals, but also cut down

how far away you can use the remote control.

1. Take the UHF antenna off

of the receiver’s back panel

UHF REMOTE ANTENNA

input.

2. Put a 10 dB attenuator onto the

UHF REMOTE ANTENNA

input.

3. Put the UHF antenna onto the

attenuator.

text_dishpvr.fm Page 4 Tuesday, January 28, 2003 8:04 AM

Summary of Contents for 121150

Page 1: ......

Page 2: ...g the equipment off and on the use is encouraged to try to correct the interference by one or more of the following measures Re orient or relocate the receiving antenna Increase the separation between...

Page 3: ...Codes 7 Check the Device Codes 8 Change the Address 9 Switch Between TV and Device Volume Control 10 Remote Control Buttons 11 Control the Receiver 11 Control a TV or a Second TV 18 Control a VCR Seco...

Page 4: ...and a third device REMOTE CONTROL BATTERIES The remote control requires AAA batteries When you replace old batteries you should replace all of the batteries Use batteries of the same kind for example...

Page 5: ...gh walls and other solid objects Because UHF signals travel so far the receiver may respond to signals from other nearby remote controls To handle this problem see Change the Address on page 9 If this...

Page 6: ...nuator you can buy one from a consumer electronics parts store Note This will help keep out stray UHF signals but also cut down how far away you can use the remote control 1 Take the UHF antenna off o...

Page 7: ...set the remote to the right mode for the device To change the mode press the button for the device you want the remote to control The mode button stays lit for two seconds to show you ve set the remot...

Page 8: ...to turn the device on 2 Find the brand name of the device in the tables starting on page 26 If the brand isn t listed see Scan for Device Codes on page 7 3 Press and hold the mode button for the devi...

Page 9: ...DEVICE CODES If the code for your device is not listed in the tables on starting page 26 use this procedure to scan the remote control s memory for the device code Here s what to do 1 Use the device s...

Page 10: ...her buttons don t CHECK THE DEVICE CODES You can find out what device code you ve set for each remote control mode Here s what to do 1 Press and hold the mode button for the device you want the remote...

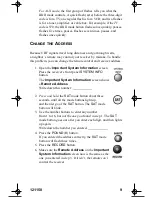
Page 11: ...tem Information screen Press the receiver s front panel SYSTEM INFO button The Important System Information screen shows a Remote Address Write down this number 2 Press and hold the SAT mode button ab...

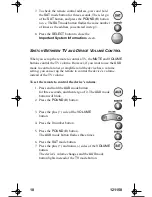
Page 12: ...r if you want to use the AUX mode to control a tuner or amplifier and the device has a volume setting you can set up the remote to control the device s volume instead of the TV volume To set the remot...

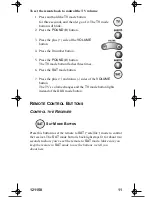
Page 13: ...three times 6 Press the SAT mode button 7 Press the plus and minus sides of the VOLUME button The TV s volume changes and the TV mode button lights instead of the AUX mode button REMOTE CONTROL BUTTON...

Page 14: ...phono RCA jacks or the S VIDEO output you must use the TV menus to change the input from local broadcast TV to satellite TV POWER BUTTONS Press the blank POWER button to turn the receiver on or off Th...

Page 15: ...ls Open the Browse Banner Press the RIGHT arrow button Show Themes Press the LEFT arrow button Move around within the Program Guide menus and Browse Banner Press the UP DOWN LEFT and RIGHT arrow butto...

Page 16: ...When you use a menu press this button to cancel and go back to watch a program CANCEL BUTTON Press this button to cancel and go back to the previous menu or to watch a program DISHPVR BUTTONS Use thes...

Page 17: ...gram Press the FWD forward button to move ahead through a program four times as fast as normal play Press this button twice to move ahead at 15 times three times to move ahead at 60 times and four tim...

Page 18: ...forward or backward that many hours Enter menu options For an option with a number you can press the number for that option instead of highlighting and selecting the option Enter numbers in a blank H...

Page 19: ...again Press the button a third time and the PIP window will close SWAP BUTTON Press this button to swap the video in the main display with the video in the PIP window Note Remember that you can only...

Page 20: ...ote to control the TV See Set Up the Remote Control on page 6 Then press the TV mode button to set the remote to TV mode The TV mode button will stay lit for two seconds to show you ve set the remote...

Page 21: ...S Use these buttons to change channels on the TV Note These buttons do not change the channels on the TV if the remote control is in limited mode SELECT BUTTON The SELECT button works as the ENTER but...

Page 22: ...up the remote to control a second VCR in AUX mode the same way it controls the first VCR in VCR mode See Set Up the Remote Control on page 6 VCR MODE BUTTON You must first set up the remote to control...

Page 23: ...s the TV POWER button to turn the TV on or off UP DOWN ARROW BUTTONS Use these buttons to change channels on the VCR Note If you are using the remote control in Limited Mode the TV will not change cha...

Page 24: ...box See your cable box user s manual for information about the box s features AUX MODE BUTTON You must first set up the remote to control the cable TV box See Set Up the Remote Control on page 6 Then...

Page 25: ...the remote to control the device s volume by following the instructions on page 10 VOLUME BUTTON Press this button to raise or lower the sound volume from the cable box Note Program the remote to cont...

Page 26: ...ol a tuner or amplifier Some of the buttons described here may not control your tuner or amplifier See the device user s manual for information AUX MODE BUTTON You must first set up the remote to cont...

Page 27: ...he remote to control the device s volume by following the instructions on page 10 VOLUME BUTTON Press this button to raise or lower the sound volume Note Program the remote to control the device s vol...

Page 28: ...691 695 712 Capehart 519 695 Circuit City 695 Citizen 506 516 522 523 524 525 526 691 712 Colortyme 573 695 Concerto 523 Contec 527 528 541 591 691 Craig 536 541 691 694 Crown 526 536 Curtis Mathes 50...

Page 29: ...627 712 Nikkai 612 613 618 Nordmende 551 Normandic 717 Novabeam 561 698 TELEVISION CODES Nyon 701 Onwa 541 691 Optonica 605 607 Orion 694 Osaki 612 Panasonic 508 509 510 511 512 566 574 685 686 687 6...

Page 30: ...543 Vector Research 506 Victor 557 Video Concepts 570 691 Vidtech 505 695 712 Viking 522 TELEVISION CODES VCR CODES Wards 505 506 515 518 534 536 543 564 565 567 568 607 619 712 714 715 Yamaha 505 50...

Page 31: ...585 Orion 506 507 Panasonic 521 522 523 524 526 553 554 598 614 628 Pentax 537 592 Perdio 588 VCR CODES Philco 553 554 611 Philips 553 554 565 585 Pioneer 553 562 573 574 575 576 600 Portland 546 593...

Page 32: ...ba 616 646 647 Zenith 648 Cable Boxes Codes Eastern 649 CI Tocom 640 Jerrold 635 636 Memorex 637 Oak 646 Panasonic 637 644 645 VCR CODES TUNER AMPLIFIER CODES Paragon 637 Pioneer 642 643 Regency 649 S...

Page 33: ...21150 31 Sharp 712 713 714 715 Sherwood 670 695 Sony 673 680 687 693 730 731 Symphonic 666 Teac 684 Technics 652 658 707 Toshiba 710 Victor 657 703 Yamaha 663 682 685 698 732 733 Tuner Amplifier Codes...

Page 34: ...wer button to turn the receiver on the receiver s front panel Power light doesn t turn on Maybe the batteries are weak or dead Maybe you didn t plug the receiver power cord into a power outlet or mayb...

Page 35: ...es in If the remote has fresh batteries check whether you put them in the right way If you didn t take them out and put them in the right way Press the correct mode button to set the remote to the mod...

Page 36: ...lightning electrical or telephone line surges fire flood or other acts of Nature accident misuse abuse repair or alteration by other than our factory service negligence commercial or institutional use...

Page 37: ...you depending upon where you live it could take three to five business days Along with replacement equipment you will receive a prepaid shipping label and instructions on how to return the defective e...

Page 38: ...rket price of the replacement ACCESSORY WARRANTY An accessory is any DISH Network branded equipment displaying the DISH Network logo excluding the receiver Smart Card cables and hookups and non mechan...

Page 39: ...box to you at your cost 8 We will Check the remote control including whether it is covered under the warranty Replace any remote we find is defective with a new or refurbished remote if the defective...

Page 40: ...r 4 IR Signals Remote Control 3 M Modes Remote Control 5 R Receiver Control the 11 Remote Control Basics 2 DishPVR 2 Remote Control Batteries 2 Remote Control Modes 5 Remote Control Signals UHF and IR...

Page 41: ...bleshoot the Remote Control 31 Tuner Codes 30 Tuner or Amplifier Control a 24 TV Codes 26 TV Control a 18 U UHF Signals Remote Control 3 V VCR Codes 28 VCR Control a 20 Volume Control Switch Between T...

Page 42: ...40 121150 Notes...

Page 43: ...tell you about such changes Send any comments or questions to EchoStar Technologies Corporation Technical Publications 94 Inverness Terrace East Englewood Colorado 80112 Part Number 121150 Printed in...

Page 44: ......

Reviews: