Page 57
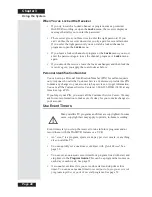
Use Event Timers
Page 57
•
To use
VCR Event Timers
, you
must
set up the receiver to control the
VCR (see below). If the receiver
can’t
control the VCR, use an
Auto-
Tune Event Timer
to tune the receiver to the channel you want to record.
Use the timers built into the VCR to start and stop the VCR at the right
times.
•
The receiver’s front panel
IR BLASTER
sends an IR signal to control
the VCR. This signal can bounce off walls or other objects on its way to
the VCR. This works in most home setups. But, shelves or smoked glass
doors between the receiver and the VCR can block the signal. If the
signal has to cross a very large room, or bounce off curtains, it may not
be strong enough to control the VCR. Make sure nothing blocks the
signal, and the signal can bounce off nearby, light-colored, smooth
surfaces.
•
If you can’t set up the
IR BLASTER
to control the VCR, maybe you
can use an IR extender you connect to the receiver
ACCESSORY
JACK
. An IR extender is a cable that carries the infrared signal from the
receiver to the IR sensor on the VCR. You can buy extenders from the
Customer Service Center. You
must
set up the receiver to send the right
signals out via the
ACCESSORY JACK
. Please see
Set Up the
Accessory Jack
on page 81.
Here’s what to do
:
The receiver
starts
the VCR to record, but
doesn’t
turn the VCR on. So, you
must
leave the VCR turned on!
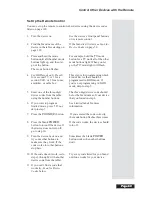
1. Get the VCR device code from the table in
Device Codes
starting on
page 121.
2. Press the
MENU
button.
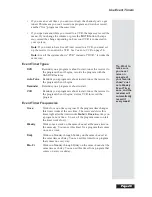
3. Select the
System Setup
option.
4. Select the
Installation
option.
5. Select the
VCR Setup
option.
6. Use the number buttons to enter the VCR device code.
7. Make sure you turn on the VCR. If you are using the
TV Set Out
on the
receiver to provide audio/video to the VCR, set its channel switch to 3
or 4 to match the receiver back panel channel 3/4 switch and make sure
the VCR is set to record on this channel. Put in a rewound videotape
that you can record on.
Summary of Contents for Platinum DishPVR 501
Page 1: ...ATTENTION Be sure to review the Read Me First information on the first page ...
Page 36: ...Chapter 2 Page 30 Parts of the System Notes ...
Page 88: ...Chapter 3 Page 82 Using the System Notes ...
Page 110: ...Page 104 Chapter 4 Installation Instructions Notes ...
Page 130: ...Page 124 Chapter 5 Reference Notes ...
Page 148: ......

