background image

27

Firmware Upgrade

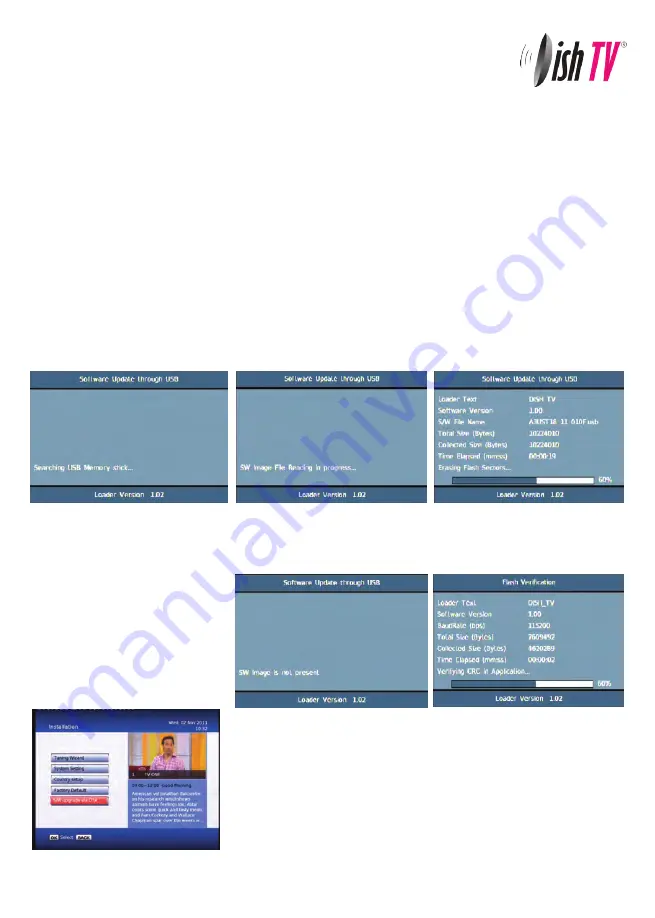
If the firmware upgrade was incorrectly placed on the USB it will also come up with the “Searching USB Memory Stick...”

message, the difference is the next message will say “SW Image is not present” it will then quickly display the Flash 

Verification screen which will last only a few seconds.

S/W Upgrade OTA:

This is a Software Upgrade over the air. This will only work if the upgrade is being 

broadcast. It can be selected from the 

Installation

 option in the Main Menu. 

If you leave this set to on your unit will automaticly update to new software 

when its broadcast.

Via USB:

One way to perform a firmware upgrade on your receiver is via USB, using the USB connection in the back of your unit.

To do this just follow the instructions below...  

Note: The USB drive must be formatted to FAT32

1. Download updated firmware from 

www.dishtv.co.nz

, follow the instructions provided on the website.

2. Turn off power to satBox, insert the flashdrive.

3. Press and hold the 

Menu

 button on the front of your S7080 while powering on the unit, Keep the menu button  

    held down until the unit says USB on the front panel.

The receiver will first display 

Load

 and if done correctly the display on the front will show 

USB

 after about 3 seconds.

Once 

USB

 is displayed on the front panel you can release the menu button and leave the unit to do the rest. 

On screen at the same time it will present a window headed 

Software Update through USB

If the upgrade has been loaded correctly onto the USB flashdrive it will come up with 

SW Image File Reading in 

progress...

 straight after it displays 

Searching USB Memory stick...

Then to a couple of loading screens which will take about 4-5 minutes to complete.

Summary of Contents for S7080

Page 1: ...User Manual DishTV S7080 500GB Hard Drive Freeview Recorder Single Tuner S7080 plus...

Page 2: ...s For more information about Freeview visit www freeviewnz tv A Freeview Digital Set Top Box gives you access to over 15 free to air digital channels without a subscription or contract For more inform...

Page 3: ...S7080 80 User Manual DishTV S7080 500GB Hard Drive Freeview Recorder Single Tuner S7080 plus RF OUT ON OFF Switch R L and CVBS AV output for connection to a non HD TV Pb Pr and Y Y Pb Pr output for co...

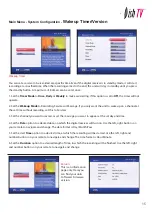
Page 4: ...m Configuration Wakeup Timer Version ESG Media Manager Thumbnail Browser Recorded Book List Media Information File Transfer Photo Viewer from USB PVR Playback from USB Recording Recordings Library Boo...

Page 5: ...Beginning End Stops playback Library Displays recorded programmes list Fast Forward Rewind playback 05 SUBT Displays subtitles whe available PLAY Plays your recordings TIMER Displays the wakeup timer...

Page 6: ...an HDMI cable connect this between the HDMI port on your satBox and one of the HDMI inputs on your HDTV If you do not have an HDMI cable or an HDTV connect the AV cable that came with your satBox bet...

Page 7: ...to scan will now start please do not push any buttons until it has finnished Once it has finnished if the signal from your dish is good TV1 will appear and you can start using your satBox Ultra Switch...

Page 8: ...invoke the main menu by pressing the MENU button This main menu contains several options User Settings Installation System Configuration ESG Media Manager You can toggle between the options by using U...

Page 9: ...nnel number button Delete Deletes a channel off the list Note Due to freeview standards channels cannot be moved around Favourite View To enter this menu you will be prompted for your password Default...

Page 10: ...our remote Recording Start Offset This option will adjust how many minutes before your program the unit will start recording This is very handy when programs are not running on time so you don t miss...

Page 11: ...ncy DiSEqC and positioner details if used need to be set for each satellite Press OK once correct settings are completed You will be returned to the Blind Scan page Blind Scan Allows you to specify wh...

Page 12: ...ssing the GREEN button will do a full satellite scan using the existing TPs or Carriers in the list To scan just one transponder view the transponder list by using the left right navigation keys The C...

Page 13: ...ware at 4am When the software is broadcast RF Mode With this setting you can adjust the RF output frequancy if its conflicting with another unit or broadcast Hearing Impaired This option is to turn su...

Page 14: ...password is 0000 S W Upgrade via OTA This option can be used only if an Over The Air software update is broadcasted via satellite The software will only be broadcast for a few weeks when there is a m...

Page 15: ...e set time without recording set this to Services 3 Set the channel you want to record or set the message you want to appear at the set day and time 4 Set the Date option to a desired date on which th...

Page 16: ...n selecting the ESG option from the Main Menu It will list the available services and when focus is set to the current service then its corresponding current and next events are displayed When your in...

Page 17: ...s date is the date and time the recording was last viewed If the access date is blank this means the recording has not yet been viewed The thumbnail browser can be accessed from the library by pushing...

Page 18: ...ibrary A max of 16 bookings can be made This limit may be increased in the future Media Information This window provides your storage device information In this window you can select which Hard Drive...

Page 19: ...f already copied to the removable external USB Hard Drive it can be transferred back to the internal Hard Drive at a later date USB to SATA By pressing the GREEN button you will have the choice to cop...

Page 20: ...Descending Alphabetical from Z to A Small to Large Arranged Smallest to Largest file size Large to Small Arranged Largest to Smallest file size YELLOW Filter For future use BLUE Device For future use...

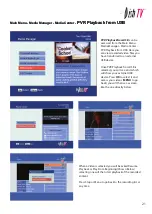
Page 21: ...e transferred to an external USB device Once PVR Playback from USB is selected you will see a list which will show your external USB device Press OK to select it and access your videos MENU to go back...

Page 22: ...lected for recording and press the Red button this will ask you whether you want to cancel the recording or not Once you have a recording set you will see a small R or S to the righthand side of your...

Page 23: ...nually enter a duration by pressing the left right navigation keys If you press the stop button you will then have the options of renaming and continuing to record just saving or discarding it Recordi...

Page 24: ...on To delete mutiple recordings you need to select the recordings you want to remove using the Yellow button then push the Red button to delete By pressing the Library button LIB a second time the Thu...

Page 25: ...t the end of each ad break and when you next play your recording you can easly skip the ads by pressing the Right Arrow button next to the OK button Bookmarks are stored with the recordings so that yo...

Page 26: ...want to edit To select an area to delete push the Red button to start the selection and then the Red button again to end If the selection you have made is not quite in the right place you can press t...

Page 27: ...tions below Note The USB drive must be formatted to FAT32 1 Download updated firmware from www dishtv co nz follow the instructions provided on the website 2 Turn off power to satBox insert the flashd...

Page 28: ...means you can only look at or record from 1 of the 5 channel groups for Freeview at one time Q Cannot get EPG A Use the Grey button above the letters EPG on your remote to access the EPG Q Not respon...

Page 29: ...Insert new batteries as shown on page 7 Infrared receiver on S7080 is obstructed Check that there is a clear line of sight from the remote to the sensor on the front panel Picture is distorted too wid...

Page 30: ...to 2150MHz Input Impedance 75Ohms unbalanced Signal Input Level 65 25dBm Symbol Rate 2 45Mbps LNB Power 13 18V Max 500mA Connections LNB IN F connector LOOP OUT F connector YPbPr Connect to your TV c...

Page 31: ...ontact your supplier and have your receipt This warranty is subject to the following provisions This is only valid within New Zealand The product must be correctly assembled and operated in accordance...

Reviews: