User manual in Original
Doc. ref: 500A_GTS-E65_am_en_210608
DISPERATOR AB
Tel: 08-724 0160
E-mail: info@disperator.se
Mälarvägen 9, 141 71 Segeltorp
Web page: www.disperator.se
42 / 48
10.5. Dismantling of Disposer
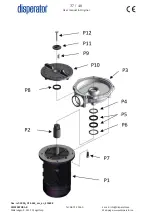
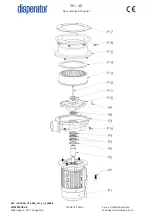
The below designations within brackets refers to the position numbers on the exploded view drawing
with associated spare part list of the disposer in section 10.2.
1. Use the main electrical safety breaker on the wall/bulkhead to disconnect electrical supply, and
lock the breaker with a padlock or a cable tie.
2. Disconnect the disposer motor (P1) connection cable from the AS1-electrical control box, i.e. let
the cable accompany the disposer out of the cabinet.
3. Disconnect the drain hose from the outlet pipe connection on the end shield (P3).
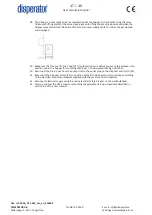
4. Use a trolley which lifting plate can be inserted under the disposer motor in the cabinet, or
alternatively a steady jack with lifting plate. Detach the disposer from the assembly under the
hopper (6 nuts, P18), and remove the the disposer from the cabinet. These nuts must always be
replaced before reassembly as they are locking nuts.
5. Loosen the 4 nuts with washers (P16). These 4 nuts must always be changed for new ones
before reassembly, as they are lock nuts. Note the location of the disposer outlet on the end
shield (P3) relative to the hole pattern on the hood (P15) upper side, so that the outlet later
may be reassembled in the same direction. For this purpose, is also an arrow engraved on the
hood lower edge, which when reassembling shall be above the outlet of the the end shield (P3).
Remove the hood (P15).
6. Remove the seal (P14) on the stationary shredder. This seal must always be replaced with a new
seal when reassembled.
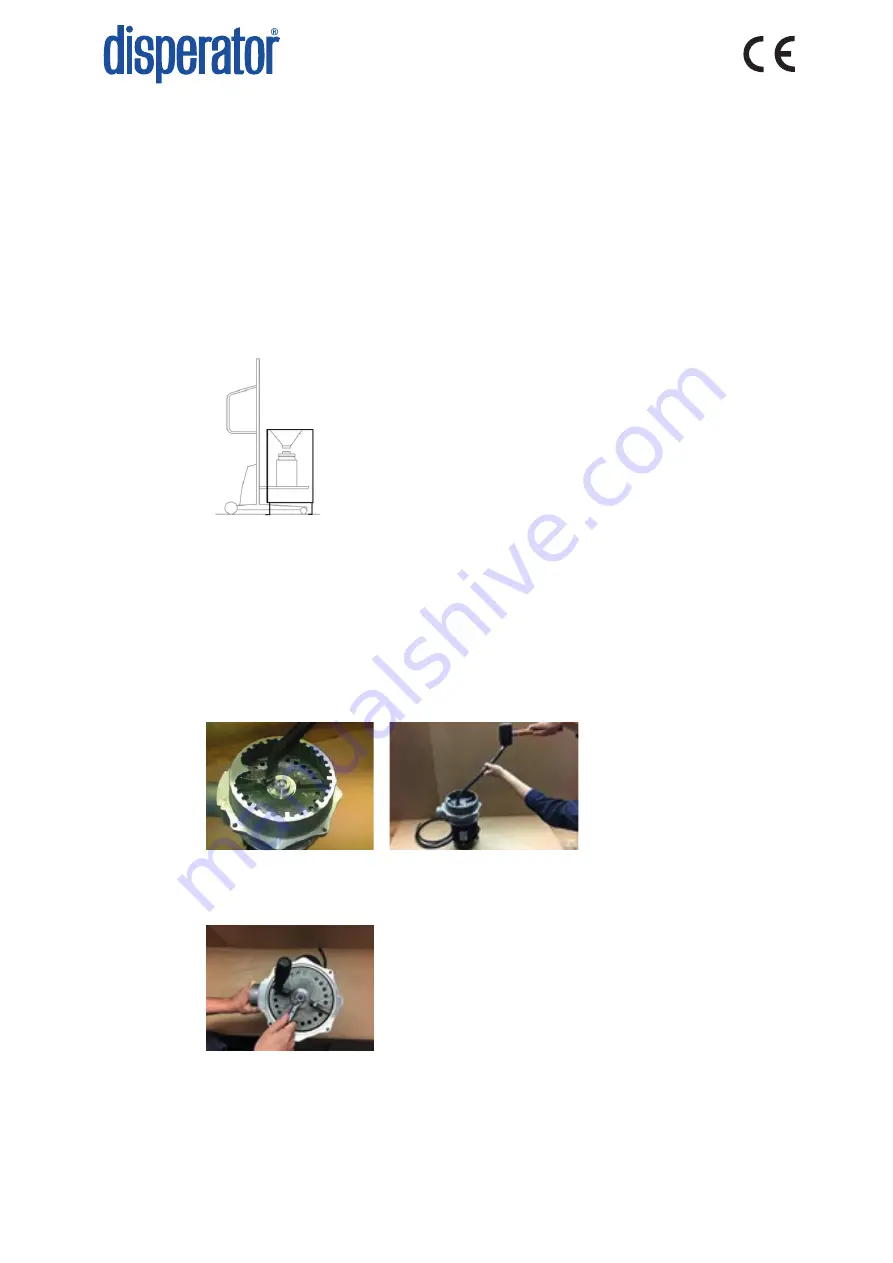
7. Pry the stationary shredder (P13) loose from the end shield (P3) using a crowbar that levers
against the large tooth on the inside rim and is supported by the rotary shredder (P10) close to
one of the two shredder blades. See photo below.
8. Loosen the axle screw (P12). If the rotating shredder (P10) keeps turning, and cannot be held
still manually, use a pipe whench to hold one of its shredder blades. Alternatively, lock the rotary
shredder with a screwdriver placed through one of the holes at the disposer outlet. See photo
below.
Summary of Contents for 500A-GTS-E65 EXCELLENT SERIES
Page 2: ......


