background image

HUN

K E 6 4 0   E S   |   K E 6 4 0   V A R I O

101

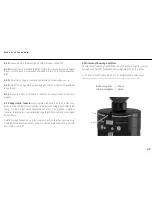
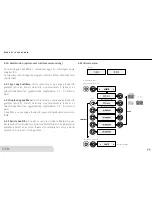
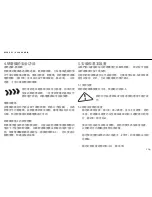
A tisztítószámláló nullázása: Lépjen be a menübe mindkét előválasztó 
gomb kb. 3 másodperces együttes nyomva tartásával. Lépjen a men-
üben a szimpla adag előválasztó gombbal amíg a GRINDZ felirathoz ér. 
Ekkor az előválasztó gombok enyüttes nyomva tartásával lépjen ki a 
menüből. A számláló ezáltal nullázódik.

6.4.4 Darálókés számláló

Az  örlő  darálókés  számlálóval  is  fel  van  szerelve,  amelynek 

köszönhetően  a  kijelzőn  a  DISC  szó  fog  megjelenni  100.000  szimpla 

adag leörlése után. 


Az  örlő  továbbra  is  használható,  de  a  késeket 

rendszeresen cserélni kell (lásd 9-es fejezet) a leg-

jobb örleményminőség és sebesség biztosítása ér-

dekében. 

•  A  darálókés  számláló  nullázása:  Lépjen  be  a  menübe  mindkét 

előválasztó gomb kb. 3 másodperces együttes nyomva tartásával. 
Lépjen a menüben a szimpla adag előválasztó gombbal (ábra 8) 
amíg a DISC felirathoz nem ér. Ekkor az előválasztó gombok enyüt-
tes nyomva tartásával lépjen ki a menüből.  

•  A PIN beviteléhez használja a bal potentiométert a számok meg-

változtatására és a szimpla adag előválasztó gombot a következő 
karakter kiválasztására. A PIN 0408. 

•  A számláló nullára fog visszaállni és a kijelzőn a PIN OK felirat je-

lenik meg. 

A kések cseréjét minden esetben képzett szerelő 

kell, hogy elvégezze, hogy szakszerűen legyen el-

végezve és megfelelően legyen újrakalibrálva. 

Summary of Contents for KE640 ES

Page 1: ... VA R I O Original operating instructions Bedienungsanleitung Manuale di istruzione Macina Mode d emploi Manual de Operação Használati utasítás 使用說明書 意式浓缩咖啡豆研磨机 EN DE IT FR BRA HUN TWN CHN KE640 ES KE640 VARIO HORECA GRINDER ...

Page 2: ... R I O Original operating instructions Bedienungsanleitung Manuale di istruzione Macina Mode d emploi Manual de Operação Használati utasítás 使用說明書 意式浓缩咖啡豆研磨机 Claim Report 03 21 39 57 75 91 109 127 146 EN DE IT FR BRA HUN TWN CHN ...

Page 3: ...EN K E 6 4 0 E S K E 6 4 0 VA R I O 3 Grind on Demand Original operating instructions KE640 Single Espresso Grinder ...

Page 4: ... O 4 Safety Technical Data Description Safety Devices of the Grinder Set Up and Basic Adjustment Operation Operating faults Cleaning Service Spare Parts Certificate Warranty Conditions 5 6 7 8 8 9 14 15 16 19 20 20 TABLE OF CONTENTS ...

Page 5: ...m failure to observe these instructions Children cannot appreciate the dangers that can exist in the op eration of electrical grinders For this reason never leave children unsupervised with electronic appliances such as this grinder Never submerge the grinder in water and never operate with wet hands 1 Safety Please carefully read and observe the following safety instructions Failure to do so can ...

Page 6: ...erience and or for lack of knowledge unless they are supervised by an appointed per son for their safety or got instructions by that person how the machine is to be used Never submerge the grinder in water and never operate with wet hands The machine must not be cleaned with a jet of water The device may be installed only in locations where operation and maintenance of the equip ment is restricted...

Page 7: ... fineness scale Pos 7 Display Pos 8 Single shot pre selection button Pos 9 Single shot timer Pos 10 Double shot pre selection button Pos 11 Double shot timer Pos 12 Spout Pos 13 Portafilter mounting Pos 14 Portafilter rest Pos 15 Fastening screw for Portafilter rest Pos 16 Start Stop switch Pos 17 Drip tray Pos 18 Hopper slide Pos 19 Main switch back Pos 20 Trip switch back Pos 21 Power cable back...

Page 8: ...vided long allen wrench 2mm 5 2 4 Open the hopper slider pos 18 in the adapter 4 Safety Devices of the Grinder Thermal overload circuit breaker The motor of the grinder is protected by a thermal overload circuit breaker which interrupts the motor s electric circuit in the event of electric overload The trip switch item 20 must be pressed to enable the grinder to be re started Motor protector The w...

Page 9: ... grinding time of 20 min Afterwards allow the grinder to cool down before the next operation 6 1 Handling the grinder Proper operation necessitates the steps described in the following 5 3 Electrical installation Protect your device with separate pre fuses not included in the scope of delivery according to the information provided under Point 2 Techni cal data Make sure that the pre fuse is not ov...

Page 10: ...rupted The LED of the active pre se lection button blinks The process can be continued by pushing the portafilter back onto the start button The saved missing amount will be ground For stopping the grinder and deleting the remaining time simply push the blinking pre selection button The entire set grinding quantity or grinding time is available once again Rotation to the left fine Rotation to the ...

Page 11: ...ouble shot Press and hold the double button pos 10 While holding use the the right potentiometer pos 1 to adjust the grinding time of the double shot rule of thumb 3 0 5 0 seconds The change is saved by letting go the double button 6 3 3 Barista Mode Shortly press both buttons pos 8 10 The display shows BARISTA The timer is disabled and the grinder will grind as long as the portafilter is inserted...

Page 12: ...at were ground since the last reset Scroll down with the single button to the display reading D The figure shows the number down double shots that were ground since the last reset Scroll down with the single button to the display reading SC The figure shows the total number of single shots that were ground on this grinder not resettable Scroll down with the single button to the display reading DC ...

Page 13: ...but the discs should be changed regularly see chapter 9 in order to assure best possible grinding quality and speed Resetting the disc counter Enter the menu by pushing and holding both buttons for appr 3 seconds Scroll through the menu with the single pre selection button pos 8 until the display reads DISC From this point exit the menu by pressing and holding both buttons for appr 3 seconds For e...

Page 14: ...the grinding mecha nism as described and re move the foreign object Observe the safety instruc tions Reset the grinding time G A ST R O N O M I E M Ü H L E N H O R E C A G R I N D E R Defect The grinder does not start the dis play is not lit In the case of other malfunctions or continued faults please contact your dealer or your authorised customer service centre Cause The main plug is not inserte...

Page 15: ...rt the grinder and grind through all GRINDZ into your por tafilter or a seperate bin several shots needed Open the hopper slider and grind appr 2 3 double shots of coffee in order to purge the residues of GRINDZ out of the disc casing Formation of dust while grinding GRINDZ is natural and harmless The dust particles can be cleaned with a soft cloth from the aroma fez and the spout 8 2 Cleaning the...

Page 16: ...n grinder it can easily be ex changed in one piece Service hours can be minimised and the grinder is quickly ready for operation 9 1 1 Close the hopper slide grind all remaining coffee beans out of the discs loosen the safety screw pos 2 and take off the hop per 9 1 2 Switch off the grinder and pull the mains plug Place the grinder on its side and unscrew the fastening screws Store the screws and ...

Page 17: ... Mark 2 Basic factory setting and also the position for instal ling and removing the lid in order to achieve the factory setting after positioning the lid Red Mark 1 Red Mark 2 Therefore turn the grind adjustment of the built in grinder to the right red mark 2 for refitting the grinder s lid 9 1 9 Replace the grinder s lid on the grinder and adjust to the desired fineness Note the correct position...

Page 18: ...40 Return your old built in grinder in the packaging 9 3 Recalibration of the grind adjustment Due to wear and tear fo the grinding discs or after exchanging them the Zero grind adjustment has to be recalibrated Turn the grind adjustment to the finest setting 0 Close and remove the hopper Remove the remaining beans from the filler shaft and vacuum out the grinder casing Remove the silicone sealing...

Page 19: ...ide 10 Spare Parts Spare parts are usually ordered from your customer service cen tre or your local dealer To ensure quick and correct processing of your order the following information is absolutely essential 1 Type designation serial number and voltage of the grinder on the rating plate underneath the grinder 2 An exact description of the part to be replaced or the article number ...

Page 20: ...ntioned product Product Device for food processing Machine model Coffee grinder Type of machine KE640 KE640 Vario Following directives regulations and standards have been applied 2006 42 EG The provisions of the Machinery Directive 2014 35 EU The Low Voltage Directive 2014 30 EU The EU Electromagnetic Compatibility Directive EMC 2011 65 EU The RoHS Directive on the restriction of use of certain ha...

Page 21: ...DE K E 6 4 0 E S K E 6 4 0 VA R I O 21 Grind on Demand Bedienungsanleitung KE640 Single Espresso Mühle ...

Page 22: ...it Technische Daten Beschreibung Sicherheitseinrichtungen der Mühle Aufstellung und Grundeinstellung Bedienung Betriebsstörungen Reinigung Service Ersatzteile Zertifikat Garantiebestimmungen 23 24 25 26 26 27 32 33 34 37 38 38 INHALTSVERZEICHNIS ...

Page 23: ...einem Fall für entstandene Schäden Kinder erkennen die Gefahren nicht die im Umgang mit Elekt rogeräten entstehen können deshalb Kinder nie unbeaufsichtigt mit Elektrogeräten alleine lassen Gerät nie ins Wasser tauchen und nicht mit nas sen Händen bedienen 1 Sicherheit Bitte lesen und beachten Sie die nachfolgenden Sicherheitshinweise sorgfältig Bei Nichtbeach tung kann es zu Schäden am Gerät sowi...

Page 24: ...anderen Spannungen und Frequenzen bitte bei uns oder Ihrem Händler erfragen nur für 120V 60Hz 1 3 Verwendungszweck Auf der von Ihnen erworbenen Espressomühle Typ KE640 ES oder KE640 Vario dürfen nur geröstete ganze Espressobohnen gemahlen werden Es ist darauf zu achten dass nur gereinigtes und ungemahlenes Mahlgut verwendet wird Nutzen Sie das Mahlwerk nie zum Mahlen anderer Produkte oder Gegenstä...

Page 25: ...cherungsschraube für Mahlgradverstellung 5 Mahlgraddeckel 6 Mahlgradskala 7 Display 8 Vorwahlknopf single shot 9 Mahlmengeneinstellung single shot 10 Vorwahlknopf double shot 11 Mahlmengeneinstellung double shot 12 Auslauf 13 Aufnahme Siebträger 14 Auflage Siebträger 15 Schraube für Siebträgerauflage 16 Startknopf 17 Tropfschale 18 Trichterschieber 19 Netzschalter 20 Auslöseknopf 21 Netzkabel bei ...

Page 26: ...e Thermischer Überstrom Schutzschalter Der Motor der Mühle ist durch einen thermischen Überstrom Schutzschalter geschützt der bei elektrischer Überlastung des Gerätes den Motorstromkreis unterbricht Um die Mühle wieder starten zu können schalten Sie die Mühle am Netzschalter aus Pos 19 und drücken den Auslöseknopf Pos 20 wieder hinein Erst dann kann die Mühle wieder eingeschaltet werden Der Bedien...

Page 27: ...5 leicht und ziehen Sie die Siebträ gerauflage ganz nach unten Sollte die mitgelieferte Siebträgerauflage nicht passen wenden Sie sich bitte an Ihren Händler Er sendet Ihnen gern eine passende Siebträger auflage zu Schieben Sie den Siebträger zwischen Siebträgeraufnahme und Siebträgerauflage bis zum Anschlag Drücken Sie die Siebträgerauflage nach oben und ziehen Sie die Befestigungsschrauben fest ...

Page 28: ...und endet automatisch 6 1 6 Break Funktion Ziehen Sie während der Vermahlung den Siebträger aus der Aufnahme so wird der Mahlvorgang unterbro chen Die Leuchtdiode in dem aktiven Vorwahlknopf blinkt Der Mahlvorgang kann weiter fortgesetzt werden indem Sie den Siebträger wieder in die Aufnahme schieben Die noch fehlende Menge wird vermahlen Ist dieses nicht gewünscht können Sie durch Drücken der Vor...

Page 29: ...ehen Sie wie folgt vor 6 3 1 Einstellung Single Shot Drücken und halten Sie die Single Taste Pos 8 Stellen Sie dann mit dem linken Stellknopf Pos 9 die Vermahlungszeit für einen einfachen Espresso ein Erfah rungswerte 1 5 3 0 Sekunden Durch Loslassen der Single Taste wird der Wert gespeichert 6 3 2 Einstellung Double Shot Drücken und halten Sie die Dou ble Taste Pos 10 Stellen Sie dann mit dem rec...

Page 30: ...e Tasten gleich zeitig und schalten Sie den Netzschalter wieder ein Displaya nzeige RESET Der Tages Mengenzähler ist jetzt auf 0 gesetzt 6 4 Softwaremenü InderobenabgebildetenÜbersichtwerdendieFunktionenderBenut zer Software der Mühle beschrieben 6 4 1 Einstellen der Vermahlungszeit im Menü Drücken und halten Sie beide Tasten Pos 8 10 gleichzeitig ca 3 Sekunden Im Display erscheint die Anzeige MEN...

Page 31: ...den um die korrekte Durchführung und Kalibrierung nach dem Wechsel zu gewährleisten 6 4 3 Reinigungszähler Unabhängig vom oben beschriebenen Shot Zähler verfügt die Mühle über einen Reinigungszähler Nach dem festgelegten Wert von 5000 Single Shots zeigt das Display CLEAN im Wechsel mit der Standardanzeige S 2 0 bzw D 4 0 Die Mühle ist weiterhin normal verwendbar sollte jedoch regelmäßig gereinigt ...

Page 32: ... das Mahl werk wie beschrieben und entnehmen Sie dabei den Fremdkörper Beachten Sie die Sicherheitshinweise Stellen Sie die Mahlzeit neu ein Fehler Die Mühle läuft nicht an das Dis play ist nicht be leuchtet Bei anderen Störungen oder fortgesetzten Fehlern fragen Sie bitte Ihren Händler bzw Ihren autorisierten Kundendienst Ursache Der Netzstecker ist nicht gesteckt Der Überstrom Schutzschalter wur...

Page 33: ...grad auf grob Raste 9 Geben Sie 35 40g GRINDZ Inhalt eines Sachets oder einer Verschlusskappe der Dose direkt in das Mahlwerk Setzen Sie den Trichter wieder auf die Mühle den Trichterschie ber noch geschlossen halten Ziehen Sie die Sicherheitsschrau be Pos 2 wieder an Starten Sie die Mühle und vermahlen den GRINDZ Reiniger komplett in ein Gefäß 2 3 double shots Öffnen Sie den Trichterschieber Verm...

Page 34: ...dürfen nur durch autorisiertes Fachpersonal ausgeführt werden Wenden Sie sich daher an eine auto risierte Kundendienstwerkstatt oder an Ihren Händler 9 1 Austausch der kompletten Einbaumühle Sollte ein Defekt an der Einbaumühle so kann die gesamte Ein baumühle leicht komplett getauscht werden So können Service zeiten minimiert werden und die Mühle ist schnell wieder ein satzbereit 9 1 1 Schließen ...

Page 35: ...rden im Werk folgende Mar kierungen vorgenommen 1 2 3 Roter Strich 1 Grundeinstellung O feinste Einstellung und mini maler Mahlscheibenabstand Roter Strich 2 Einstellung zum Auf und Abnehmen des Deckels um nach Aufsatz des Deckels die feinste Einstellung zu erreichen Verdrehen Sie die Mahlscheiben nie im Uhrzei gersinn über die rote Markierung 1 hinaus da ansonsten die Mahlscheiben durch Berührung...

Page 36: ...pelten Espresso von 15g starke Erwärmung des Mahlguts ungleichmäßige Korngrößenverteilung im Mahlgut Veränderung des Geräuschs der Vermahlung von Rauschen zu Kratzen Der Mahlscheibenwechsel sollte nur durch autorisiertes Fachper sonal oder durch eine Kundendienstwerkstatt durchgeführt wer den Zum Austausch der Mahlscheiben wird die Serviceanleitung KE640 Art Nr 306592 empfohlen Der Mahlscheibenwec...

Page 37: ...nn bis sich die Mahlscheiben sehr leicht berüh ren Bei feinster Einstellung sollten sich die Mahlscheiben gera de nicht berühren Ziehen Sie die beiden Inbusschrauben wieder an legen den Gummidichtring wieder ein und setzen den Trichter wieder ein 10 Ersatzteile Ersatzteile werden üblicherweise bei Ihrer Kundendienstwerk statt oder bei Ihrem Händler bestellt Für eine schnelle und kor rekte Ausführu...

Page 38: ...nten bezeichnete Produkt Produktart Gewerbliches Gerät zur Nahrungsmittelbearbeitung Maschinenbezeichnung Kaffeemühle Maschinentyp KE640 KE640 Vario folgende Richtlinien Verordnungen und Normen entsprechen 2006 42 EG Den Bestimmungen der Maschinenrichtlinie 2014 35 EU Die Richtlinie für Niederspannung 2014 30 EU Die EU Richtlinie für elektromagnetische Verträglichkeit EMV 2011 65 EU Die RoHS Richt...

Page 39: ...IT K E 6 4 0 E S K E 6 4 0 VA R I O 39 Grind on Demand Manuale di istruzione Macinacaffè singolo per espresso KE640 ...

Page 40: ...0 Sicurezza Dati tecnici Descrizione Dotazioni di sicurezza del macinacaffè Installazione ed impostazione di base Uso Guasti Pulizia Service Pezzi di ricambio Certificati Condizioni di garanzia 41 42 43 44 44 45 50 51 52 55 56 56 INDICE ...

Page 41: ...oli con apparecchi elettrici senza sorveglianza Non utilizzare mai il macinacaffè in ambiente o luogo umido o bagnato e con mani bagnate 1 Sicurezza Si prega di leggere ed osservare attentamente le seguenti istruzioni di sicurezza In caso di inosservanza si possono verificare danni all apparecchio o danni fisici agli utilizzattori 1 1 Simboli In questo manuale d uso si utilizzano i seguenti due si...

Page 42: ...a 1 5 kg rivolgersi per favore a noi o al vostro rivenditore per altre tensioni o frequenze solo 120V 60Hz 1 3 Destinazione d uso Con il macinacaffè per espresso della famiglia KE640 ES o Vario potete macinare solo caffè in grani per espresso Osservate che si usi soltanto un prodotto pulito da macinare ed ancora non ma cinato Non utilizzate l apparecchio per macinare altri prodotti od oggetti 1 4 ...

Page 43: ...zione della macinatura Pos7 Display Pos8 Tasto Espresso Singolo Pos9 Regolazione della quantità Espresso Singolo Pos10 Tasto Espresso Doppio Pos11 Regolazione della quantità Espresso Doppio Pos12 Bocchetta di uscita Pos13 Ingresso Portafiltro Pos14 Forcella di supporto Portafiltro Pos15 Vite di regolazione per supporto Portafiltro Pos16 Pulsante di erogazione Pos17 Vaschetta di raccolta Pos18 Ghig...

Page 44: ...con entrambe le mani e ruotatela in senso orario 4 Predisposizione di sicurezza del macinacaffè Interruttore di sicurezza per sovraccarico termico Il motore del macinacaffè è protetto da un interruttore di sovraccarico termico che con un carico elettrico eccessivo sull apparecchio blocca l alimentazione del motore Per far ripartire nuovamente il macinacaffè spengere il macinacaffè dall interruttor...

Page 45: ...macinacaffè Svitate con la chiavetta a brugola di corredo 3 mm le viti di fissaggio pos 15 leggermente e muovete la forcella verso il basso Nel caso in cui la forcella fornita non sia compatibile con il portafiltro rivolgetevi al vostro rivenditore Vi consegnerà una forcella compatibile Far scivolare il portafiltro tra il blocco superiore del portafiltro e la forcella fino a che non tocca Spingere...

Page 46: ...o In questo modo la macinatura verrà interrotta La luce al diodo sul pulsante selezionato lampeggia La macinatura può riprendere se nuovamente posizionate il portafiltro nella posizione di erogazione La macinatura proseguirà per il tempo residuo Nel caso non si desiderasse questa funzione potete eliminarla premendo il tasto di selezione In questo modo si procede al reset della quantità residua ed ...

Page 47: ...il pulsante dell Espresso Doppio il tempo viene memorizzato 6 3 3 Modalità Barista Premete brevemente entrambi i pulsanti Pos 8 10 Sul display appare la scritta BARISTA Il timer è adesso inserito Il macinacaffè macina fino a che il portafiltro rimane inserito nella forcella In questo modo il dosaggio avviene manualmente 6 4 Menù del Software Display To enter the menu Save the changes Press and hol...

Page 48: ...ppio e accendere nuovamente l interruttore generale Sul diplay appare RESET I contatori parziali sono adesso su 0 6 4 Menù del Software Nella visione mostrata vengono descritte le funzioni del software per l utilizzatore del macinacaffè 6 4 1 Regolazione del tempo di macinatura nel menù Premete e tenete entrambi i pulsanti Pos 8 10 contemporaneamente per circa 3 sec Sul display appare la scritta M...

Page 49: ... l installazione delle macine ed la seguente calibrazione 6 4 3 Deconto per la pulizia Indipendentemente dal contatore sopra descritto il macinacaffè dispone di un contatore di pulizia Dopo il raggiungimento del valore fissato di 5000 Espresso singoli il display mostra la scritta PULIZIA al posto della scritta standard S 2 0 oppure D 4 0 Ilmacinacaffèèdestinatoadunusocontinuativo deve essere quind...

Page 50: ...stro desiderio Pulite il macinacaffè come descritto e togliete i corpi estranei Fate attenzione agli avvisi di sicurezza Regolate nuovamente il tempo di macinatura Errore Il macinacaffè non gira il display non è illuminato Per altri guasti o errori continuativi domandate al vostro rivenditore o al servizio di assistenza autorizzata Causa La presa di corrente non è collegata La protezione dai sovra...

Page 51: ...ndete 35 40 gr di GRINDZ contenuto di un sacchetto o del tappo di chiusura del flacone ed inseritelo nel macinacaffè Inserite nuovamente la tramoggia sul macinacaffè tenere sempre chiusa la ghigliottina Avvitare nuovamente la vite di sicurezza Pos 2 FatepartireilmacinacaffèemacinatecompletamenteGRINDZ 2 3 Dosi doppie Aprite la ghigliottina Macinate circa la stessa quantità di caffè in grani per to...

Page 52: ...arazioni che saranno necessarie dovranno essere eseguite solo da personale specializzato Rivolgetevi ad una officina autorizzata o al vostro rivenditore 9 1 Cambio completo del Macinacaffè installato NelcasodidifettodelmacinacaffèInstallato puòesseresostituita completamente la parte interna In questo modo i tempi di servizi vengono minimizzati ed il macinacaffè è velocemente pronto per l uso 9 1 1...

Page 53: ...ione della macinatura parte interna vengono inseriti in fabbrica le seguenti marcature Marcatura Rossa 1 Regolazione di base 0 macinatura più fine e minima distanza delle macine Marcatura Rossa 2 Regolazione per aprire e togliere il coperchio e dopo la estrazione del coperchio per otteren la più fine regolazione Non ruotate mai le macine in senso orario oltre la marcatura 1 altrimenti le macine po...

Page 54: ... delle macine Capacità di macinatura ridotta 5 sec per un Doppio Espresso di 15 gr Eccessivo riscaldamento del macinato Macinatura non omogena Cambio del rumore durante la macinatura Il cambio delle macine deve essere eseguito solo da personale specializzato o tramite una officina autorizzata Per il cambio delle macine viene consigliato il manuale di servizio KE640 Art n 306592 Il cambio delle mac...

Page 55: ...uotate l utensile in senso orario fino a che le macine leggermente non toccano Con la regolazione più fine le macine non devono toccarsi Fissate nuovamente le viti mettete la guarnizione e inserite nuovamente la tramoggia 10 Parti di ricambio Ordinate le parti di ricambio dal vostro servizio di assistenza o presso il vostro rivenditore Per una rapida definizione del vostro ordine è necessario forn...

Page 56: ...and Tel 41 44 864 18 00 Fax 41 44 864 18 01 Hereby declares that the below mentioned product Product Device for food processing Machine model Coffee grinder Type of machine KE640 KE640 Vario Following directives regulations and standards have been applied 2006 42 EG The provisions of the Machinery Directive 2014 35 EU The Low Voltage Directive 2014 30 EU The EU Electromagnetic Compatibility Direct...

Page 57: ...FR K E 6 4 0 E S K E 6 4 0 VA R I O 57 Grind on Demand Mode d emploi Moulin à café pour espresso KE640 Single ...

Page 58: ...tiques techniques Description Dispositifs de sécurité du moulin Installation et paramètres de base Utilisation Dysfonctionnements Nettoyage Service après vente Pièces de rechange Certificat Conditions de garantie 59 60 61 62 62 63 68 69 70 73 74 74 SOMMAIRE ...

Page 59: ...t dans l incapacité d identifier les dangers liés à la manipulation d appareils électriques et il est donc strictement interdit de les laisser sans surveillance en présence d appareils électriques Ne jamais immerger l appareil dans l eau et ne pas l utiliser avec les mains mouillées 1 Sécurité Veuillez lire et respecter les consignes de sécurité ci après avec un maximum d attention Toute non obser...

Page 60: ...techniques avec d autres tensions et fréquences seulement 120V 60Hz 1 3 Domaine d application Votre moulin à café pour espresso modèle KE640 ES ou KE640 Vario est exclusivement destiné à la mouture de grains entiers de café pour espresso torréfiés Veillez impérativement à utiliser du café à moudre nettoyé et non moulu Ne vous servez jamais du broyeur pour moudre d autres produits ou objets 1 4 Qua...

Page 61: ...gré de mouture 7 Affichage 8 Bouton de présélection espresso simple 9 Réglage de la quantité de mouture espresso simple 10 Bouton de présélection espresso double 11 Réglage de la quantité de mouture espresso double 12 Sortie 13 Récepteur du porte filtre 14 Support du porte filtre 15 Vis du support du porte filtre 16 Bouton de démarrage 17 Bac collecteur 18 Coulisse de trémie 19 Interrupteur princi...

Page 62: ...ositifs de sécurité du moulin Disjoncteur thermique à maximum d intensité Le moteur du moulin est protégé par un disjoncteur thermique à maximum d intensité qui interrompt le circuit du moteur en cas de surcharge électrique de l appareil Pour redémarrer le broyeur vous devez mettre le moulin hors circuit en actionnant l interrupteur principal point 19 puis appuyer de nouveau sur le bouton de décle...

Page 63: ...la clé pour vis à six pans creux 3 mm pour desserrer légèrement les vis de fixation point 15 puis tirez le support du porte filtre point 12 jusqu en bas Contactez votre revendeur si les supports de porte filtre fournis ne conviennent pas Il se fera un plaisir de vous faire parvenir un support adapté Faites glisser le porte filtre entre le récepteur du porte filtre et le support du porte filtre jus...

Page 64: ...ine automatiquement 6 1 6 Fonction Break Pendant la mouture retirez le porte filtre du récepteur Le processus de mouture est ainsi interrompu La LED clignote à l intérieur du bouton de présélection Vous pouvez poursuivre la mouture en repoussant le porte filtre dans le récepteur La quantité manquante est moulue Si vous ne souhaitez pas poursuivre la mouture vous pouvez appuyer sur le bouton de pré...

Page 65: ... 1 Ajustage de l espresso simple Appuyez et maintenez enfoncé le bouton Single point 8 Ajustez ensuite à l aide du bouton de réglage de gauche point 9 le temps de mouture pour un espresso simple valeurs d expérience 1 5 à 3 0 secondes Lorsque vous relâchez le bouton Single la valeur est enregistrée 6 3 2 Ajustage de l espresso double Appuyez et maintenez enfoncé le bouton Double point 10 Ajustez e...

Page 66: ...ez enfoncés les deux boutons simultanément et allumez de nouveau l interrupteur principal L écran affiche RESET Le compteur de quantité journalier est à présent remis à zéro 6 4 Menu du logiciel Dans l aperçu ci dessus sont décrites les fonctions du logiciel utilisateur du moulin 6 4 1 Réglage de la durée de mouture dans le menu Appuyez et maintenez enfoncés les deux boutons point 8 10 simultanéme...

Page 67: ... par un technicien qualifié afin d assurer une exécution et un calibrage corrects après le remplacement 6 4 3 Compteur de nettoyage Indépendamment du compteur d espressos décrit ci dessus le moulin dispose d un compteur de nettoyage Après 5000 espressos simples l écran affiche CLEAN en alternance avec l affichage standard S 2 0 ou D 4 0 Le moulin peut toujours être utilisé normalement mais il doit...

Page 68: ...du moulin en suivant les instructions et retirez le corps étranger Respectez les consignes de sécurité Réglez l appareil sur une nouvelle durée de mouture Erreur Le moulin ne tourne pas l écran n est pas éclairé Veuillez consulter votre revendeur ou le service après vente agréé en cas d autre panne ou dysfonctionnement répété Cause La fiche d alimentation n est pas branchée Le disjoncteur à maximu...

Page 69: ...re sur grossier grille 9 Versez 35 à 40g de GRINDZ le contenu d un sachet ou d un bouchon du flacon directement dans les rouages du moulin Placez de nouveau la trémie sur le moulin maintenez la coulis se de trémie toujours fermée Serrez de nouveau la vis de sécu rité point 2 Démarrez le moulin et broyez le nettoyant GRINDZ dans un récipient 2 à 3 expressos doubles Ouvrez la coulisse de trémie Proc...

Page 70: ... être effectuées par un personnel spécialisé et agréé Veuillez vous adresser dans un tel cas à un atelier de service après vente agréé ou à vot re revendeur 9 1 Remplacement du broyeur encastré complet Encasdedysfonctionnementdubroyeurencastré celui cipeutfa cilement être remplacé complètement Les temps d intervention sont ainsi réduits au minimum et le moulin est remis en marche rapidement 9 1 1 ...

Page 71: ...quages suivants sont effectués à l usine sur les rou ages du moulin à l intérieur Trait rouge 1 Réglage de base 0 ajustage fin et espace minimal entre les rouages de broyage Trait rouge 2 Ajustage pour soulever et retirer le couvercle afin d atteindre le degré de mouture le plus fin après la mise en place du couvercle Ne tournez jamais les rouages de broyage dans le sens des aiguilles d une montre...

Page 72: ... réduite 5s pour un double espresso de 15g fort échauffement de la mouture distribution non uniforme de la taille des grains dans la mou ture modification du bruit lors de la mouture le bruit devient un crissement Le remplacement des rouages de broyage ne doit être effectué que par un personnel spécialisé et agréé ou par un atelier de ser vice après vente Pour le remplacement des rouages de broyag...

Page 73: ...ulin Démarrez le moulin et tournez l outil spécial dans le sens des aiguilles d une montre jusqu à ce que les rouages de broyage touchent très légèrement Pour le réglage le plus fin les rouages de broyage ne doivent pas toucher Serrez de nouveau les deux vis à six pans creux remettez en place la bague d étanchéité en caoutchouc ainsi que la trémie 10 Pièces de rechange Vous pouvez habituellement c...

Page 74: ...ECLARATION OF CONFORMITY The manufacturer Ditting Maschinen AG Länggenstrasse 34 CH 8184 Bachenbülach Switzerland Tel 41 44 864 18 00 Fax 41 44 864 18 01 Hereby declares that the below mentioned product Product Device for food processing Machine model Coffee grinder Type of machine KE640 KE640 Vario Following directives regulations and standards have been applied 2006 42 EG The provisions of the M...

Page 75: ...BRA K E 6 4 0 E S K E 6 4 0 VA R I O 75 Grind on Demand Manual de Operação KE640 Moinho de Café Espresso ...

Page 76: ...O 76 Segurança Dados Técnicos Descrição Dispositivos de Segurança Instalação e Configuração Básica Manuseio Falhas de Funcionamento Limpeza Manutenção e Peças de Reposição Certificado Garantia 77 78 79 80 80 81 86 87 88 89 89 ÍNDICE ...

Page 77: ...has com aparelhos elétricos sem supervi são de um adulto responsável Nunca mergulhe o aperelho em água Nunca use o com mãos molhadas O aparelho jamais deve ser limpo com jato de água 1 Segurança 1 1 Símbolos Neste manual são usados os dois símbolos seguintes Aviso de Segurança A não observância traz um altíssimo risco de aci dentes Aviso Geral A não observância pode danificar o aparelho ou diminui...

Page 78: ...inclusive crianças com restrições físicas sensoriais ou mentais ou com falta de experiên cia e ou pouco conhecimento de uso a não ser que supervisionadas por um supervisor de segu rança ou treinadas por este Não ultrapasse o ciclo de funcionamento de mo agem máximo permitido veja dados técnicos p 5 Deixe o moinho resfriar depois deste acima descrito antes de reutilizá lo 1 3 Finalidade de Uso Nest...

Page 79: ...tidade de cafe para Single Shot 1 espresso 10 Botão modo Double Shot 2 espressos 11 Regulagem quantidade de cafe para Double Shot 2 espressos 12 Saida do pó de café 13 Receptor para o porta filtro 14 Suporte para o porta filtro 15 Parafuso do suporte para o porta filtro 16 Botão para início da moagem 17 Bandeja 18 Comporta da cúpula 19 Interruptor de alimentação parte traseira 20 Botão interruptor...

Page 80: ...tor do moinho esta protegido por um interruptor térmico de proteção de sobrecorrente o qual em caso de uma sobrecarga elétrica desliga o circuito do motor Para reiniciar o moinho des ligue o moinho no interruptor de alimentação fig 19 e aperte o botão interruptor de proteção de sobrecorrente fig 20 Só então o moinho pode ser religado O usuário não tem nenhuma influência sobre este interruptor de p...

Page 81: ...a os dois pa rafusos do suporte do porta filtro fig 15 e puxe o suporte até bem embaixo Caso o suporte fornecido não seja adequado ao modelo de seu porta filtro contacte seu distri buidor Ele lhe fornecerá o suporte adequado com prazer Encaixe até o fundo o porta filtro entre o receptor e o suporte do porta filtro Empurre o suporte do porta filtro para cima e aperte os dois parafusos deste O ajust...

Page 82: ...automaticamente 6 1 6 Função Pausa Tirando durante a moagem o porta filtro do receptor a moagem será interrompida A luz LED no botão ati vo pisca A moagem poderá ser continuada assim que encaixar o porta filtro de volta no receptor A quantidade faltante será então moída Caso não deseje finalizar a moagem desta porção aper te o botão piscando para apagar o tempo de moagem faltante Agora a quantidad...

Page 83: ...egule então o tempo de moagem atraves da regulagem 2 Espressos fig 11 para dois cafés espresso Ge ralmente é entre 2 5 5 seg Soltando o botão modo 2 Espressos a nova regulagem está sal va 6 3 3 Modo Barista Aperte rapidamente ao mesmo tempo os dois botões de modo fig 8 10 Aparece no display a palavra BARISTA O timer tempo automático de moagem está desati vado e o moinho moerá durante o tempo em qu...

Page 84: ... Desligue o moinho no inter ruptor de alimentação atrás do moinho Segure apertados jun tos os dois botões de modo fig 8 10 e ao mesmo tempo ligue o moinho no interruptor de alimentação O display mostra RE SET O contador diário de porções está agora zerado 6 4 Menu do Software O esquema acima mostra as funções do software do moinho 6 4 1 Regulagem do tempo de moagem no menu Segure apertados juntos ...

Page 85: ...li bragem corretas 6 4 3 Contador de limpezas Independente do descrito contador de doses há no moinho um contador de limpezas Depois do número programado de 3 500 doses de café o display mostra CLEAN alternando com a mostra normal do display p ex S 2 0 ou D 4 0 O moinho mesmo assim pode ser usado normal mente no entato deve ser limpo regularmente veja cap 8 Para zerar o contador de limpezas após e...

Page 86: ...da Limpe o moinho como des crito e retire o corpo estra nho respeitando os avisos de segurança Regule novamente o tempo de moagem Falha O moinho não liga o display não está aceso Em caso de outras falhas ou falhas recorrentes contacte o seu distribui dor ou serviço autorizado Motivo O plugue de alimentação não está na tomada O interruptor de proteção de sobrecorrente foi disparado O disjuntor no q...

Page 87: ...a Regule a moagem para grossa pos 9 Jogue 35 40 gr de GRINDZ o conteúdo de um sachê ou uma tampa do pote direto dentro do moinho Recoloque a cúpula mantendo a comporta fig 18 fechada Aperte o parafuso de segurança fig 2 Ligue o moinho e moa todo o limpador GRINDZ dentro de um recipiente 2 3 shots de 2 Espressos Reabra a comporta Moa aproximadamente a mesma quantidade de graõs de café a fim de remo...

Page 88: ...a pode causar danos e alterações de cor destes 9 Manutenção e Peças de Reposição Eventuais reparos necessários devem ser efetu ados somente por pessoas especializadas Pro cure uma oficina autorizada seu distribuidor ou a nós o fabricante Peças de reposição podem ser encomendadas normalmente atra véz da sua oficina autorizada ou seu distribuidor Para um rápido e correto processamento do seu pedido ...

Page 89: ...lach Switzerland Tel 41 44 864 18 00 Fax 41 44 864 18 01 Hereby declares that the below mentioned product Product Device for food processing Machine model Coffee grinder Type of machine KE640 KE640 Vario Following directives regulations and standards have been applied 2006 42 EG The provisions of the Machinery Directive 2014 35 EU The Low Voltage Directive 2014 30 EU The EU Electromagnetic Compati...

Page 90: ...K E 6 4 0 E S K E 6 4 0 VA R I O 90 ...

Page 91: ...HUN K E 6 4 0 E S K E 6 4 0 VA R I O 91 Grind on Demand Használati utasítás KE640 Vario Espresso Daráló ...

Page 92: ...Technikai adatok Leírás Az eszköz biztonsági felszereltsége Beüzemelés és alapbeállítás Használat Hibajelenségek Tisztítás Szervíz Alkatrészek Certifikáció engedélyek Garanciális feltételek 93 94 95 96 96 97 102 103 104 107 108 108 TARTALOMJEGYZÉK ...

Page 93: ...kek nem tudják felmérni az elektromos készülékek használata kor felmerülő veszélyeket Ezért soha ne hagyja a gyerekeket felügy elet nélkül elektromos eszközökkel mint amilyen ez a daráló is Soha ne merítse vízbe a darálót és ne érintse nedves kézzel 1 Biztonság Kérjük figyelmessen szemlélje és olvassa végig a következő biztonsági utasításokat Ezek elmulasz tása a daráló sérüléséhez vezethet és ves...

Page 94: ...ideje 6 sec on 60 sec off Méretek mm ben W 240 D 320 H550 Tömeg 13 kg 28 7 lbs Szemeskávétartály kapacitás 1 5 kg 3 3 lbs Kérjen a gyártótó technikai adatokat más Volt és Frekvenciatartomány esetén only for 120V 60Hz 1 3 Célhasználat Csak pörkölt tisztított öröletlen szemeskávé darálható a KE640 ES vagy KE640 Vario darálókban Soha ne használja a darálót más any agok örlésére 1 4 Személyi követelmé...

Page 95: ...s 6 Darálásfinomság mértékegységjelző Pos 7 Kijelző Pos 8 Szimpla adag előválasztó gomb Pos 9 Szimpla adag időzítő Pos 10 Dupla adag előválasztó gomb Pos 11 Dupla adag időzítő Pos 12 Kifolyó Pos 13 Kar beillesztő Pos 14 Kartartó Pos 15 Kartartó rögzítőcsavar Pos 16 Start Stop kapcsoló Pos 17 Csepptálca Pos 18 Szemeskávé elzáró csúszka Pos 19 Főkapcsoló hátul Pos 20 Biztonsági megszakító hátul Pos ...

Page 96: ...a a szemeskávétartályt a biztonsági csavarral ábra 2 Használja a darálóval szállított hosszú imbuszkulcsot 2mm 5 2 4 Nyissa ki a szemeskávé elzáró csúszkát ábra 18 mely az adapt erben található 4 Az eszköz biztonsági felszereltsége Túlhevülés elleni megszakító A daráló túlhevülés elleni megszakítóval van ellátva amely megszakít ja a motor áramkörét amennyiben túlfeszültség lépne fel A biztonsági m...

Page 97: ...entetés Ne lépje túl a maximum 20 perc folyamatos örlési időt Ezután hagyja hogy az örlő kihűljön 6 1 A daráló használata A megfelelő használat céljából kövesse a lent leírt utasításokat 5 3 Elektromos beüzemelés Védje az eszközt különálló biztosítékkal nem része a darálónak a 2 pont Technikai adatok leírása alapján Bizonyosodjon meg hogy a biztosíték ne legyen túlterhelve más eszközökkel pl fűtőv...

Page 98: ...ciklus félbemarad Ilyenkor a választott adag gomb feletti led villog A ciklus a kar visszahelyezésével start stop gomb megnyo másával folytatható A programnak megfelelő fennmaradt mennyiség kerül örlésre A daráló megállításához és a fennmaradó idő törléséhez nyomja meg a villogó előválasztó gombot Ilyenkor visszaáll alaphelyzetbe az örlő és új ciklus indulhat Balra mozgatás finom Jobbra mozgatás d...

Page 99: ...asználja a potenciométert ábra 9 az örlésidő beállításához gyakorlatnak megfelelően 3 0 5 0 másod perc A beállítás a dupla adag előválasztó gomb elengedésével memorizá lódik 6 3 3 Barista beállítás Röviden nyomja le mindkét előválasztó gom bot ábra 8 10 A kijelzőn megjelenik a BARISTA felirat Az időkapcsoló kiiktatásra került és az örlési folyamat mindaddig tart amíg a karral nyomva tartjuk a star...

Page 100: ...a adagok mennyiségét mutatja Lépjen az egy adag előválasztó gomb ábra 8 nyomkodásával a menüben az D felirathoz A szám az utolsó nullázás óta leőrölt dupla adagok mennyiségét mutatja Lépjen az egy adag előválasztó gomb ábra 8 nyomkodásával a menüben az SC felirathoz A szám az összes leőrölt szimpla adagok mennyiségét mutatja nem nullázható Lépjen az egy adag előválasztó gomb ábra 8 nyomkodásával a...

Page 101: ...zeresen cserélni kell lásd 9 es fejezet a leg jobb örleményminőség és sebesség biztosítása ér dekében A darálókés számláló nullázása Lépjen be a menübe mindkét előválasztó gomb kb 3 másodperces együttes nyomva tartásával Lépjen a menüben a szimpla adag előválasztó gombbal ábra 8 amíg a DISC felirathoz nem ér Ekkor az előválasztó gombok enyüt tes nyomva tartásával lépjen ki a menüből A PIN bevitelé...

Page 102: ...isztítsa ki az örlési mechaniz must és távolítsa el az idegen tárgyat Olvassa el a bizton sági utasításokat Programozzaújraazörlésidőt Hibajelenség A daráló nem indul el és a kijelző nem világít Más üzemzavar vagy visszatérő hibajelenség esetén kérem vegye fel a kapc solatot a forgalmazóval vagy meghatalmazott szervízzel Ok Az örlő nincs csatla koztatva az elektro mos hálózathoz A túlfeszültség ka...

Page 103: ...kében Indítsa el a darálót és őrölje a GRINDZ et a karba vagy más edénybe néhány adagnyi örlésre lesz szükség Nyissa ki a csúszkát a szemeskávétartályon és daráljon le 2 3 dupla adagot a GRINDZ szemcsék eltávolítása céljából Használat folyamán GRINDZ por képződik ami ter mészetes és ártalmatlan A port puha kendővel könnyen el lehet távolítani a kifolyóból 8 2 A daráló helyének tisztítása Húzza ki ...

Page 104: ...nyen és egyszerűen egy darabban cserélhető A szervízidő csökkenthető és a daráló gyorsan és egyszerűen újra üzembeállítható 9 1 1 Zárja el a szemeskávé csúszkát és darálja ki a kések közül a maradék kávét Lazítsa ki a biztonsági csavart ábra 2 és emelje le a szemeskávétartályt 9 1 2Kapcsoljakiadarálótéshúzzakiazelektromoshálózatbólacsatla kozót Helyezze a darálót az oldalára és csavarja ki a rögzí...

Page 105: ...lzés 2 Gyári beállítás és a fedő leemelésének és visszahelye zésének helye hogy a gyári értékeket kapja a fedő visszahelyezésekor Red Mark 1 Red Mark 2 Ezért tolja el a daráló örleményfinomság beállítóját a 2 es piros jelig a fedő visszahelyezéséhez 9 1 9 Helyezze vissza a fedőt az örlőre és állítsa be a megfelelő örlemé nyfinomságot Figyeljen a megfelelő pozícióra a fedő visszahelyezésekor A záró...

Page 106: ... darálót a csomagolásba 9 3 A örleményfinomság újrakalibrálása Az elhasználódásnak és kopásnak köszönhetően vagy darálókések cseréjekor zero darálás beállítás újraállítására van szükség Csavarja az örleményfinomságállítót a lagfinomabb 0 beállításra Zárja el a csúszkát és emelje le a szemeskávétartályt Távolítsa el a maradék kávét a vázból egyben porszívózza ki a vázat Távolítsa el a szilikontömít...

Page 107: ...sági csavar ral Nyíssa ki a szemeskávé csúszkát 10 Alkatrészek Az alkatrészek általában a szervíz illetve a forgalmazó által kerülnek megrendelésre A gyors és pontos rendelés biztosítása érdekében a lent leírtak elengedhetetlenek 1 A daráló típusa gyári száma és feszültsége az örlő alján lévő lapon minden megtalálható 2 A cserélendő alkatrész pontos leírása vagy cikkszám ...

Page 108: ...witzerland Tel 41 44 864 18 00 Fax 41 44 864 18 01 Hereby declares that the below mentioned product Product Device for food processing Machine model Coffee grinder Type of machine KE640 KE640 Vario Following directives regulations and standards have been applied 2006 42 EG The provisions of the Machinery Directive 2014 35 EU The Low Voltage Directive 2014 30 EU The EU Electromagnetic Compatibility...

Page 109: ...TWN K E 6 4 0 E S K E 6 4 0 VA R I O 109 Grind on Demand 使用說明書 KE640 單頭義式咖啡豆研磨機 ...

Page 110: ...K E 6 4 0 E S K E 6 4 0 VA R I O 110 安全 技術規格 描述 研磨機的安全功能 安裝和基本設置 操作 運行故障 清潔 服務 備用零件 證明書 保固條款 111 112 113 114 114 115 120 121 122 125 126 126 目錄 ...

Page 111: ...在再 次使用前對研磨機進行冷卻 請您不要對研磨機作出任何改裝或變化 由于不遵守而造成的 损害 制造商将 不会承担任何 責任 兒童對在使用電氣時可能產生的危險沒有意識 因此請絕對不 要讓兒童與電氣設備單獨相處 請不要將電氣浸泡於水中 也不要用濕手進行 操作 如果電源線損壞 爲了避免危險 必須由製造商 其維修部或 類似部門的專業人員更換 1 安全 請仔細閱讀並且注意以下安全注意事項 如果 不這樣做 可能會導致設備損壞以及對個人安 全造成危險 1 1 符號 在本手冊中 會使用以下兩個符號 安全提示 如果不注意 發生意外的風險很高 一般注意事項 如果不注意可能會損壞機器或者無法保證進行 最佳 操作 1 2 安全提示 KE640 ES KE640 Vario 機型只允許研磨經過烘焙 未經未碾磨 的咖啡豆 打開機器包裝時 請檢查電源電壓 伏特 是否與銘牌上的電 壓設備 機器底部 相吻合 請不要在潮濕的...

Page 112: ...16 安珀 慢 過載 斷路器 220 伏 4 安珀 T 110 120 伏 7 安珀 T 研磨機最长允许持续操作時間 S320 例如 運作4秒 休息16秒 運作6秒 休息60秒 尺寸以毫米為單位 長 240 寬 320 高 550 重量 13千克 28 7 磅 豆倉容量 1 5千克 3 3 磅 關於其他電壓和頻率的技術規格請與我們或您的經銷商詢問 僅為 120伏 60赫茲 1 3 使用目的 您購買的義式咖啡研磨機類型 KE640 ES 或者 KE640 Va rio 只允許對完全烘焙過的咖啡豆進行 研磨 需要注意的是 只能使用清潔 未經研磨的咖啡豆 切勿使用研磨機研磨其它 產品或物體 1 4 操作員要求 此機器對用戶沒有特殊的要求 然而前提依然是 用戶已經認 真閱讀並且理解了本使用說明書 以及 所有的指示都被注意遵守 此外 期望進行有安全意識的工 作 ...

Page 113: ...蓋 2 咖啡豆倉的鎖定螺絲 3 滑動鎖定 研磨粗細度調節 4 研磨粗細度調的固定螺絲 5 研磨粗細度調節頂蓋 6 研磨粗細度刻度 7 顯示屏 8 预选按键 單杯 9 研磨量設置 單杯 10 预选按键 雙杯 11 研磨量設置 雙杯 12 電源插座 13 咖啡手柄支架 14 咖啡手柄支架座 15 用於調節咖啡手柄支架座的螺絲 16 開始按鈕 17 散粉盤 18 豆倉開關片 19 電源開關 機身後 20 釋放按鈕 機身後 21 電源線 機身後 Vario 帶鎖緊螺釘 1 18 3 7 8 12 13 14 17 9 4 5 2 6 10 11 15 19 20 21 16 ...

Page 114: ...站立 要固定幷且鎖住咖啡豆倉時 請您用雙手抓住咖啡豆倉 以順時針方向轉動直至發出喀嗒聲 請您使用隨附提供的長六角扳手 2毫米 的旋轉角安全固 定螺絲 請您打開豆倉底部的料斗片 第18項 4 研磨機的安全功能 導熱過載 斷路器 研磨機的電機通過導熱過載 斷路器保護 它在電氣過載的情 況下會中斷電機的電路 要再次開啟 研磨機 請您關閉研磨機 電源開關 第19項 並且再次按下釋放按鈕 第20項 只有 這樣 才可以重新開啟研磨機 操作者對這些斷路器沒有任何影響 如果出現 反复的斷路器跳閘 一定要對授權的服務合作 夥伴進行諮詢 因為電機繞組可能被損壞 電機保護器 在電機的繞組中已經安裝了導熱開關 熱感片 雙金屬 在過 熱情況下切斷電機 該研磨機將無法啟動 讓電機冷卻大約30 分鐘 熱控開關會自動讓電機再次可用 研磨機頂蓋上的微型開關 研磨機頂蓋使用微型開關固定 只有在該研磨機頂蓋被關閉的 情況下才能...

Page 115: ...4項 插入咖啡手柄支架上 步驟如下 請您關閉研磨機 使 用 附 帶 的 六 角 扳 手 3 毫 米 輕 鬆 解 除 固 定 螺 釘 第15項 並且把咖啡手柄座拉到最下部 如果提供的咖啡手柄座不合適 請與您的經銷 商聯繫 經銷商會很樂意為您提供合適的過濾 器支架墊 在咖啡手柄支架與咖啡手柄支架座之間推動過濾器直到它 停止 向上推動咖啡手柄支架座並擰緊固定螺釘 如果咖啡手柄 在支架上可以自行固定 那麼設置就是正確的 6 操作 請您根據 章節1 3給出的 規定使用義式濃縮咖啡研磨機KE640 ES KE640 Vario 請您注意章節1 2中的安全說明 請您切勿超過最長允許操作週期 對于220V和240V的研磨機 運行4秒 休息16秒 也就是每分鐘3杯雙濃縮咖啡 如果研磨 機是110 120伏 運行6秒 休息60秒 請您切勿超過最長允許 研磨時間20分鐘 請您在再次使用前對電機進行冷卻 ...

Page 116: ...1 4 請您使用預設按鈕 第8 10項 進行選擇要研磨的咖啡研 磨量 您是需要單杯還是雙杯咖啡 6 1 5 請您把咖啡手柄 推入過咖啡手柄支架上 研磨過程會自動 開始及結束 6 1 6 中斷功能 如果您在研磨過程中將咖啡手柄抽離支架 研 磨過程會被中斷 激活預選按鈕上的LED指示燈開始閃爍 研 磨過程會繼續進行 如果您再次把咖啡手柄推入支架 未完成 研磨的部分會繼續研磨 如果這不是您的願望 您可以通過按下預選按鈕刪除餘下的研 磨時間 設置的研磨總量以及研磨總時間再次 可用 6 2 研磨調節 粗細度 您可以這樣設置研磨粗細度 通過稍稍拉出滑動鎖定 第3項 以及按期望方向的旋轉研磨機頂蓋 請您注意 設置為 0 表 示研磨度最細而設置的 10 表示研磨度最粗 順時針旋轉 細 逆時針旋轉 粗 比如為 KE640 Vario 擰松固定螺絲 調整後再次擰緊 細 粗 ...

Page 117: ... 继续 下级菜单 回去 上级菜单 MENU SAVE 6 3 研磨時間設置 咖啡量 出廠設置的研磨時間預設值是2秒為單杯 4秒為雙杯 如果您 想通過對咖啡研磨量的設置進行重新設置 步驟如下 6 3 1 單杯設置 按住單杯選鍵 第8項 請您旋轉左邊的旋 鈕 第9項 設置單杯濃縮咖啡的研磨時間 根據經驗 1 5 3 0 秒 鬆開單杯選鍵保存該數值 6 3 2 雙杯設置 按住雙杯選鍵 第10項 請您選裝右邊 的旋鈕 第11項 設置雙杯濃縮咖啡的研磨時間 根據經 驗 3 0 5 0 秒 鬆開雙杯選鍵保存該數值 6 3 3 咖啡大師模式 同時按下單杯以及雙杯按鈕幷鬆開 第 8 10項 熒幕上會顯示BARISTA 此時定時器被關閉 研磨 機將繼續研磨只要咖啡手柄還在支架上 因此必須手動設置劑 量 ...

Page 118: ...要離開菜單請再次持續3秒同時按住兩個按鈕 熒幕顯 示保存 SAVE 6 4 3 日總量累加器的復位 請您關閉研磨機電源開關 請您同 時按住兩個按鈕並再次打開電源開關 熒幕顯示復位RESET 日 數量計數器現在被設置為0 6 4 軟件菜單 在上面圖表顯示的概覽中將描述研磨機的使用者 軟件功能 6 4 1 設置菜單中的研磨時間 持續3秒同時按住並鬆開兩個按鈕 第8 10項 熒幕上會 顯示MENU 鬆開兩個按鈕後會顯示 STI 單杯時間 請您使用左 旋鈕 第9項 設置單倍濃縮咖啡的研磨時間 根據經 驗 1 5 2 7 秒 使用預選按鈕單杯鍵滾動查看 第8項 直至菜單項 DTI 雙杯時間 請您使用右旋鈕 第11項 設置雙杯濃 縮咖啡的研磨時間 根據經驗 2 5 4 5 秒 對研磨時間設置之後再次持續3秒同時按住兩個按鈕以保存 更改 熒幕顯示SAVE 6 4 2 總量累加器 日發及持續計數器 進入用...

Page 119: ...輸入密碼以設置數字 使用單鍵更換下 一個數字 該密碼為0408 熒幕顯示為 密碼確定 研磨片更換應該通過經過培訓的維修技術人員 進行 以確保在更換後的正確實施以及校準 6 4 3 清潔計數器 與上面所描述的發計數器無關 研磨器有清潔計數器可用 在確定總數 5000的單杯數量後 標準顯示 將會變換為顯示清 潔 CLEAN S2 0或者D 4 0 即使研磨機運轉正常 但是仍然需要定期進行 清潔 請參閱 章節 8 要在清潔後再次將清潔計數復位為零 請您按如下步驟進行 進入用戶菜單 通過持續3秒同時按住兩個按鈕 第10項 使用預選按鈕滾動查看 單杯 第8項 直到菜單項 GRINDZ 通過按住兩個按鈕 您現在從菜單離開 熒幕顯 示保存 SAVE 6 4 4 研磨機刀片計數器 此外 研磨機還有獨立的研磨機刀片使用壽命計數器 在確定 總數100 000的單杯數量後 標準顯示將會變換為顯示 DISC S2...

Page 120: ...調整研磨粗細度設置為粗 同時將研磨過程取消 研磨機再 次開始研磨 然後將研磨度調 整至期望的研磨粗細度 再次進 行研磨 有異物存在於研磨 機內 清潔研磨機 根據描述並且同時 取出異物 請您注意安全提示 研磨機不研磨 熒幕 顯示閃爍 單杯為 預選 研磨時間設置為 零 請您重新調整研磨時間設置 故障 原因 補救措施 研磨機不運作 熒幕 顯示不閃爍 電源插頭沒有插 入 插頭插入插座 過載 斷路器跳閘 請您驗證是否斷路器的釋放按鈕 已經跳閘 在必要時將其再次按 下 對於反复出現的開關跳閘 請詢問您的授權客戶服務中心或 經銷商 保險絲被燒壞 請您檢查保險絲 請您將它再次 修好到初始狀態或者將它進行更 換 請您確定 是否還有其他 消耗電器 與保險絲連接 對於其他故障或者重複錯誤 請與您的經銷商或授權客戶服務中心聯繫 ...

Page 121: ...驟如下 請您從咖啡豆倉內移除所有的咖啡豆 同時關閉料斗片並 且研磨所有餘下的咖啡豆 以使研磨機可以進行空轉 擰松安全螺釘 第2項 並且取下咖啡豆倉 請您將研磨粗細度設置為最粗 凹槽 9 請您將35至40克的GRINDZ 一小包或者一個蓋子的劑 量 直接倒入研磨機器中 請您將咖啡豆倉再次放置入研磨機中 豆倉開關片保持關 閉 請您啟動研磨機並且將GRINDZ 清潔劑完全在容器中研磨 2至3次雙杯的研磨量 請您打開料斗片 請您再研磨同樣數量的咖啡豆 以確保清除剩余清潔顆粒 2至3次的研磨量 在研磨過程中請您再次將研磨度調 整到初始設置 在研磨過程中產生灰塵是正常並且無害的 請 使用軟布清除咖啡豆容器以及電源插座的灰塵 顆粒 8 2 對研磨部位表面的清潔 拔掉電源插頭 抬起研磨機放置到一旁 請清潔各個使用表面和底座 兩個表面都必須乾燥 確保無油和油脂 請將研磨機放置回原處 ...

Page 122: ...之前 務必將電源線插頭從 插座中拔 出 不要讓任何異物進入研磨機 定期檢查機器上是否有損壞情況 特別是電源 線 插頭 指觸保護 等等 任何所需的維修只允許由專業人員進 行 因此請務必聯繫授權的服務中心或者您的 經銷商 9 1更換完整的內置馬達EK11 如果內置的馬達EK11發現缺陷 可以輕鬆地更換整個內置馬 達 這樣可以把服務時間減到最短 而研磨機很快就可以再次 投入使用 9 1 1 請您關閉豆倉底部的開關片 研磨所有剩餘的咖啡豆 鬆 開安全螺釘 第2項 並且取下咖啡豆容器 9 1 2 請您關閉研磨機並且拔掉電源插頭 請您將研磨機放置於 一旁 擰松底板下的三個固定螺釘 請 好好保存螺釘及墊片 請將研磨機重新放置於橡膠墊腳上 9 1 3 請您移除頂蓋安全螺絲 第4項 並且逆時針方向旋轉 研磨粗細調節度在最粗位置停止 從上部提起 研磨機頂蓋 第 5項 9 1 4 解除馬達連接器 把完整的內置馬...

Page 123: ...它們必須 在出粉嘴的位置 不允許平放於 出粉嘴的管口上 9 1 7 請您連接連接插頭並且將這些連接放置在機身內空餘的空 間處 9 1 8 研磨機上 內部 在出廠時將被作出下面的標記 請您切勿以順時針方向扭轉研磨片超過紅色標記1 因為 1 2 3 1號紅線 默認設置 O 最細設置和最小研磨刀片的間距 2號紅線 對頂蓋安裝取下的設置 以達到頂蓋使用最好的設 置 請您切勿以順時針方向扭轉研磨片超過紅色標 記1 因為 這樣研磨機刀片可能會因為過度接 觸而被損壞 這樣研磨機刀片可能會因為過度接觸而被損壞 請您將研磨度設置扭轉到右邊紅色標記上 以便可以蓋上頂 蓋 9 1 9 請您再次蓋上研磨機頂蓋並且設置您所期望的研磨度 1號紅線 2號紅線 ...

Page 124: ...打開豆倉底部滑動開 關片 請您再次擰緊安全螺釘 第2項 9 2 研磨片更換 如果出現以下情況 請更換研磨機刀片 降低的研磨能力 一杯15克雙濃縮咖啡時間大於5秒 研磨出的咖啡粉過熱 研磨出的咖啡顆粒度不均勻 研磨時機器付出的异類聲音 吱吱的噪聲 研磨刀片更換只可以由受權專業人員或者客戶服務車載車間裡 進行 研磨片的更換應該遵循 服務指南KE640 第306592 號 的建議 研磨刀片更換也可以通過對集成式研磨機的更換 進行安裝 為此您需要訂購新的內置馬達EK11 在收到新的馬達EK11後請 您根據第章節9 1把集成式研磨機KE640 ES KE640 Vario 拆出並 安裝入新的集成式研磨機 舊的內置馬達請您使用包裝寄送回 來 9 3 研磨度設置的歸零調整 在更換舊的研磨片或者在內置馬達之後 應該把研磨度設置重 新調整至零點 ...

Page 125: ...使用隨附的內六角扳手擰松 幷不是取下兩個螺絲 2 5毫米 請您把專用工具放入研磨機頂蓋上 請您開啟研磨機並且按順時針旋轉專用工具 直到研磨機 刀片互相接觸 然後逆時針方向做稍許回擰 讓研磨機刀 片沒有發出互相摩擦的聲音 請您擰緊兩個六角螺絲 再次把橡膠密封圈置入並且放置 豆倉底部 如果橡膠圈已經破損 必須更換新的橡膠圈 重新安置豆倉 幷打開豆倉底部的活動插片 10 備用零件 備用部件通常從客戶服務工廠或者您的經銷商那裡訂購 為了 您的訂單可以得到快速和正確的執行 下面的信息是 必不可少 的 1 研磨機 的型號名稱 機器序列號和電壓 研磨機位於銘牌的底 部 2 對於備用零件或者 項目編號的更準確描述 ...

Page 126: ... Directive on the restriction of use of certain hazardous substances in electrical and electronic equipment EG No 1907 2006 The EU chemicals regulation REACH Regulation 2012 19 EU WEEE Regulation Waste of Electrical and Electronic Equipment EN 60335 1 12 A11 14 Safety of electrical appliances for household general requirements EN 60335 2 64 00 A1 02 Safety of electrical appliances for household pa...

Page 127: ...CHN K E 6 4 0 E S K E 6 4 0 VA R I O 127 Grind on Demand 意式浓缩咖啡豆研磨机 KE640 单头意式咖啡豆研磨机 ...

Page 128: ...K E 6 4 0 E S K E 6 4 0 VA R I O 128 安全 技术规格 描述 研磨机的安全功能 安裝和基本设置 操作 运行故障 清洁 服务 备用零件 证明书 保固条款 129 130 131 132 132 133 138 139 140 143 144 144 目录 ...

Page 129: ...在再 次使用前对研磨机进行冷却 请您不要对研磨机作出任何改装或变化 由于不遵守而造成的 损害 制造商将 不会承担任何 责任 儿童对在使用电气时可能产生的危险没有意识 因此请绝对不 要让儿童与电气设备单独相处 请不要将电气浸泡于水中 也不要用湿手进行 操作 如果电源软线损坏 为了避免危险 必须由制造商 其维修部 或类似部门的专业人员更换 1 安全 请仔细阅读并且注意以下安全注意事项 如果 不这样做 可能会导致设备损坏以及对个人安 全造成危险 1 1 符号 在本手册中 会使用以下两个符号 安全提示 如果不注意 发生意外的风险很高 一般注意事项 如果不注意可能会损坏机器或者无法保证进行 最佳 操作 1 2 安全提示 KE640 ES KE640 Vario 机型只允许研磨经过烘焙 未经未碾磨 的咖啡豆 打开机器包装时 请检查电源电压 伏特 是否与铭牌上的电 压设备 机器底部 相吻合 请不要在潮湿...

Page 130: ...16 安珀 慢 过载 断路器 220 伏 4 安珀 T 110 120 伏 7 安珀 T 研磨机最长允许持续操作时间 S320 例如 运作4秒 休息16秒 运作6秒 休息60秒 尺寸以毫米为单位 长 240 宽 320 高 550 重量 13千克 28 7 磅 豆仓容量 1 5千克 3 3 磅 关于其他电压和频率的技术规格请与我们或您的经销商询问 仅为 120伏 60赫兹 1 3 使用目的 您购买的意式咖啡研磨机类型 KE640 ES 或者 KE640 Va rio 只允许对完全烘焙过的咖啡豆进行 研磨 需要注意的是 只能使用清洁 未经研磨的咖啡豆 切勿使用研磨机研磨其它 产品或物体 1 4 操作员要求 此机器对用户没有特殊的要求 然而前提依然是 用户已经认 真阅读并且理解了本使用说明书 以及 所有的指示都被注意遵守 此外 期望进行有安全意识的工 作 ...

Page 131: ... 1 咖啡豆仓以及豆仓盖 2 咖啡豆仓的锁定螺丝 3 滑动锁定 研磨粗细度调节 4 研磨粗细度调的固定螺丝 5 研磨粗细度调节顶盖 6 研磨粗细度刻度 7 显示屏 8 预选按键 单杯 9 研磨量设置 单杯 10 预选按键 双杯 11 研磨量设置 双杯 12 电源插座 13 咖啡手柄支架 14 咖啡手柄支架座 15 用于调节咖啡手柄支架座的螺丝 16 开始按钮 17 散粉盘 18 豆仓开关片 19 电源开关 机身后 Vario带锁紧螺钉 1 18 3 7 8 12 13 14 17 9 4 5 2 6 10 11 15 19 20 21 16 ...

Page 132: ...立 要固定并且锁住咖啡豆仓时 请您用双手抓住咖啡豆仓 以顺时针方向转动直至发出喀嗒声 请您使用随附提供的长六角扳手 2毫米 的旋转角安全固 定螺丝 请您打开豆仓底部的料斗片 第18项 4 研磨机的安全功能 导热过载 断路器 研磨机的电机通过导热过载 断路器保护 它在电气过载的情 况下会中断电机的电路 要再次开启 研磨机 请您关闭研磨机电源开关 第19项 并且再次按下释 放按钮 第20项 只有这样 才可以重新开启研磨机 电机保护器 在电机的绕组中已经安装了导热开关 热感片 双金属 在过 热情况下切断电机 该研磨机将无法启动 让电机冷却大约30 分钟 热控开关会自动让电机再次可用 操作者对这些断路器没有任何影响 如果出现 反复的 断路器跳闸 一定要对授权的服务合作 伙伴进行咨询 因为 电机绕组可能被损坏 研磨机顶盖上的微型开关 研磨机顶盖使用微型开关固定 只有 在该研磨机顶盖被关闭的情况下才能...

Page 133: ...将咖啡手柄座 第14项 插入咖啡手柄支架上 步骤如下 请您关闭研磨机 使用附带的六角扳手 3毫米 轻松解除固定螺钉 第15 项 并且把咖啡手柄座拉到最下部 如果提供的咖啡手柄座不合适 请与您的经销 商联系 经销商会很乐意为您提供合适的过滤 器支架垫 在咖啡手柄支架与咖啡手柄支架座之间推动过滤器直到它 停止 向上推动咖啡手柄支架座并拧紧固定螺钉 如果咖啡手柄 在支架上可以自行固定 那么设置就是正确的 6 操作 请您根据 章节1 3给出的 规定使用意式浓缩咖啡研磨机KE640 ES KE640 Vario 请您注意章节1 2中的安全说明 请您切勿超过最长允许操作周期 对于220V和240V的研磨机 运行4秒 休息16秒 也就是每分钟3杯双浓缩咖啡 如果研磨 机是110 120伏 运行6秒 休息60秒 请您切勿超过最长允许 研磨时间20分钟 请您在再次使用前对电机进行冷却 ...

Page 134: ... 1 4 请您使用预设按钮 第8 10项 进行选择要研磨的咖啡 研磨量 您是需要单杯还是双杯咖啡 6 1 5 请您把咖啡手柄 推入过咖啡手柄支架上 研磨过程会自动 开始及结束 6 1 6 中断功能 如果您在研磨过程中将咖啡手柄抽离支架 研 磨过程会被中断 激活预选按钮上的LED指示灯开始闪烁 研 磨过程会继续进行 如果您再次把咖啡手柄推入支架 未完成 研磨的部分会继续研磨 如果这不是您的愿望 您可以通过按下预选按钮删除余下的研 磨时间 设置的研磨总量以及研磨总时间再次 可用 6 2研磨调节 粗细度 您可以这样设置研磨粗细度 通过稍稍拉出滑动锁定 第3项 以及按期望方向的旋转研磨机顶盖 请您注意 设置為 0 表 示研磨度最细而设置的 10 表示研磨度最粗 顺时针旋转 细 逆时针旋转 粗 比如为 KE640 Vario 拧松固定螺丝 调整后再次拧紧 粗 细 ...

Page 135: ...下 继续 下级菜单 回去 上级菜单 MENU SAVE 6 3 研磨时间设置 咖啡量 出厂设置的研磨时间预设值是2秒为单杯 4秒为双杯 如果您 想通过对咖啡研磨量的设置进行重新设置 步骤如下 6 3 1 单杯设置 按住单杯选键 第8项 请您旋转左边的旋 钮 第9项 设置单杯浓缩咖啡的研磨时间 根据经验 1 5 3 0 秒 松开单杯选键保存该数值 6 3 2 双杯设置 按住双杯选键 第10项 请您选装右边的旋 钮 第11项 设置双杯浓缩咖啡的研磨时间 根据经验 3 0 5 0 秒 松开双杯选键保存该数值 6 3 3 咖啡大师模式 同时按下单杯以及双杯按钮并松开 第 8 10项 荧幕上会显示BARISTA 此时定时器被关闭 研磨 机将继续研磨只要咖啡手柄还在支架上 因此必须手动设置剂 量 ...

Page 136: ...如果要离开菜单请再次持续3秒同时按住两个按钮 荧幕显 示保存 SAVE 6 4 3 日总量累加器的复位 请您关闭研磨机电源开关 请您同时按 住两个按钮并再次打开电源开关 荧幕显示复位RESET 日数量 计数器现在被设置为0 6 4 软件菜单 在上面图表显示的概览中将描述研磨机的使用者 软件功能 6 4 1 设置菜单中的研磨时间 持续3秒同时按住并松开两个按钮 第8 10项 荧幕上会 显示MENU 松开两个按钮后会显示 STI 单杯时间 请您使用左旋钮 第9项 设置单倍浓缩咖啡的研磨时间 根据经验 1 5 2 7 秒 使用预选按钮单杯键滚动查看 第8项 直至菜单项DTI 双杯时间 请您使用右旋钮 第11项 设置双杯浓缩咖啡 的研磨时间 根据经验 2 5 4 5 秒 对研磨时间设置之后再次持续3秒同时按住两个按钮以保存更 改 荧幕显示SAVE 6 4 2 总量累加器 日发及持续计数器 进入用户...

Page 137: ...输入密码以设置数字 使用单键更换下 一个数字 该密码为0408 荧幕显示为 密码确定 研磨片更换应该通过经过培训的维修技术人员 进行 以确保在更换后的正确实施以及校准 6 4 3 清洁计数器 与上面所描述的发计数器无关 研磨器有清洁计数器可用 在确定总数 5000的单杯数量后 标准显示 将会变换为显示清 洁 CLEAN S2 0或者D 4 0 即使研磨机运转正常 但是仍然需要定期进行 清洁 请参阅 章节 8 要在清洁后再次将清洁计数复位为零 请您按如下步骤进行 进入用户菜单 通过持续3秒同时按住两个按钮 第10项 使用预选按钮滚动查看 单杯 第8项 直到菜单项 GRINDZ 通过按住两个按钮 您现在从菜单离开 荧幕显 示保存 SAVE 6 4 4 研磨机刀片计数器 此外 研磨机还有独立的研磨机刀片使用寿命计数器 在确定 总数100 000的单杯数量后 标准显示将会变换为显示 DISC S2...

Page 138: ...调整研磨粗细度设置为粗 同时将研磨过程取消 研磨机 再次 开始研磨 然后将研磨度调整 至期望的研磨粗细度 再次进 行研磨 有异物存在于研磨 机内 清洁研磨机 根据描述并且 同时取出异物 请您注意安全 提示 研磨机不研磨 荧幕 显示闪烁 单杯为 预选 研磨时间设置为 零 请您重新调整研磨时间设置 故障 原因 补救措施 研磨机不运作 荧幕 显示不闪烁 电源插头没有插 入 插头插入插座 过载 断路器跳闸 请您验证是否断路器的释放按钮 已经跳闸 在必要时将其再次按 下 对于反复出现的开关跳闸 请询问您的授权客户服务中心或 经销商 保险丝被烧坏 请您检查保险丝 请您将它再次 修好到初始状态或者将它进行更 换 请您确定 是否还有其他 消耗电器 与保险丝连接 对于其他故障或者重复错误 请与您的经销商或授权客户服务中心联系 ...

Page 139: ...骤如下 请您从咖啡豆仓内移除所有的咖啡豆 同时关闭料斗片并 且研磨所有余下的咖啡豆 以使研磨机可以进行空转 拧松安全螺钉 第2项 并且取下咖啡豆仓 请您将研磨粗细度设置为最粗 凹槽 9 请您将35至40克的GRINDZ 一小包或者一个盖子的剂 量 直接倒入研磨机器中 请您将咖啡豆仓再次放置入研磨机中 豆仓开关片保持关 闭 请您启动研磨机并且将GRINDZ 清洁剂完全在容器中研磨 2至3次双杯的研磨量 请您打开料斗片 请您再研磨同样数量的咖啡豆 以确保清除剩余清洁颗粒 2至3次的研磨量 在研磨过程中请您再次将研磨度调 整到初始设置 在研磨过程中产生灰尘是正常并且无害的 请 使用软布清除咖啡豆容器以及电源插座的灰尘 颗粒 8 2 对研磨部位表面的清洁 拔掉电源插头 抬起研磨机放置到一旁 请清洁各个使用表面和底座 两个表面都必须干燥 确保无油和油脂 请将研磨机放置回原处 ...

Page 140: ...何维修或者 清洁工作之前 务必将电源线插头从 插座中拔 出 不要让任何异物进入研磨机 定期检查机器上是否有损坏情况 特别是电源 线 插头 指触保护 等等 任何所需的维修只允许由专业人员进 行 因此请务必联系授权的服务中心或者您的 经销商 9 1 更换完整的内置马达EK11 如果内置的马达EK11发现缺陷 可以轻松地更换整个内置马 达 这样可以把服务时间减到最短 而研磨机很快就可以再次 投入使用 9 1 1 请您关闭豆仓底部的开关片 研磨所有剩余的咖啡豆 松 开安全螺钉 第2项 并且取下咖啡豆容器 9 1 2 请您关闭研磨机并且拔掉电源插头 请您将研磨机放置于 一旁 拧松底板下的三个固定螺钉 请 好好保存螺钉及垫片 请将研磨机重新放置于橡胶垫脚上 9 1 3 请您移除顶盖安全螺丝 第4项 并且逆时针方向旋转 研磨粗细调节度在最粗位置停止 从上部提起 研磨机顶盖 第 5项 9 1 4 解除马达...

Page 141: ...请您注意内置马达EK11出粉嘴弹片的正确位 置 它们必须 在出粉嘴的位置 不允许平放于出粉嘴的管口 上 9 1 7 请您连接连接插头并且将这些连接放置在机身内空余的空 间处 9 1 8 研磨机上 内部 在出厂时将被作出下面的标记 1 2 3 1号红线 默认设置 O 最细设置和最小研磨刀片的间距 2号红线 对顶盖安装取下的设置 以达到顶盖使用最好的设 置 请您切勿以顺时针方向扭转研磨片超过红色标 记1 因为 这样研磨机刀片可能会因为过度接触而被损 坏 请您将研磨度设置扭转到右边红色标记上 以便可以盖上顶 盖 9 1 9 请您再次盖上研磨机顶盖并且设置您所期望的研磨度 1号红线 2号红线 ...

Page 142: ...打开豆仓底部滑动开 关片 请您再次拧紧安全螺钉 第2项 9 2 研磨片更换 如果出现以下情况 请更换研磨机刀片 降低的研磨能力 一杯15克双浓缩咖啡时间大于5秒 研磨出的咖啡粉过热 研磨出的咖啡颗粒度不均勻 研磨时机器付出的异类声音 吱吱的噪声 研磨刀片更换只可以由授权专业人员或者客户服务车载车间里 进行 研磨片的更换应该遵循 服务指南KE640 第306592 号 的建议 研磨刀片更换也可以通过对集成式研磨机的更换 进行安装 为此您需要订购新的内置马达EK11 在收到新的马达EK11后请 您根据第章节9 1把集成式研磨机KE640 ES KE640 Vario 拆出并 安装入新的集成式研磨机 旧的内置马达请您使用包装寄送回 来 9 3研磨度设置的归零调整 在更换旧的研磨片或者在内置马达之后 应该把研磨度设置重 新调整至零点 ...

Page 143: ...请您使用随附的内六角扳手拧松 并不是取下两个螺丝 2 5毫米 请您把专用工具放入研磨机顶盖上 请您开启研磨机并且按顺时针旋转专用工具 直到研磨机 刀片互相接触 然后逆时针方向做稍许回拧 让研磨机刀 片没有发出互相摩擦的声音 请您拧紧两个六角螺丝 再次把橡胶密封圈置入并且放置 豆仓底部 如果橡胶圈已经破损 必须更换新的橡胶圈 重新安置豆仓 并打开豆仓底部的活动插片 10 备用零件 备用部件通常从客户服务工厂或者您的经销商那里订购 为了您 的订单可以得到快速和正确的执行 下面的信息是必不可少 的 1 研磨机的型号名称 机器序列号和电压 研磨机位于铭牌的底 部 2 对于备用零件或者项目编号的更准确描述 ...

Page 144: ...irective on the restriction of use of certain hazardous substances in electrical and electronic equipment EG No 1907 2006 The EU chemicals regulation REACH Regulation 2012 19 EU WEEE Regulation Waste of Electrical and Electronic Equipment EN 60335 1 12 A11 14 Safety of electrical appliances for household general requirements EN 60335 2 64 00 A1 02 Safety of electrical appliances for household part...

Page 145: ...K E 6 4 0 E S K E 6 4 0 VA R I O 145 ...

Page 146: ...l an der Mühle Defects of the grinder from the outside Sonstiges Others Gehäuse Housing Unterteil Lower part Oberteil Upper part Deckel Lid Grundplatte Ground plate Rüttelblech Vibrating sheet Funktionsprüfung Operational Test Mühle läuft nicht an Grinder does not start Sicherung Mühle geprüft Fuse inspected Steckdosenanschluss geprüft Plug connection inspected Sicherung Gebäude geprüft Building f...

Page 147: ...K E 6 4 0 E S K E 6 4 0 VA R I O 147 ...

Page 148: ...K E 6 4 0 E S K E 6 4 0 VA R I O 41 44 864 18 00 Ditting Maschinen AG Länggenstrasse 34 CH 8184 Bachenbülach Switzerland www dittingswiss ch ...

Reviews: