background image

Page  1 


                            WG

-

U881 R


Summary of Contents for WG-U881 R

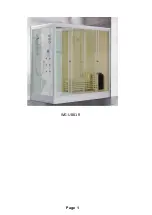
Page 1: ...Page 1 WG U881 R...

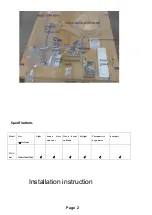
Page 2: ...Page 2 Specifications Model Size LxWxH mm Light Sauna Stove and stone Wood barrel and ladle Skylight Thermometer hygrometer hourglass WG U 881 2200x1200x22000 Installation instruction...

Page 3: ...ugh the breaker first and leakage switch then to the product The electric box must be arranged in a place away from water and easy for operation Cut off the breaker after use to shut off the master su...

Page 4: ...idden to use this product in case of lightning Cut off the master supply of the product and take out the power plug 12 Stop immediately using of the product when trouble of electric circuit happens fo...

Page 5: ...ss than 2mm2 i e 3x2mm2 Fire retardant wall bushing shall be used for the supply crossing the wall to make it safe 2 This product is supplied with the special power wires and special plugs with leakag...

Page 6: ...middle of H C and turn on the faucet test the water temperature by finger and then rotate the handle to adjust the temperature of water until feel comfortable 9 When using steam function please don t...

Page 7: ...and come in again 9 Keep your body away from sauna stove at least 30cm away never touch sauna stone with your hand for this may scald your skin 10 Only can put the sauna stone producing by the manufa...

Page 8: ...the glass panels In particular avoid the glass edges coming into contact with hard surfaces 1 Level the tray to the ground adjust the feet if needed make sure the drain hose is installed already and p...

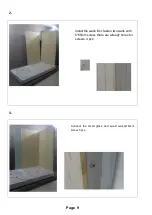
Page 9: ...Page 9 2 3 Install the walls first fasten two walls with 5 60mm screw there are already holes for screws 4 pcs Connect the small glass and wood wall 4x16mm screw 5 pcs...

Page 10: ...he shower column fasten with 4x16mm screw and nuts there are already holes for screws 5 pcs And in bottom of shower column 6x25mm screw and nuts 2 pcs Connect the small glass with shower column 4x16mm...

Page 11: ...ig side glass fasten with 4x16mm screw and nuts there are already holes for screws 5 pcs Install the middle glass connect it to wood wall with4x16mm screw 5 pcs Install the glass in aluminum frame Put...

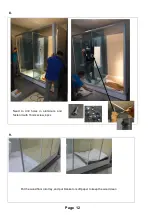
Page 12: ...Page 12 8 9 Need to drill holes in aluminum and fasten it with 16mm screw 4 pcs Put the wood floor into tray and put blanket or soft paper to keep the wood clean...

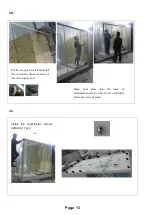
Page 13: ...s on a table install the wheel don t fasten the screw of wheel too tightly now Hang door glass into the track of aluminium adjust the wheel to fit well finally fasten the screw of wheel Install the co...

Page 14: ...Page 14 12 13 Install the door handle Install the shelf Install the hand shower pole Install the door side glass seal...

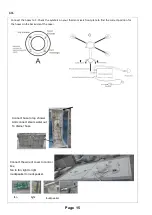
Page 15: ...ner hose Connect the wire of cover to control box fan to fan light to light loudspeaker to loudspeaker fan light loudspeaker Connect the hoses to C Check the symbols on your thermo mixers front plate...

Page 16: ...Page 16 15 16 Fasten one pcs screw hang up the hygrometer thermometer Fasten the hourglass Hang up the oven on the plate pull out the cable from the hole...

Page 17: ...Page 17 Manuals for oven Time controller 0 180 minute Temperature controller...

Page 18: ...th proper size of sauna room 30 60 minutes it can reach the preset temperature and remains The power switch or the timer The timer is the main power switch in heater The timer automatically cut off th...

Reviews: