


29
I25
I24
I23
I22
I21
I20
I19
I18
I17
I16
tr
sv
sl
pt
pl
no
nl
it
fr
fi
es
en
de
da
cz
After completing the charging and with immediate use:
Charging procedure (traction block batteries with external charging unit)
Attaching tools
Check:
• that the brush has not fallen below the red mark or a brush length of 1 cm.
• the pad for wear before using.
Attach squeegee
Filling water
Dosage:
Only use chemical products recommended by the manufacturer.
Dosing examples (The concentration is product dependent)
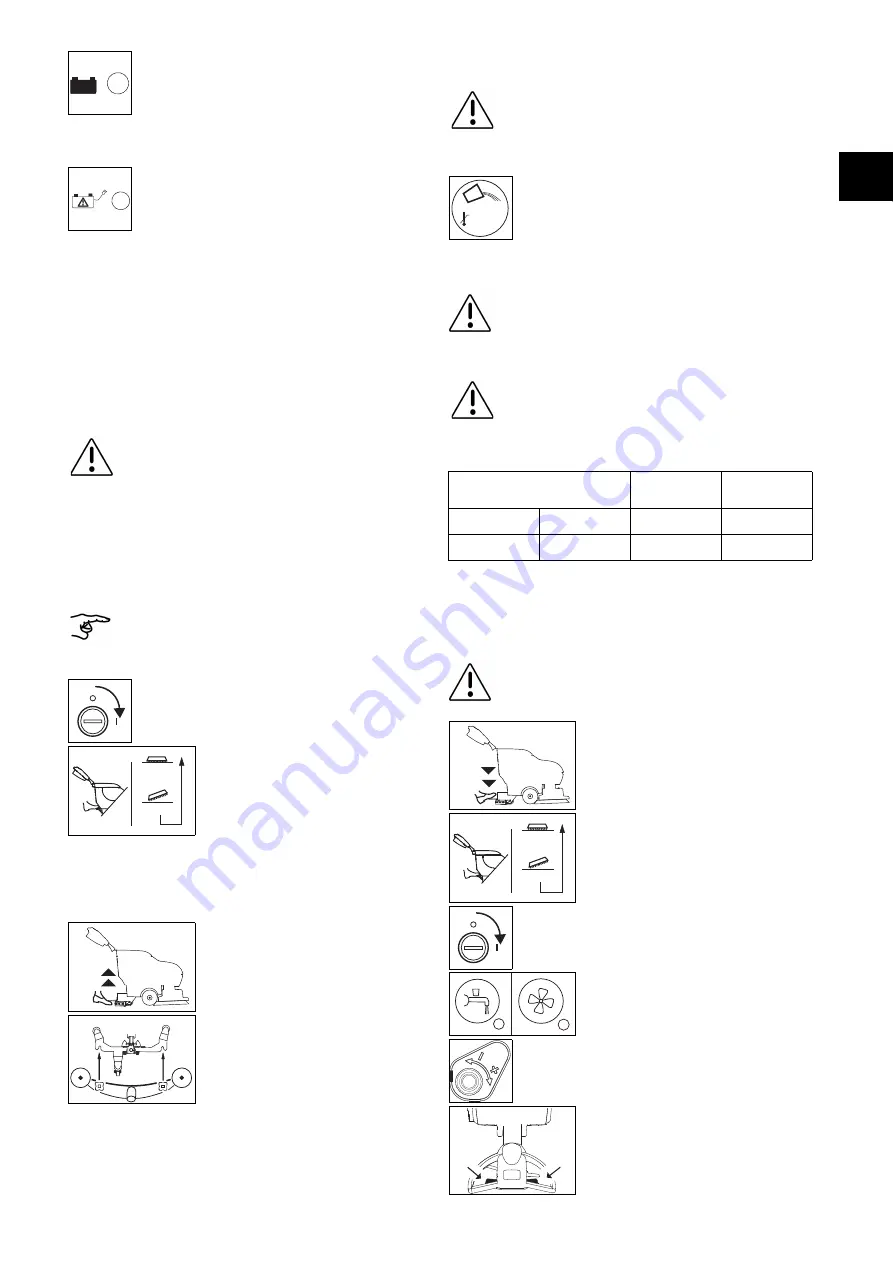
Beginning work
• When the charging process is complete, the
green indicator lights up.
• Leave the power supply cord connected to the mains until you use the
machine again. The on-board charger unit automatically monitors and
charges the batteries. The energy consumption in the mode is limited to a
few milliwatts.
• If a fault occurs during the charging process as
the result of a defect in the charging unit, an
interruption of a cable or a defective battery cell,
the red indicator will light up.
• Unplug the connection to the mains socket.
• Connect the battery to the machine with the battery disconnection socket.
• Check that the machine has been switched off with the keyswitch.
• Disconnect the battery from the machine using the battery disconnection
socket.
• Connect the battery disconnection socket to the external battery charging
unit (pay attention to the voltage from the mains supply socket).
Caution:
Follow the instructions of use for your battery charger!
• Switch the machine off using the keyswitch and remove the key.
Working with worn out, damaged and or wrong tools, could result
in possible damage to floors or their protective layers.
• Position the tool below the brush unit.
• Switch on the keyswitch.
• Unlatch the foot lever and slowly lower the tool.
• Briefly pull the brush drive bar.
By doing this the tool will be centered and coupled.
• Switch the machine off.
• Raise the squeegee and loosen the fixing
screws on the squeegee.
The squeegee support wheel must be in the
direction of movement.
• Assemble the squeegee and tighten the fixation
knobs.
• Attach the suction hose to the squeegee.
Caution:
Maximum permissible water temperature 60 °C/140 °F.
• Switch the machine off.
• Lift the tank lid.
• Fill water into the solution tank.
Maximum permissible filling level (page 28).
Caution:
Wear protective gloves, goggles and the corresponding
(protective) work clothing when handling chemical products!
Caution:
Using other chemicals (e.g. chemicals containing solvents,
chlorine, hydrochloric acid and hydrofluoric acid) can damage or
destroy the machine.
Instructions on the product’s
packaging
Tank capacity
The volume per
tank filling
0.25%
25ml to 10l water 20l
50ml = 0,05l
0.5%
50ml to 10l water 20l
100ml = 0,1l
• Add the product measured with the dosing aid to the water in the solution
tank.
Caution:
Always wear non-slip shoes and appropriate work clothing while
working with this machine!
• Lower the squeegee.
• Unlatch the foot lever and slowly lower the tool.
• Switch on the keyswitch.
• First press the solution dosing control button,
and then the vacuum on.
The indicators light up briefly.
• Adjust the volume of the cleaning solution.
• Pull the operating lever.
By doing this the tool is activated.
max.60
˚
C
max.140
˚
F


