REV A 2017/11/08
877.582.3569
3
FT7500 Series Junction Box
Junction Box Installation
1.
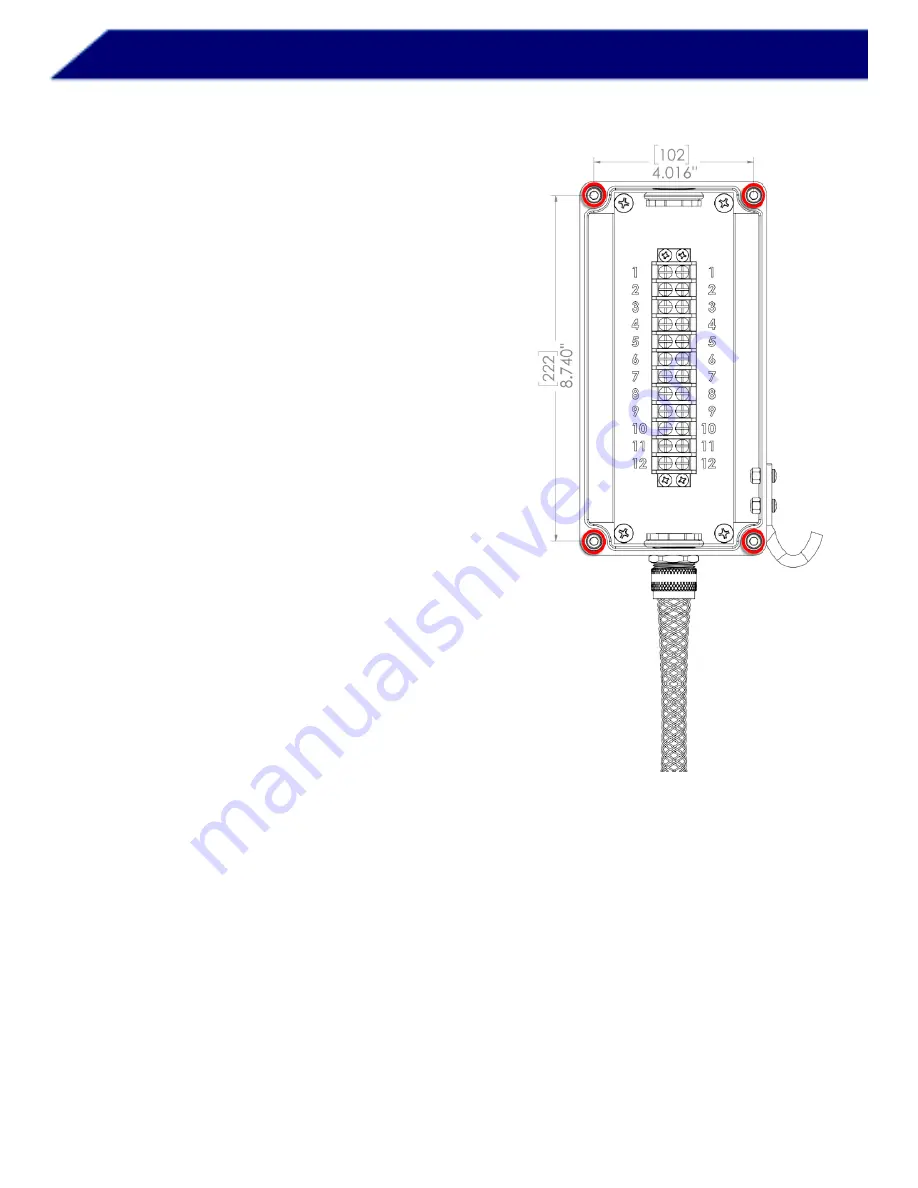
Using the bolt pattern provided to the right, locate a
sturdy area large enough to install the junction box.
Consider the proximity to the incoming trailers as
rack cords are generally 20-30FT in length. The box
should be easily accessible to return the cable to the
integrated hook when not in use. The junction box is
water resistant, but will last longer when protected
from the elements. The included carriage bolts are
suitable for mounting the box to a plate no thicker
than 0.6”. Mounting the box to a wall is possible but
will require customer supplied anchors or lag bolts.
Conduit from the rack monitor must enter the top of
the junction box.
2.
Level the bolt pattern and drill four holes marked on
the pattern.
3.
Remove the lid from the junction box by unscrewing
the four corner screws.
4.
Mount the junction box using either the supplied
carriage bolts and nuts, or customer supplied lag
bolts with anchors.
5.
Run conduit between the rack monitor and the top
of the junction box, including a conduit sealing joint
near the rack monitor if required by local
regulations. A sealing joint ensures that safety
critical wiring is unmodified during service at the
junction box.
6.
Install wiring from rack monitor I.S. output connections, through conduit, into the junction box.
Once the wiring is verified, seal the conductors by filling the conduit sealing joint with approved
sealing compound.
7.
Rack monitor connections should come in from the top of the junction box, then connect to the
left side of the terminal block. Wire color codes are different between manufacturers, so refer
to the rack monitor and rack cord instructions for correct wiring order.


