background image

29

CARE AND MAINTENANCE

STEERING CONTROL ADJUSTMENTS (continued):

D.

Adjusting for Straight Forward Tracking:

In large open area, actuate the control handles into the full forward position.  If

the mower veers in either direction (left or right) some adjustment is necessary.

1.

If the mower veers to the right, then the right hydrostat needs to be

sped up.  If the

mower veers to the left, then the left hydrostat

needs to be sped up.

2.

Stop the machine and shut off the engine.

3.

Slightly loosen the bolt at the lower end of the upper linkage assembly

on the side that

is slower.  Using a 1/8" Allen wrench turn the

setscrew 1/4 turn in.  It may take several

test drives to get the

mower to track straight forward.

4.

Once the tracking is to the operator's liking, completely tighten the

bolt on the control

linkage assembly that was loosened

earlier.

5.

Recheck to make sure neutral adjust has not been effected, see

procedure A.

Steering Control

Lever

Inward Stop

Setscrew

Reverse Stop

Setscrew

Setscrew used to

adjust Forward Tracking

Loosen Bolt  on Linkage

RH Locknut

Upper linkage As-

sembly

Turn this

rod to

Adjust

Neutral

Rod End Ball

Joint

LH Locknut

Forward

Stop

Setscrew

new in-

structions &

graphics. 

Access

Hole

Summary of Contents for 8000 SERIES ZTR

Page 1: ...8000 SERIES ZTR MOWERS Operator s Manual...

Page 2: ...se the mower read the operator s manual carefully and become completely familiar with the controls The information in this operator s manual applies to all Dixon ZTR 8000 Series Commercial Mowers Your...

Page 3: ...AFETY Pages 4 9 WARRANTY POLICY Page 10 SPECIFICATIONS Page 11 SEAT ADJUSTMENT Page 12 CONTROLS Pages 13 16 OPERATION INSTRUCTIONS Pages 17 22 CARE AND MAINTENANCE Pages 23 33 STANDARD SERVICE PARTS L...

Page 4: ...MOWERS IF IMPROPERLY OPER ATED CAN CAUSE SERIOUS INJURY OR DEATH The most common causes of injury to the operator or bystander BLADE CONTACT TIP OVER RUN OVER BACK OVER read and understand this manual...

Page 5: ...an imminently hazardous situation which if not avoided will result in death or serious injury Warning indicates a potentially hazardous situation which if not avoided could result in death or serious...

Page 6: ...place Slow down before turning Never leave a running mower unattended Always turn off blades set parking brake stop engine and remove key before dismounting Turn off blades when not mowing Stop engin...

Page 7: ...sscatchersorotherattachments Thesecanchangethestabilityofthemower Keepallmovementontheslopesslowandgradual Donotmakesuddenchangesinspeedordirection Avoid starting or stopping on a slope If tires lose...

Page 8: ...the mowing area and under the watch ful care of another responsible adult Be alert and turn mower off if a child enters the area Before and during backing look behind and DOWN for small children Never...

Page 9: ...a trailer with a portable container rather than from a gasoline dispenser nozzle If a gasoline dispenser nozzle must be used keep the nozzle in contact with the rim of the fuel tank or container openi...

Page 10: ...0 days from date of purchase 5 Warranty does not apply to damage in transit or incidents of misuse negligence accidents or alteration The use of parts or components other than those supplied by Dixon...

Page 11: ...ead andCrankcasewithCastIron Liners Full Pressure Lubrication Full Flow Filter Pulse type Fuel Pump Fixed Jet Carburetor w Smart Choke Electronic Ignition In Line Fuel Filter Dual ElementAirCleaner ST...

Page 12: ...ls FORE AFT ADJUSTMENT 1 Grasp seat slide adjuster and move it into adjustment position 2 Slide seat forward or backward 3 Release seat slide adjuster SEAT BACK ADJUSTMENT 1 Rotate knob clockwise to r...

Page 13: ...13 CONTROLS SHOW HOW TO REMOVE BOOT RAISE AND LOWER ROTATE CONTROL HANDLES ADD INFO ON HEADLIGHT POSITION ON START SWITCH...

Page 14: ...t left hand side of mower To engage brake pull upward To release brake move lever downward NOTE Always set parking brake before dismounting Release parking brake before moving mower HYDRO GEAR DRIVE S...

Page 15: ...15 CONTROLS SHOW HOW TO REMOVE BOOT RAISE AND LOWER AND ROTTTE CONTROL HANDLES ADD...

Page 16: ...t To engage blades Pull up on the switch To disengage blades Push down MOWER DECK CUT HEIGHT LIFT LEVER Located to the right and front of operator Controls the cutting height Eleven positions of adjus...

Page 17: ...ir functions During initial operation learning to drive set throttle at slow speed Sound judgement by the owner will prevent accidents BEFORE OPERATING MOWER 1 Read engine manufacturer s operating and...

Page 18: ...seat 4 The engine will stop if the brake is SET and the steering control levers are moved to the IN position BLADE DRIVE SWITCH TEST Electric Clutch a With the electric blade drive switch turned on an...

Page 19: ...to Run position 4 Once engine starts to warm up slowly push choke control lever back to the fully open position 5 Move throttle control lever to the wide open or maximum setting for actual opera tion...

Page 20: ...000 Series may require partial choke setting to start even if the engine has been operated for a period of time 4 Engine must be operated at wide open or maximum setting to insure adequate lubrication...

Page 21: ...second cutting 4 Keep The Underside Of The Mower Deck Clean Frequent removal of dried grass and dirt will allow the clippings to discharge correctly 5 Maintain Sharp Blade s Throughout The Cutting Sea...

Page 22: ...ck hydrostatic transmission fluid every 25 hours Service air filter element every 100 hours Change engine crankcase oil every 100 hours 5 hours break in Change engine oil filter every 200 hours Change...

Page 23: ...heck the fluid in the battery at frequent intervals Keep fluid level above the plates in each cell using distilled water OFF SEASON BATTERY STORAGE Identify each cable so cables can be reconnected to...

Page 24: ...nd file electric grinder or blade sharp ener Wear gloves and eye protection when sharpening Grind blade at original 25 degree bevel D Check balance of blade by positioning the blade on a nail or blade...

Page 25: ...il level should register between the marked hole on the dipstick and the end of the dipstick Replenish as needed with 20W 50 Motor Oil DO NOT OVERFILL When checking the oil level be very careful to ke...

Page 26: ...ck Tighten the castle nut with the feeler gauge inserted until the gauge fits snugly between the disc and puck The gap should not be so tight that the feeler gauge cannot be reinserted after removal B...

Page 27: ...1 8 to 3 16 Make sure belt is not too tight Belt deflection or movement should be approximately 1 4 to 1 2 when measured at mid point between hydro and idler pul ley Hydrostat Drive Pulley 3 8 Pin and...

Page 28: ...ee that the drive wheel is still not turning 7 Repeat steps 1 6 for the other side 8 Shut off engine before removing the blocks B To Adjust IN Position of the Steering Controls 1 Remove the two front...

Page 29: ...e lower end of the upper linkage assembly on the side that is slower Using a 1 8 Allen wrench turn the setscrew 1 4 turn in It may take several test drives to get the mower to track straight forward 4...

Page 30: ...the boards not the anti scalping sheels Adjust the deck hangers longer or shorter until the deck just comes off of the boards Remove the boards and verify that the deck is hanging on all four deck ha...

Page 31: ...ng in reverse E Attached a hoist to the deck lift bolt lift the nose of the deck until the deck is standing vertical and the deck latch engages IMPORTANT NOTE MAKE SURE THAT THE DECK IS LIFTED FAR ENO...

Page 32: ...tch Foot Deck Center Deck Spindle Deck Lift Bolt Front Caster Wheels positioned out of the way Rear Deck Mounting Latch Rear Corner Cut Height Adjustment Pin Engine to Deck Drive Belt Hoist Deck Latch...

Page 33: ...our engine investment use only original equipment filters Model ZTR 8025 25HP Pre Cleaner Foam Element Cartridge Air Cleaner Engine Oil Filter IMPORTANT Some applications extreme dirt conditions or th...

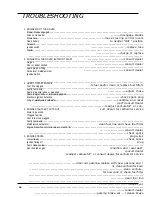
Page 34: ...tor bowl and or check fuel filter clean fuel line check vent consult dealer parking brake set release brake 1 ENGINE WON T TURN OVER Mower blades engaged Drive not in neutral Blown fuse Dead battery S...

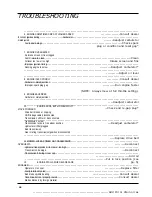
Page 35: ...lean Oil level too low or too high Improper ignition timing Running engine too slow 8 ENGINE IDLES POORLY Carburetor maladjustment Improper spark plug gap 9 ENGINE BACKFIRES Carburetor maladjustment 1...

Page 36: ...36 NOTES...

Page 37: ...37 NOTES...

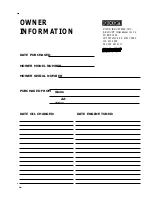
Page 38: ...NUMBER MOWER SERIAL NUMBER PURCHASED FROM OWNER INFORMATION DATE OIL CHANGED DATE ENGINE TUNED Ad dress Name DIXON INDUSTRIES INC A BLOUNT International Inc Co PO BOX 1569 COFFEYVILLE KS 67337 0945 3...

Page 39: ...67337 0945 316 251 2000 The engine exhaust from this product contains chemicals known to the State of California to cause cancer birth defects or other repro ductive harm Dixon and ZTR are registered...

Reviews: