background image

12

OPERATION

BEFORE STARTING THE ENGINE

CHECK ENGINE OIL LEVEL

The engine in your tractor has been shipped from the fac-

tory already filled with sum mer weight oil.
•  Check engine oil with tractor on level ground.
•  Unthread and remove oil fill cap/dipstick; wipe oil off.  

Reinsert the dipstick into the tube and rest oil fill cap 

on the tube.  Do not thread the cap onto the tube.  

Remove and read oil level.  If necessary, add oil until 

“FULL” mark on dipstick is reached.  Do not overfill.

•  For cold weather operation you should change oil for 

easier starting.  (See “OIL VISCOSITY CHART” in the 

Maintenance sec tion of this manual.)

•  To change engine oil, see the Maintenance section in 

this manual.

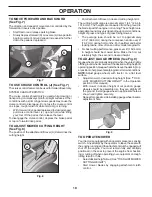
TO START ENGINE (See Fig. 3)

When starting the engine for the first time or if the engine 

has run out of fuel, it will take extra cranking time to move 

fuel from the tank to the engine.

• 

Ensure freewheel control is in the transmission en gaged 

position.

•  Sit on seat in operating position, depress brake pedal 

and set parking brake.

•  Move attachment clutch to “DISENGAGED” position.
•  Move throttle control to fast position
•  Pull choke control out for a cold engine start attempt. 

For a warm engine start attempt the choke control may 

not be needed.

NOTE:

 Before starting, read the warm and cold starting 

procedures below.

•  Insert key into ignition and turn key clockwise to 

“START” position and release key as soon as engine 

starts. Do not run starter continuously for more than 

fifteen sec onds per minute. If the engine does not start 

after several attempts, push choke control in, wait a 

few minutes and try again. If engine still does not start, 

pull the choke control out and retry.

WARM WEATHER STARTING (50°F/10°C and above)

• 

When engine starts, slowly push choke control in until 

the engine begins to run smoothly. If the engine starts to 

run roughly, pull the choke control out slightly for a few 

seconds and then continue to push the control in slowly.

• 

The attachments and ground drive can now be used. If 

the engine does not accept the load, restart the engine 

and allow it to warm up for one minute using the choke 

as described above.

COLD WEATHER STARTING (50°F/10°C and below)

• 

When engine starts, slowly push choke control in until 

the engine begins to run smoothly. Continue to push 

the choke control in small steps allowing the engine to 

accept small changes in speed and load, until the choke 

control is fully in. If the engine starts to run roughly, pull 

the choke control out slightly for a few seconds and 

then continue to push the control in slowly. This may 

require an engine warm-up period from several sec onds 

to several minutes, depending on the temperature.

AUTOMATIC TRANSMISSION WARM UP

• 

Before driving the unit in cold weather, the trans mis sion 

should be warmed up as follows:

•  Be sure the tractor is on level ground.
•  Release the parking brake and let the brake slowly 

return to operating po si tion.

•  Allow one minute for transmission to warm up. This 

can be done during the engine warm up period.

• 

The attachments can be used during the engine warm-

up period after the transmission has been warmed up 

and may require the choke con trol be pulled out slight ly.

ADD GASOLINE 

•  Fill fuel tank to bottom of filler neck. Do not overfill.  

Use fresh, clean, regular gasoline with a minimum of 

87 octane.  Do not mix oil with gasoline.  Purchase fuel 

in quantities that can be used within 30 days to ensure 

fuel freshness.

CAUTION:  Wipe off any spilled oil or 

fuel.  Do not store, spill or use gasoline 

near an open flame.

IMPORTANT:

  WHEN OPERATING IN TEMPERATURES 

BELOW 32°F (0°C), USE FRESH, CLEAN WINTER GRADE 

GASOLINE TO HELP ENSURE GOOD COLD WEATHER 

STARTING.

CAUTION:  Alcohol blended fuels (called gasohol 

or using ethanol or methanol) can attract moisture 

which leads to sep a ra tion and for ma tion of acids 

during storage.  Acidic gas can damage the fuel 

system of an engine while in storage.  To avoid 

engine problems, the fuel system should be emptied 

before stor age of 30 days or longer.  Drain the gas 

tank, start the engine and let it run until the fuel 

lines and carburetor are empty.  Use fresh fuel next 

season.  See Storage In struc tions for additional 

information.  Never use engine or carburetor cleaner 

products in the fuel tank or permanent damage may 

occur.  Fuel stabilizer is an acceptable alternative 

in minimizing the formation of fuel gum deposits 

during stor age.  Add stabilizer to gasoline in fuel 

tank or storage container.  Always follow the mix 

ratio found on stabilizer container.  Run engine at 

least 10 minutes after adding stabilizer to allow the 

stabilizer to reach the carburetor.  Do not empty 

the gas tank and carburetor if using fuel stabilizer.

Summary of Contents for D22KH42

Page 1: ...erator s Manual D22KH42 581 26 93 28 Rev 4 Gasoline containing up to 10 ethanol E10 is acceptable for use in this machine The use of any gasoline exceeding 10 ethanol E10 will void the product warrant...

Page 2: ...ook down and behind before and while backing Never direct discharged material toward anyone Avoid dischargingmaterialagainstawallorobstruction Material may ricochet back toward the operator Stop the b...

Page 3: ...OF GASOLINE To avoid personal injury or property damage use extreme care in handling gasoline Gasoline is extremely flammable and the vapors are explosive Extinguish all cigarettes cigars pipes and o...

Page 4: ...Storage sections of this manual Wear proper Personal Protective Equipment PPE while operating this machine including at a minimum sturdyfootwear eyeprotection andhearingprotection Do not mow in shorts...

Page 5: ...this manual TOOLS REQUIRED FOR ASSEMBLY A socket wrench set will make assembly easier Standard wrench sizes are listed 1 1 2 wrench Tire pressure gauge 2 7 16 wrenches Utility knife Pliers Whenrighto...

Page 6: ...perly inflated for leveling Check mower and drive belts Be sure they are routed properly around pulleys and inside all belt keepers Check wiring See that all connections are still secure and wires are...

Page 7: ...ty damage DANGER indicates a hazard which if not avoided will result in death or serious injury WARNING indicates a hazard which if not avoided could result in death or serious injury CAUTION indicate...

Page 8: ...or F IGNITION SWITCH Used for starting and stopping the engine G REVERSE OPERATION SYSTEM ROS ON POSITION Allows operation of mower or other powered attachment while in reverse H LIGHT SWITCH Turns th...

Page 9: ...tractor com pletely as described above and set parkingbrakebeforeleavingtheopera tor s position NOTE Failure to move throttle control between half and full speed fast position before stopping may cau...

Page 10: ...r turning With forward drive pedal depressed to desired speed pull cruise control lever J up and hold while lifting your foot off the pedal then release the lever To disengage the cruise control depre...

Page 11: ...tion key clockwise to engine ON position ROS ON POSITION ENGINE ON POSITION NORMAL OPERATING 02828 TO OPERATE ON HILLS CAUTION Donotdriveupordownhills with slopes greater than 15 and do not drive acro...

Page 12: ...until the engine begins to run smoothly Continue to push the choke control in small steps allowing the engine to acceptsmallchangesinspeedandload untilthechoke control is fully in If the engine starts...

Page 13: ...ol to half 1 2 speed Disengage parking brake 8 Drive tractor forward for approximately five feet then backwards for five feet Repeat this driving procedure three times Your transmission is now purged...

Page 14: ...MMENDATIONS The warranty on this tractor does not cover items that have beensubjectedtooperatorabuseornegligence Toreceive full value from the warranty operator must maintain tractor as instructed in...

Page 15: ...s running with the ignition switch in the ROS ON position and the attachment clutch engaged any attempt by the operator to shift into reverse should NOT shut off the engine BLADE CARE Forbestresultsmo...

Page 16: ...60 5W 30 10W30 ENGINE LUBRICATION Only use high quality detergent oil rated with API service classification SG SL Select the oil s SAE viscosity grade according to your expected operating temperature...

Page 17: ...ntactwiththeblade Replace broken or missing washout fitting immediately prior to using mower again Pluganyholesinmowerwithboltsandlocknuts Fig 19 DECK WASHOUT PORT See Fig 19 Your tractor s deck is eq...

Page 18: ...disconnect mower suspension arm A from chassis and rear lift link C from rear mower bracket D remove retainer springs and washers Go to other side of mower and disconnect the suspen sion arm and rear...

Page 19: ...NKS C Lift rear corner of mower and position slot in link assembly over pin on rear mower bracket D and secure with washer and retainer spring ATTACH MOWER SIDE SUSPENSION ARMS A TO CHASSIS Position h...

Page 20: ...ly checking the appearance Readjust if neces sary until you are satisfied with the results A TURN NUT LEFT TO LOWER MOWER TURN NUT RIGHT TO RAISE MOWER Fig 26 Fig 27 PRECISION SIDE TO SIDE ADJUSTMENT...

Page 21: ...aqualifiedservicecenter TO REPLACE MOTION DRIVE BELT See Fig 31 Park the tractor on level surface Engage parking brake For assistance there is a belt installation guide decal on bottom side of left fo...

Page 22: ...ry TO REMOVE CABLES REVERSE ORDER BLACK cable first from chassis and then from the fully charged battery RED cable last from both batteries WEAK OR DEAD BATTERY FULLY CHARGED BATTERY Fig 33 SERVICE AN...

Page 23: ...bulb holder securely back into the hole in the backside of the grill Close hood INTERLOCKS AND RELAYS Loose or damaged wiring may cause your tractor to run poorly stop running or prevent it from star...

Page 24: ...Plastic cannot breathe which allows condensation to form and will cause your tractor to rust IMPORTANT NEVER COVER TRACTOR WHILE ENGINE AND EXHAUST AREAS ARE STILL WARM Immediately prepare your tracto...

Page 25: ...eck replace ignition switch 8 Faulty solenoid or starter 8 Check replace solenoid or starter 9 Faulty operator presence switch es 9 Contact an authorized service center department Engine clicks but wi...

Page 26: ...mower drive belt 9 Blades improperly installed 9 Reinstall blades sharp edge down 10 Improper blades used 10 Replace with blades listed in parts manual 11 Cloggedmowerdeckventholesfrombuildup of gras...

Page 27: ...never across the face Do not mow slopes greater than 15 degrees Make turns gradually to prevent tipping or loss of control Exercise extreme caution when changing direction on slopes 1 Fold this page a...

Page 28: ...05 08 14 BD Printed in the U S A...

Reviews: