background image

11

SAfety

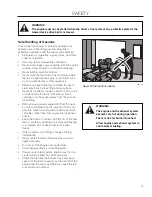
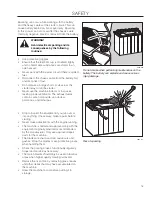
Personal Safety Equipment

8011-670a

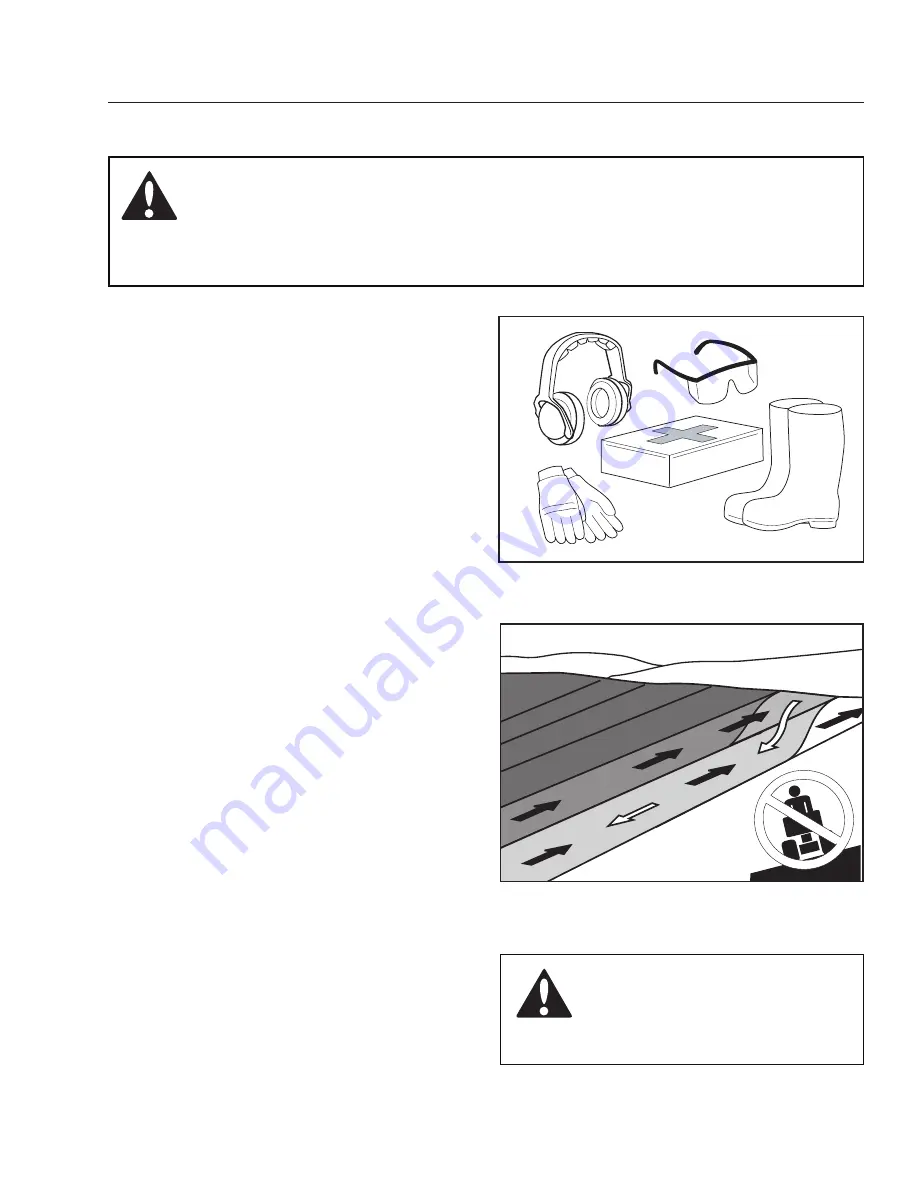
Personal protective equipment

6003-004

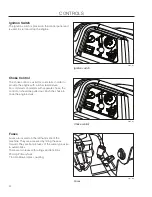
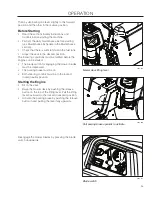
Mow up and down, not side to side

make sure that you have first aid equipment close 

• 

at hand when using the machine.
never use the machine when barefoot.

• 

Always wear protective shoes or boots, preferably 

• 

with steel toe caps.
Always wear approved protective glasses or a full 

• 

visor when assembling or driving.
Always wear gloves when handling the blades.

• 

never wear loose clothing that can get caught in 

• 

moving parts.
Use ear protectors to avoid damage to hearing.

• 

Slope Operation

Slopes are a major factor related to loss of control and 
tip-over accidents, which can result in severe injury or 
death. Operation on all slopes requires extra caution. 
If you cannot back up the slope or if you feel uneasy 
on it, do not mow it.

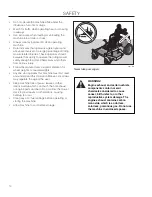
mow up and down slopes (10 degrees maximum), 

• 

not across.
Watch for holes, ruts, bumps, rocks, or other 

• 

hidden objects. Uneven terrain could overturn the 
machine. tall grass can hide obstacles.
Choose a low ground speed so that you will not 

• 

have to stop while on the slope.
Do not mow on wet grass. tires may lose traction.

• 

Avoid starting, stopping, or turning on a slope. If 

• 

the tires lose traction, disengage the blades and 
proceed slowly straight down the slope.
Keep movement on the slopes slow and gradual. 

• 

Do not make sudden changes in speed or 
direction, which could cause machine to roll over.
Use extra care while operating machine with 

• 

grass catchers or other attachments; they can 
affect the stability of the machine.
Do not use on steep slopes.

• 

Do not try to stabilize the machine by putting a 

• 

foot on the ground.
Do not mow near drop-offs, ditches, or 

• 

embankments. the machine could suddenly roll 
over if a wheel is over the edge or if the edge 
caves in.

WARNING!

When using the machine, approved personal protective equipment (shown in illustrations) 
shall be used. Personal protective equipment cannot eliminate the risk of injury but it 
will reduce the degree of injury if an accident does happen. Ask your retailer for help in 
choosing the right equipment.

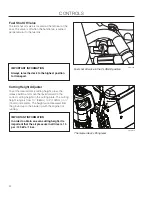
WARNING!

Do not drive up or down hills with 
slopes greater than 10 degrees. And 
do not drive across any slopes.

Summary of Contents for SPDZTR 42

Page 1: ...DZTR 46 966657801 SPDZTR 46 CA 966657901 SPDZTR 46 BF 966658001 SPDZTR 48 966698601 SPDZTR 54 966658201 SPDZTR 54 966658301 SPDZTR 54 BF 966658401 Please read the operator s manual carefully and make...

Page 2: ...he information contained in these instructions Use only original parts for repairs The use of other parts voids the warranty Do not modify or install non standard equipment to the unit without consent...

Page 3: ...raining 24 Steering 24 Before Starting 25 Starting the Engine 25 Jumper Cables 28 Running 29 Operating On Hills 30 Mowing Tips 31 Stopping the Engine 32 Manual Transport 33 Maintenance 34 Maintenance...

Page 4: ...d mind and body and must not be under the influence of any mind altering substance WARNING Engine exhaust some of its constituents and certain vehicle components contain or emit chemicals known to the...

Page 5: ...equipment and ensure that the machine is well anchored DO NOT operate this machine on public roadways Towing If machine is equipped with a tow hitch use extreme caution when towing Never allow childre...

Page 6: ...s Manual belongs to the machine with the manufacturing number Engine Manufacturing Number The machine s manufacturing number can be found on the printed plate affixed to the engine compartment Stated...

Page 7: ...ated in the chapter TECHNICAL DATA and on the decals Only machines for European market Use protective gloves WARNING Xxxx xxxxxx xxxxx xxxx xxxxxxxxx xxxxxx xxxxxxxxx xx xxxxxxxx xxxx xxxxxx Used in t...

Page 8: ...ce or repair work Whole body Severing of fingers Do not open or Careful backing up Careful going exposure to and toes remove safety watch for other forward watch for thrown objects shields while peopl...

Page 9: ...by one person Do not mow in reverse unless absolutely necessary Always look down and behind before and while backing Never direct discharged material toward anyone Avoid discharging material against a...

Page 10: ...urer s recommendation for wheel weights or counterweights Anyone who operates this machine must first read and understand this Operation Manual Local laws may regulate the age of the user Keep machine...

Page 11: ...tacles Choose a low ground speed so that you will not have to stop while on the slope Do not mow on wet grass Tires may lose traction Avoid starting stopping or turning on a slope If the tires lose tr...

Page 12: ...he watchful care of a responsible adult other than the operator Be alert and turn machine off if a child enters the area Before and while backing look behind and down for small children Never carry ch...

Page 13: ...round If this is not possible refuel such equipment with a portable container rather than from a gasoline dispenser nozzle Keep the nozzle in contact with the rim of the fuel tank or container opening...

Page 14: ...rly to be sure it works properly The machine must not be driven with defective or unmounted protective plates protective cowlings safety switches or other protective devices Do not change the settings...

Page 15: ...a bridge short circuit across the starter relay to run the starter Never use the machine indoors or in spaces lacking proper ventilation The exhaust fumes contain carbon monoxide an odorless poisonous...

Page 16: ...ransport the machine Activate the parking brake turn off the fuel supply and fasten the machine with approved fastening devices such as bands chains or straps when transporting Do not operate this mac...

Page 17: ...ade via a belt Control Locations Steering control levers 1 Parking brake 2 Fuel shut off valve 3 Fuses 4 Fuel tank cap 5 Seat adjustment lever 6 Blade switch 7 1 2 11 5 8 9 12 4 10 7 Ignition switch 8...

Page 18: ...e rotation of the right wheel is reduced and the machine turns to the right Zero turn can be achieved by moving one control backward behind the neutral position and carefully moving the other steering...

Page 19: ...regulates the engine speed and thereby the rate of rotation of the blades assuming the blade switch is pulled out see Engaging the Mower Deck In order to increase or decrease the engine speed the con...

Page 20: ...forward They are flat pin fuses of the same type used in automobiles There are two fuses with ratings and functions 20 Amp Primary fuse 7 5 Amp Mower deck coupling Choke Control The choke control is...

Page 21: ...ethanol can attract moisture which leads to separation and formation of acids during storage Acidic gas can damage the fuel system of an engine while in storage To avoid engine problems the fuel syste...

Page 22: ...button and move the lever forward to the correct cutting height on the cutting plate The cutting height range is from 1 38mm to 4 102mm in 13mm increments The heights are measured from the ground up...

Page 23: ...at can be moved backward or forward 8058 023 Lengthways adjustment Hour Meter The hour meter displays the total operating time It will flash CHG OIL Change Oil at 50 hour intervals The flash duration...

Page 24: ...ee Manual Transport in the Operation section to an open flat area without other people vehicles or obstacles nearby To move the unit under its own power the operator must sit in the seat and start the...

Page 25: ...efore the engine can be started The blade switch for engaging the mower blades must be depressed The parking brake must be on Both steering controls must be in the locked outer neutral position Starti...

Page 26: ...tral position 8058 148 Set the throttle 8058 134 Set the choke control Move the steering controls outward to the locked outer neutral position Move the throttle to the middle position If the engine is...

Page 27: ...stem damage The engine exhaust contains carbon monoxide which is a odorless colorless poisonous gas Do not use the machine in enclosed spaces 8050 780 Turn to the start position 8058 148 Set the engin...

Page 28: ...he discharged battery away from the fuel tank and battery To remove cables reverse order Remove BLACK cable first from chassis and then from the fully charged battery Remove RED cable last from both b...

Page 29: ...neutral position 2 N Set retaining pin into selected cutting height and 3 secure the opposite side with a cotter hairpin 8058 080 Parking brake released 8058 019 Mower deck lifting lever WARNING Ensur...

Page 30: ...other steering control forward from its neutral position 8058 149 Set blade engagement and throttle control Operating On Hills Read the Safety Instructions Driving on Slopes in the Safety Instruction...

Page 31: ...awn becomes more even and the grass clippings more evenly distributed over the mown area The total time taken is not increased as a higher operating speed can be used without poor mowing results Avoid...

Page 32: ...e switch 8058 134 Disengage the mower deck and move throttle to minimum Raise the mower deck by pressing the release button on the lever and pulling fully backward to the transport position 8061 077 P...

Page 33: ...rs with the head outside the frame and held in the bypass position To reengage the EZT s to drive reverse the 3 above procedure 8058 150 Bypass linkages 8058 033 EZT engaged 1 EZT locked in the bypass...

Page 34: ...d in this manual Not described in this manual Refer to the engine manufacturer s manual MAINTENANCE Daily At least once each year Maintenance interval in hours Before After 25 50 100 300 Check the par...

Page 35: ...0 hours 2 In dusty conditions cleaning and replacement are required more often 3 Performed by authorized service workshop Described in this manual Not described in this manual Refer to the engine manu...

Page 36: ...in 280 min 11 8V 0 85 min 150 min 195 min 370 min Charging time depends on battery capacity condition age temperature and efficiency of charger Cleaning battery and terminals Corrosion and dirt on the...

Page 37: ...he operator leaves the seated position Check that the engine stops if the mower blades are engaged and the driver temporarily moves off the drivers seat IMPORTANT INFORMATION In order to be able to dr...

Page 38: ...3 Belt routing Deck belt installation NOTE For ease in installing the deck belt refer to the routing decal on the top of the deck Wrap the deck belt around the electric clutch 1 pulley that is located...

Page 39: ...are than specified 8058 027 Blade 1 Blade bolt special 2 Cutter housing 3 Blade attachment Cutting Blades To attain the best mowing effect it is important that blades are well sharpened and not damage...

Page 40: ...that 3 measurement is the same If adjustment is required with a or adjustable wrench turn the lift link adjustment nuts on either side counter clockwise to lower or clockwise to raise Adjust until bot...

Page 41: ...erly adjusted when they are just slightly off of the ground when the deck is at the desired cutting height in the operating position Anti scalp rollers then keep the deck in the proper position to hel...

Page 42: ...gular cleaning especially under the mower deck will increase the machine s life span Make it a habit to clean the machine directly after use after it is cooled before the debris sticks Do not spray wa...

Page 43: ...hine should be lubricated twice weekly 12 12 Every year 1 52 Every Week 1 365 Every day Lubricate with grease gun Oil change Filter change Level check 8050 832 Wipe away excess grease after lubricatio...

Page 44: ...y good quality bearing grease 8058 068 Lubricating the front wheels 8058 136 Deck spindle IMPORTANT INFORMATION Use minimal lubrication and remove excess lubricant so that is does not come into contac...

Page 45: ...r contact of the battery terminal cable connections Blown fuse Fault in the starter safety circuit See Safety System in the Maintenance Section Engine runs rough Faulty carburetor Choke control is pul...

Page 46: ...brake on Bypass valve on pump open Drive belt for the transmission slack or has come off Air trapped in hydraulic system Mower deck not engaging Drive belt for the mower deck has come loose Contact fo...

Page 47: ...fuel stabilizer Start 4 the engine and allow it to run until the carburetor is drained of fuel or the stabilizer has reached the carburetor Remove the spark plug and pour about a 5 tablespoon of engin...

Page 48: ...48 schematics...

Page 49: ...m gripped Speed forward 0 6 mph 0 9 7 km h 0 6 mph 0 9 7 km h Speed reverse 0 3 5 mph 0 5 6 km h 0 3 5 mph 0 5 6 km h Brakes Mechanical parking brake Mechanical parking brake Front caster tires smooth...

Page 50: ...rm Rests Optional Optional Hour Meter Standard Standard Blade Engagement Electric clutch Electric clutch Deck Construction Fabricated Fabricated Productivity 2 6 acres h 10521 m2 h 2 6 acres h 10521 m...

Page 51: ...evers foam gripped Speed forward 0 6 mph 0 9 7 km h 0 6 mph 0 9 7 km h Speed reverse 0 3 5 mph 0 5 6 km h 0 3 5 mph 0 5 6 km h Brakes Mechanical parking brake Mechanical parking brake Front caster tir...

Page 52: ...evers foam gripped Speed forward 0 6 mph 0 9 7 km h 0 6 mph 0 9 7 km h Speed reverse 0 3 5 mph 0 5 6 km h 0 3 5 mph 0 5 6 km h Brakes Mechanical parking brake Mechanical parking brake Front caster tir...

Page 53: ...Hinged Arm Rests Optional Optional Hour Meter Standard Standard Blade Engagement Electric clutch Electric clutch Deck Construction Stamped 11 gauge w 10 gauge skirts Productivity 2 6 acres h 10521 m2...

Page 54: ...Rollers No Sprung Seat Standard Hinged Arm Rests Optional Hour Meter Standard Blade Engagement Electric clutch Deck Construction Stamped Productivity 3 3 acres h 13354 m2 h Dimensions Weight 538 lbs 2...

Page 55: ...hank Size Diameter in inches fine or coarse thread 9 12 13 18 5 16 18 24 28 38 24 33 3 8 31 42 46 62 40 54 7 16 50 68 75 108 75 102 115 156 9 16 110 150 165 224 5 8 150 203 225 305 250 339 370 502 7 8...

Page 56: ...the machine will fulfill the requirements This is also applicable to special requirements for any of the states California emission rules etc Do not remove any of these labels Certificates can also b...

Page 57: ...adjustment q Check The safety switch for the parking brake q The safety switch for the mower deck q The safety switch in the seat q The safety switch in the steering controls q Parking brake functiona...

Page 58: ...mp sign 25 Hour Service Check the fuel pump s air filter q Sharpen Replace mower blades if required q Check the tire pressures q Check battery with cables q Lubricate according to lubrication chart q...

Page 59: ...the spark plugs q Replace the fuel filter q Check V belts q Check tighten caster wheel axle bolts every 200 hours q Change the air filter s paper cartridge q Change hydraulic pump oil and filter 200 h...

Page 60: ...gine oil 50 hours q Replace the engine oil filter 100 hours q Check adjust the cutting height q Check adjust the parking brake 50 hours q Clean Change the spark plugs 100 hours q Change the fuel filte...

Page 61: ...SERVICE JOURNAL Action Date mtr reading stamp sign 61...

Page 62: ...SERVICE JOURNAL Action Date mtr reading stamp sign 62...

Page 63: ......

Page 64: ...P N 115 384127R2 10 06 10...

Reviews: