12
OPERATION
TIPS FOR IMPROVED BAGGING
OPERATION
Follow the mower operation instructions in your
mower operator’s manual.
When operating your grass catcher on a lawn
where grass and leaf bagging equipment has not
been used, you are picking up thatch and debris
that has accumulated for long periods of time. The
amount collected and the total time of operation
may be greater than you will experience with
regular use of your grass catcher.
•
Always run throttle at full speed when bag-
ging.
•
Select a speed low enough to give good
mower cutting performance, good quality cut
and good bagging performance.
NOTE:
It may be necessary to overlap
width of cut to suit your conditions.
•
If grass is extremely tall, it should be mowed
twice. The first time relatively high, the second
time to desired height.
•
Use left hand side of mower for trimming.
•
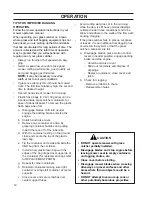
Plastic trash bags (3.0 mil, 30 gallon) can be
inserted inside grass catcher containers for
ease of debris disposal. To remove the plastic
trash bags when full:
a. Disengage blades, shift into neutral,
engage the parking brake and stop the
engine.
b. Unlatch and raise cover.
c.
Remove one container at a time by
grasping container handles and pulling
toward the rear, off of the tube rails.
d. With the container resting on the ground,
close and secure the top of the plastic
lawn bag.
e. Tip the container on its side and slide the
filled bag from the container.
f.
Install a new plastic lawn bag with the
edges of the bag draped over upper lip of
the Container (for replacement bags refer
to REPLACEMENT PARTS).
g. Repeat for other containers.
h. Reinstall containers making sure right
container overlaps left container at center
supports.
i.
Close cover and secure latches over
center support tubes.
CAUTION
• DO NOT operate mower with grass
catcher partially installed.
• Disengage blades and stop engine before
leaving mower seat to empty containers,
unclogging chutes, etc.
• Close cover before starting.
• Disengage mower blades when crossing
driveways or gravel surfaces and other
areas where thrown objects could be a
hazard.
• DO NOT attempt to vacuum up cans or
other potentially hazardous projectiles.
•
Avoid cutting wet grass or in the morning
while the dew is still heavy. Grass clippings
collected under these conditions tend to be
sticky and adhere to the walls of the flow path
causing clogging.
•
If the grass catcher fails to pick up cut grass
or leaves, it is an indication that clogging has
occurred in the system or that the grass
catcher containers are full.
a. Disengage blades, place motion control
levers in neutral position, engage parking
brake and stop engine.
-
Unlatch and raise cover.
-
Slide out containers and dispose of
clippings.
-
Replace containers, close cover, and
latch.
b. Check for clogging.
- Remove all debris in chute.
- Reassemble chutes.
Summary of Contents for SPEEDZTR 30
Page 1: ...Grass Catcher Dixon SpeedZTR 30 Kit 539 131188 Operator and Parts Manual...
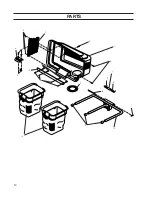
Page 14: ...PARTS 14 1 2 3 4 5 6 8 9 14 15 11 7 13 10 12 9 8 8 9 9...
Page 16: ...PARTS 16 1 2 3 4 5 6 7 8 9 10 11 12 13 14 16 17 17 17 19 19 18 18 16 15 15 17 19 19 17...
Page 19: ......
Page 20: ...539 131193 IR 05 07...


