background image

ZTR 503 Parts List


5623 

Electric Clutch


5624 

Tank Cap


5625 

Gearbox


5627 

Left Fan


5628 

Right Fan


5631 

3/8" Hose - 21"


5632 

3/8" Hose - 5"


5633 

5/8" Hose - 2"


5635 

Reservoir Assembly


5636 

Brass Ferrule


6075 

Engine Idler Spacer


6100 

Outer Shaft Key


6101 

Center Shaft Key


6111 

Deck Drive Belt


6113 

Blade Washer


6168 

Trash Guard


6257 

Blade Washer


6744 

Spring


7034 

Belt Keeper


8172 

Frame - 503


8175  

Upper Body Assembly - 503


8176 

Lower Body Assembly - 503


8177 

Caster Tire - 50"


8178 

Caster Rim - 50"


8179 

Caster Bearing - 50"


8180 

Bearing Retainer 50"


8328 

Greasable Shaft 9225


8573 

Headlight Socket Assembly


8576 

Rear Wheel


8577 

Rear Tire


9017 

Seat Frame


9023 

Engine Mount - Fwd


9024 

Engine Mount - Rear


9031 

Lift Tube


9035 

Lift Frame


9049 

Lift Bushing Bracket


9055 

Lift Cam Left


9056 

Lift Cam Right


9057 

Front Lift Rod


9065 

Lift Handle


9066 

Lift Shaft


9067 

Control Rod


9076 

Seat Frame Cable


9082 

Seat Frame Pivot Rod


9098 

Hanger Rod


9110 

Tank Cover


9142 

Rear Lift Rod


9156 

Right Swivel Plate


9157 

Left Seivel Plate


9158 

Control Lever w/Grip Left


9159 

Control Lever w/Grip Right


9164 

Brake Plate


9165 

Brake Plate


9168 

Brake Shaft


9171 

Spacer 1.75


9172 

Spacer 1.50


9174 

Brake Rod


9175 

Spring Anchor


9179 

Brake Lever


9191 

Connecting Link


9192 

Tie Bar


9195 

Tie Bar


9196 

Plate


9212 

Spring (Belt Tensioner)


9219 

Deck Hub


9224 

Outer Shaft


9228 

Deck Hub Bearing Spacer


9242 

Pulley Guard


9254 

Lift Plate


9261 

Deflector Tab


9262 

Rod 5/16" X 10


9264 

Deflector Sub Assembly


9265  Mower Blade Hi-Lift


9273  Mower Deck


9276  Idler Arm


9280  Engine Plate


9298  Caster Tube Assembly


9309  Caster Axle LH


9310  Caster Axle RH


9312  Bumper Weldment


9315  Caster Wheel & Tire


Page 32


Summary of Contents for ZTR 503

Page 1: ......

Page 2: ...r mower must be operated properly to be safe It is not a toy or a recreational vehicle Before you start to use the mower read the operator s manual carefully and become completely familiar with the controls The information in this operator s manual applies to all Dixon ZTR Model 503 Mowers Your Dixon dealer will gladly provide a check out ride and answer any questions See your dealer for warranty ...

Page 3: ...IFICATIONS 4 SET UP AND SERVICE 5 OPERATION INSTRUCTIONS 6 CARE AND MAINTENANCE 7 TROUBLE SHOOTING 8 PARTS ILLUSTRATIONS 9 PARTS LIST INDEX Pages 1 3 Page 4 Page 5 Pages 6 11 Pages 12 13 Pages 14 20 Pages 21 23 Pages 24 29 Pages 30 32 ...

Page 4: ...l Mow slopes when the grass is dry and watch for bumps holes and other obstacles Test the slope with the blades off A good rule of thumb is Don t mow on a slope you can t back up Stay clear of drop offs especially if they are on the down side of a slope 4 THROWN OBJECTS The fast spinning mower deck blade can strike stones or other objects which can be hurled into the path of a bystander To prevent...

Page 5: ...d with a weight sensitive switch that kills the engine when operator leaves the seat while blades are engaged Note This important safety feature must be tested prior to each mowing This may be done by starting engine engaging blades and then rising slightly from seat If engine does not stop see your dealer for necessary repair 10 Before adjusting or servicing your mower turn off the engine and let...

Page 6: ... is in safe working condition 20 To reduce fire hazard keep the engine free of grass leaves or excessive grease 21 The mower should be stopped and inspected for damage after siriking a foreign object or if it starts vibrating and any damage should be repaired berore restarting and operating the mower 22 When mowing proceed as follows A Mow only in daylight or in good artificial light B Shut the en...

Page 7: ......

Page 8: ...ox are permanently lubricated using a special grease which completely eliminates the need for any type of maintenance The Sundstrand BDU 10L Series 70 hydrostatic transmissions are serviced with any high quality 10W 30 motor oil The oil is filtered by a 10 micron oil filter Recommended service interval for both oil and filter is after the first 150 hours of operation then after every 400 hours of ...

Page 9: ...SET UP AND SERVICE 1 Seat assembly instructions 2 Upper control lever installation 3 Mower deck installation 4 Deck leveling procedure 5 Final preparation Page 6 ...

Page 10: ... the rear holes of the body cover Firmly hold seat assembly against body cover with one hand while rear body is raised to fully open position Continue to hold seat against body to prevent damage to seat safety switch wiring 4 Install 1 flat washer and 1 nylok nut on 1 of the rear studs extending through body cover and seat frame tighten a few threads to hold seat assembly in place 5 Position seat ...

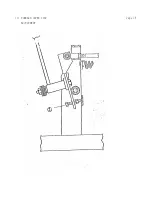
Page 11: ...lever then second flat washer 3 Push control lever into the neutral slot and install 2 cup washers 1 flat washer and jam nut See Illustration 4 Tighten jam nut Proper tightness or tension on jam nut is achieved when swing out movement of upper control levers requires some pressure Levers should not fall to the side or be sloppy in movement 5 Repeat above procedure on left side ...

Page 12: ... allow for belt installation in step 7 6 Raise mower deck at the rear and slide 1 of the deck support rods through the mower deck lift plate and the tabs of the mower deck Note A length of 2 x 4 board turned on end and placed under the mower deck for support will make this task easier if the installation 1s being done by one person due to the weight of the mower deck 7 Raise front of mower deck an...

Page 13: ...s measurement Move to the opposite side and check that measurement is the same If adjustment is required turn the nut on the bottom of the front threaded adjuster up or down until both side to side measurements are equal Retain measurement D Rotate or turn both outer blades to align with the deck in a front to rear manner Move to the left rear threaded adjuster left rear is designated from operato...

Page 14: ...irst Engine Service 1 Final preparation of engine should be completed using engine service manual provided with mower Initial Start and Hydrostat Transmission Check 1 Final hydrostat checks have been performed at the factory however it is necessary to check that the pressure relief bypass on each hydrostatic transmission is completely released before attempting to drive mower 2 Each hydrostat has ...

Page 15: ...onfidence necessary to mow like a pro LEVER MOVEMENTS No shifting or clutching required TO GO FORWARD Release parking brake From neutral position gently push both drive levers forward to increase speed move levers farther forward TO GO BACKWARD From neutral position gently pull both drive levers toward you TURNING Turning is controlled by moving one drive lever slightly forward or rearward of the ...

Page 16: ...s used for transporting the mower in a non mowing situation Located in front of operator on the right side of mower BLADE DRIVE To engage the mower deck cutter blades lift switch up lightly and push forward To disengage blades pull switch backward Switch is clearly marked on and off LIGHT SWITCH The headlights are activated by pushing the switch forward Failure to turn off the lights once the engi...

Page 17: ... to accurately perform all service required Due to the precision nature of these transmissions field repairs cannot be recommended MAINTENANCE SCHEDULE To insure a long and trouble free service life on all the components used on the Model 503 a regular and thorough maintenance schedule should be followed As with any type of precision made equipment a certain amount of initial bedding in or seating...

Page 18: ...moved Slide deck from under chassis 3 Reverse procedure to re install deck assembly CUTTER BLADE REMOVAL 1 Carefully place deck assembly in a manner which will allow access to the blade bolts Hold blade from turning while bolt is removed from the center of each hub assembly Caution wear heavy thick gloves when holding onto cutter blade avoid the sharp edge of the blade 2 When re assembling blades ...

Page 19: ... 1 FORWARD LEVER STOP ADJUSTMENT Page 18 ...

Page 20: ...nded as damage to seals and bearings could occur Using a hand pressure grease gun lubricate each front caster to allow even distribution of grease within the caster rotate or spin each front wheel caster after 3 pumps of the grease gun Repeat process until the appearance of grease is noted completely around each caster ENGINE OIL CHANGES Refer to separate owners manual furnished by OIL RECOMMENDAT...

Page 21: ...ure A stiff brush can be used to loosen excess grass and dirt build up Avoid directing water pressure onto the mower deck hub assemblies electrical wiring and engine components such as air filter openings To remove excess water which accumulated during washing of the mower either blow off with compressed air if available or start the engine allowing a long enough operation time to dry thoroughly I...

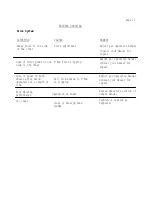
Page 22: ...lable to provide assistance to you Page 21 TROUBLE SHOOTING CAUSES Ground speed Loose belts Engine RPM too low Dull or bent blades Unlevel mower deck Grass build up under mower deck Improper blades Uneven tire pressures SITUATION Poor cut quality Poor cut quality Poor cut quality Poor cut quality Poor cut quality Poor cut quality Poor cut quality Poor cut quality REMEDY Reduce mowing speed Adjust ...

Page 23: ...CAUSES Drive adjustment T Box belts slipping Belt from engine to T Box 1s slipping Operation of mower Loose or missing hose clamps REMEDY Adjust per operators manual Consult your dealer for repair Adjust per operators manual Consult your dealer for repair Adjust per operators manual Consult your dealer for repair Review operators section of owners manual Tighten or replace as required Page 22 TROU...

Page 24: ...witch Broken wiring Poor connection on lights Broken wiring Bad bulb REMEDY Inspect and replace fuse If fuse continues to burn consult your dealer for repair Charge battery Tighten or replace as required Have electrical system checked by your dealer Increase engine RPM Consult your dealer for information Repair or replace as required Consult your dealer for repair Repair or replace as required Not...

Page 25: ......

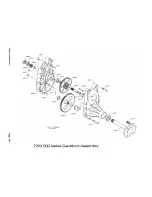
Page 26: ...1993 T Box Gearbox Hydrostats Assembly Model ZTR 503 ...

Page 27: ...1993 Fuel Hydraulics Tanks Fittings Assembly Model ZTR 503 ...

Page 28: ...1993 Mower Deck Assembly Model ZTR 503 ...

Page 29: ...1993 Chassis Assembly Model ZTR 503 ...

Page 30: ...1993 Body Assembly Model Zl R 5O3 ...

Page 31: ...pring 3145 Washer 170 I D 3161 5 16 24 UNF Nut LH Thread 3163 1 2 Int Tooth Lock Washer 3169 3 8 16 X 1 HH Bolt Gr 5 3175 l 2 13 X 1 1 2 HH Bolt 3178 3 8 16 X 2 1 2 HH Bolt Gr 5 3182 Flip Lock Bushing 3184 5 16 18 X 1 1 4 Pan Hd Phillips Screw 3186 12 14 X 1 Drill Tap Screw 3193 Washer 43 X 1 38 X 25 3195 Face Nut l 2 27 3196 Face Nut 7 16 28 3203 3 8 ID Flat Washer Narrow 3204 l 4 20 Hex Nut w Ny...

Page 32: ...840 1 4 Hose 21 3844 Decal HYDRO GEAR 3847 Ignition Nut 3848 Cap Nut 3852 Spring 3876 Caster Spring 3878 Caster Plug 3887 Chrome Lug Nut 3889 Drive Pulley 1 13 Bore 3890 Bearing 3896 Hub Cover 3897 Decal DIXON 3898 Clutch Spacer 503 4013 Wire Tie 4075 15 Amp Fuse 4146 Nylon Washer 4198 Blade Drive Clutch Switch 4199 Light Switch 4201 Switch Key 4217 Battery 4242 Deck Switch 4256 Utility Box Plasti...

Page 33: ...t Bushing Bracket 9055 Lift Cam Left 9056 Lift Cam Right 9057 Front Lift Rod 9065 Lift Handle 9066 Lift Shaft 9067 Control Rod 9076 Seat Frame Cable 9082 Seat Frame Pivot Rod 9098 Hanger Rod 9110 Tank Cover 9142 Rear Lift Rod 9156 Right Swivel Plate 9157 Left Seivel Plate 9158 Control Lever w Grip Left 9159 Control Lever w Grip Right 9164 Brake Plate 9165 Brake Plate 9168 Brake Shaft 9171 Spacer 1...

Reviews: