background image

Attaching a Payload (cont…) 

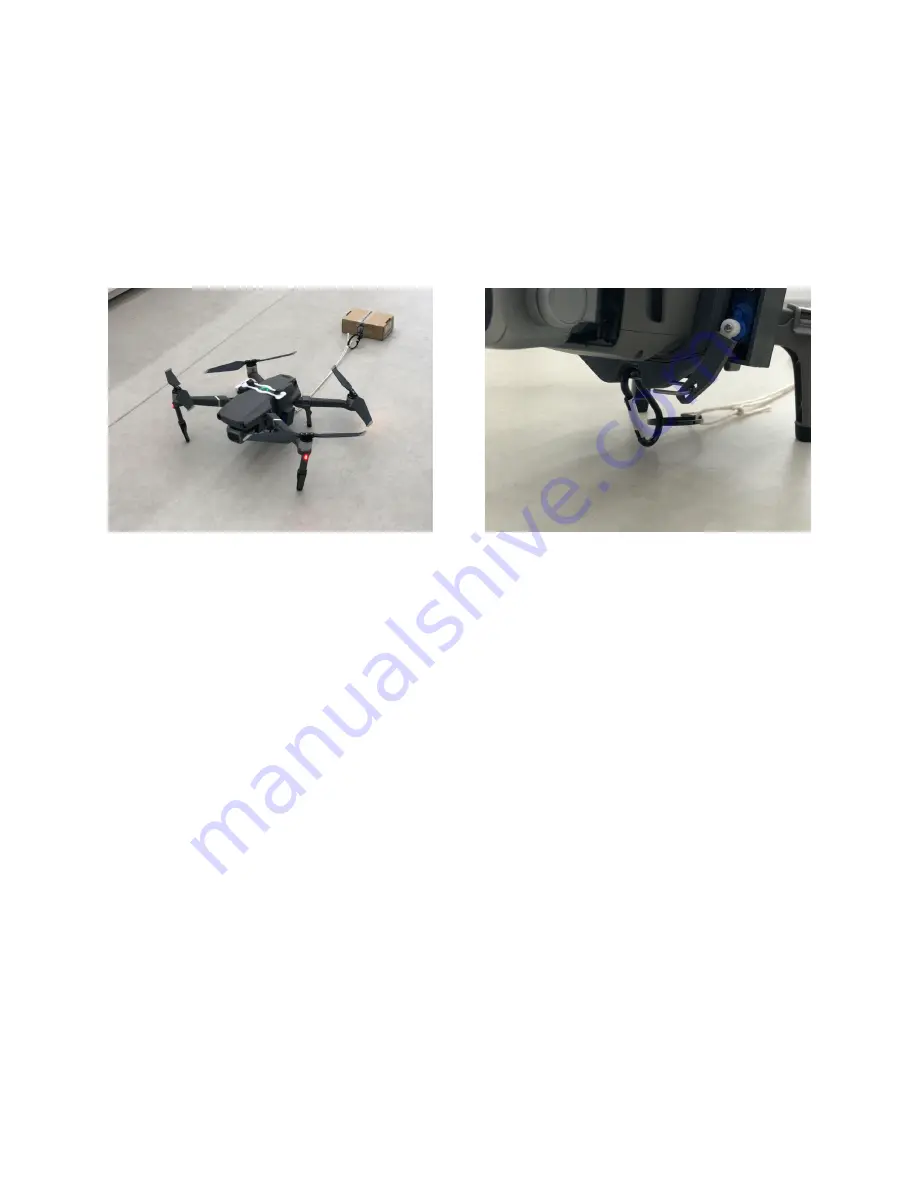
Once your payload is connected, it must be positioned behind 
the aircraft to ensure takeoff is unobstructed. Please see the 
images below for reference. 

Important things to consider: 

-

The line you use to connect your payload must be strong 
and not frayed. 

-

Ensure any knots you tie are strong and will not unravel. 

-

DO NOT use any open hooks such as “S” hooks when 
connecting your payload. Always use closed hooks, loops or 
connectors such as the included carabiner clip. 

-

Attaching a payload to your aircraft will alter its flight 
characteristics and overall performance. Exercise additional 
caution when flying with a payload. 

Your payload is now connected and 

you may begin your flight. 

15

Summary of Contents for DROP SYSTEM NAV LIGHT EDITION

Page 1: ...DROP SYSTEM USER GUIDE NAV LIGHT EDITION MAVIC 2 MAVIC 2 ENTERPRISE Oct 2020 v1 0 1...

Page 2: ...In This Guide Parts and Components 3 In the Box 4 Installation and Usage 5 Attaching a Payload 13 Troubleshooting 16 Warranty and Service 19 Terms of Use 20 2...

Page 3: ...to ensure a sturdy and reliable build A breakdown of the parts and components are indicated in the illustrations below 3 1 Manual Pin Release Button 2 Security Lock 3 Main Clip Assembly 4 Servo and Se...

Page 4: ...cator Lit when pin is in the open position 10 Power Indicator Lit when powered on 11 Power Switch Down ON Up OFF 10 1x Drop System Assembly 1x Security Lock 1x Electronics Box Cover 1x Payload Pin 1x...

Page 5: ...hop Canada for support Step 1 It is recommended to pre install your landing gear risers of choice not included to ensure adequate clearance between the lower portion of the Drop System and the ground...

Page 6: ...ge cont Step 3 The clip will snap into place when fully installed Ensure that the downward vision and IR sensors are not obstructed The clip must sit between the vision sensor and IR sensor on the bel...

Page 7: ...f the battery Install the clip security lock by inserting into one side of the clip then stretching to meet the other side of the clip This will require some force as the lock is designed to keep tens...

Page 8: ...ing gear extension if installed and fold the arm towards the stowed position Step 6 Slide the navigation light sensor clip upwards towards the motor It will require slight force to cover the light Ens...

Page 9: ...navigation light sensor clip has been installed Ensure that the wire does not get caught while performing this action Once the arm is extended there will be tension on the wire ensuring that it does...

Page 10: ...ling the upper part towards you then rotating downward to free the lower latch Step 10 Connect the battery to the battery connector inside the electronics box and tuck the battery inside Be sure to co...

Page 11: ...point ensure that the drop system assembly is installed correctly and does not obstruct the propellers The drop system is now installed and you may attach a payload To learn how see page 13 11 The dr...

Page 12: ...ation light of your aircraft which is located on the front right arm to know when to engage When the navigation light is on the drop system will engage dropping the payload As long as the navigation l...

Page 13: ...to the propellers of the aircraft The payload is suspended at least 1m 3ft away from the aircraft Please be sure to exercise caution and good judgement when attaching a payload Do not attach a payload...

Page 14: ...oint you may connect your payload to the carabiner clip When attaching a payload you must keep at least 1m 3ft of clearance between the belly of the aircraft and the top of your payload If this distan...

Page 15: ...be strong and not frayed Ensure any knots you tie are strong and will not unravel DO NOT use any open hooks such as S hooks when connecting your payload Always use closed hooks loops or connectors suc...

Page 16: ...heck that the battery is fully charged The red green LEDs are flickering when the unit is powered on Charge the battery The servo is twitching when the unit is powered on Charge the battery The servo...

Page 17: ...ty Only power the unit on when attached to the aircraft The aircraft begins hovering upwards after attaching a payload Check that there are no objects in close proximity to the downward vision system...

Page 18: ...arger to a different outlet Replace the charger if it is found not to be functional Replace the battery if it is found not to be functional The battery is swollen Responsibly recycle the battery immed...

Page 19: ...made to the unit by the end user will automatically void any warranty offered by DJI Shop Canada We reserve the right to deny warranty service to any customer if we feel that the warranty benefit is b...

Page 20: ...ectly installed and charged and the payload is correctly attached Failure to do so may cause undesired operation of the drop system and or the aircraft which can result in injury 5 It is the responsib...

Reviews: