4
5. Linking the Smart Controller and Aircraft
When the Smart Controller is purchased together with an aircraft as a combo, it is already linked
to the aircraft. If not, please follow the steps below to link the Smart Controller and the aircraft
after successful activation.
1. Turn on the Smart Controller and the aircraft.
2. Press down the customizable buttons C1, C2, and the record button simultaneously. The
status LED will blink blue and the Smart Controller will sound a double beep to indicate that
linking starts.
3. Press and hold the aircraft's power button for at least five seconds to link the aircraft and the
Smart Controller. The Smart Controller’s status LED will be solid green if linking is successful.
Please refer to the user manual for more details about linking the Smart Controller to the aircraft. To
download the manual, please visit https://www.dji.com/matrice-300.
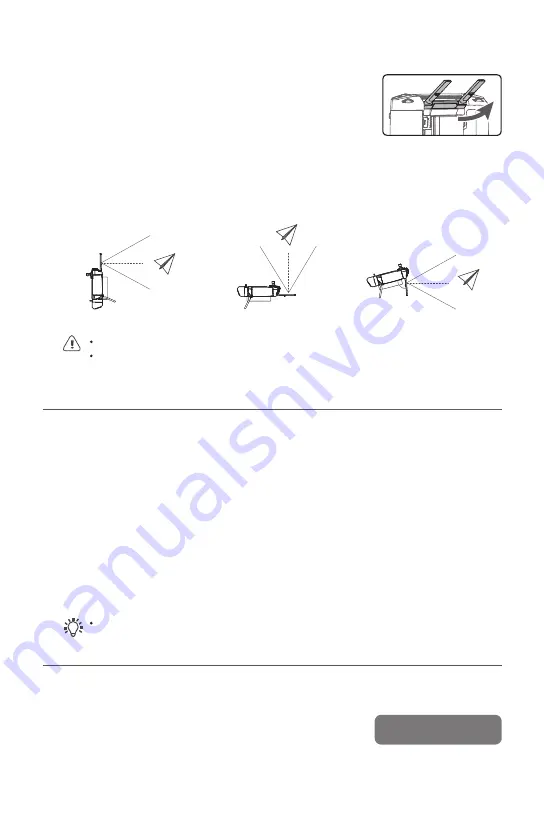
Lift the antennas and adjust them. The strength of the Smart
Controller signal is affected by the position of the antennas.
When the angle between the antennas and the back of the Smart
Controller is 80° or 180°, the connection between the Smart
Controller and aircraft can reach its optimal performance.
Optimal Transmission Zone
Try to keep the aircraft inside the optimal transmission zone. If the signal is weak, adjust the
antennas or fly the aircraft closer.
4. Adjusting the Antennas
80°
Avoid using wireless devices that use the same frequency bands as the Smart Controller.
In real operation, the DJI Pilot app will issue a prompt to warn that the transmission signal is weak, and
please adjust the antennas to ensure that the aircraft is back to the optimal transmission range.
6. Flight
Before taking off, make sure the Aircraft Status Bar
in the DJI Pilot app displays “Ready to Go (GPS)” or
“Ready to Go (RTK)”.
Ready to Go (GPS)


