background image

02/2020


1


 Starting the chipper


1. Introduction


Always

 use 

 your hand  to turn the chipper ejecter toud before starting  the machine.


 Turn the 

chipper's


ejection away from buildings, yourself  and other bystanders.


Keep the PTO shaft straight and within 15 degrees horizontally when operating  the 

chipper.  


Drive shaft specifications


•  Check that the supplied PTO shaft is the correct length.


•  Remember to mount the PTO shaft safety chain.


Security


In the case of those hazards that cannot

 be 

 effectively  eliminated, it is important to 

ensure  safety. 


1.  Orient yourself by reading  the user manual and safety labels.


 The machine should only 

be used when the tractor's PTO safetyscreen has been installed


Warning and instructions


This, and the upcoming sections, will inform you of the various warnings and instructions for the 

hazards   associated with the chipper, as well as instructions for proper maintenance and 

repairs.


1.  Ensure that the safety labels are attached to  the chipper, that

 the 

 user is instructed in the 

correct dimensions of the coupling device and the maximum speed for safe use of the chipper.


The drive shaft, like most other components, must be used correctly, this also includes the proper 

use of the tractor's safe and


secure screens.


Spare parts


 Always

 use 

 original spare parts, otherwise the warranty will lapse

 You can easily find  the  spare 

parts


that fits  the machine by scanning the scan code that sits on your machine's CE plate.


Download the App 'QR scanner' on 

your smartphone in

 the 

 Play Store or 

App Store to be able to scan the scan 

code.


Summary of Contents for HNDK

Page 1: ...01 2021 Woodchipper for tractor User manual Original manual Model HNDK ALWAYS READ INSTRUCTIONS BEFORE USING THE MACHINE DK TEC A S r vej 8 5800 Nyborg Phone 66128222 E mail info dk tec dk...

Page 2: ...02 2020 Table of contents 1 Introduction 1 2 Safety Labels 2 3 Safety Instructions 4 4 Safety equipment 4 5 Checklist 5 6 Using the machine 6 7 Service and Maintenance 9 8 Problem Solving 11...

Page 3: ...been installed Warning and instructions This and the upcoming sections will inform you of the various warnings and instructions for the hazards associated with the chipper as well as instructions for...

Page 4: ...xplanation of mm may vary CAUTION Flying objects Pay attention and stay away from the material from the ejection spout The chipper eject ejects wood chips quickly enough to predict damage Do not turn...

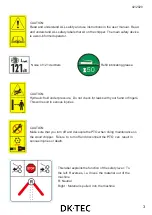
Page 5: ...ulic fluid under pressure Do not check for leaks with your hand or fingers This will result in serious injuries CAUTION Make sure that you turn off and decouple the PTO when doing maintenance on the w...

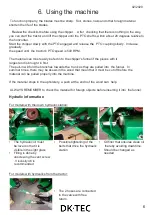
Page 6: ...ection spout away from doorways sidewalks and other areas where people may reside The funnel should be turned with the wind if possible otherwise the tile will blow in your eyes or down your neck Neit...

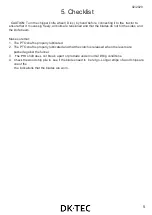
Page 7: ...e knife beam Make sure that 1 The PTO shaft is properly lubricated 2 The PTO shaft is properly lubricated and that the clutch is released when the levers are pushed against the funnel 3 The PTO shaft...

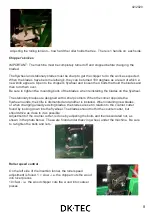
Page 8: ...fold the branches towards the trunk as they are pulled into the funnel In summer times there may be skews in the wood that mean that it must be cut off before the material can be pulled properly into...

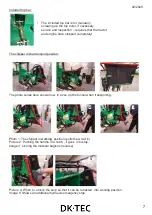
Page 9: ...the transport position The photo series here shows how to close up the funnel when transporting Photo 1 The chipper in working position pulls the wood in Picture 2 Pushing the handle in a notch it goe...

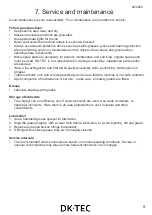
Page 10: ...tionary blades are designed with 4 sharp corners When the corner opposite the flywheel rounds the knife is dismantled and another is installed When installing new blades or when changing already exist...

Page 11: ...kit easily accessible while performing maintenance on Chipper Tighten all bolts nuts and screws periodically and ensure that the machine is in a safe condition Upon completion of maintenance or servi...

Page 12: ...tling cleaning and lubrication is recommended to ensure that all components function as intended For the maintenance of the shaft this procedure should be followed 1 Remove the shaft from the chipper...

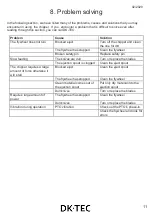
Page 13: ...pin Replace safety pin Slow feeding The knives are dull Turn or replace the blades The ejection spout is clogged Clean the eject spout The chipper requires a large amount of force otherwise it will st...

Page 14: ...maskine Betegnelse Flishugger Model WSH148 HNDK148 WC52R HNDK178 WSH178 WC72R Beskrivelse Flishugger til traktor med egen hydraulik Er fremstillet i overensstemmelse med f lgende EF direktiv Maskindi...

Page 15: ...02 2020 12 Always refer to the latest version of the manual as well as the spare parts list parts list for your item on www dk tec dk under the machine itself...

Reviews: