- 7 -
LED
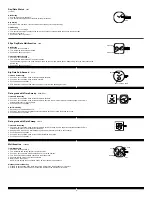
Normal Time Display
LED is off in normal display.
Press pusher B to display time for 3 seconds. Upper dot of colon indicates a.m.; lower dot of colon indicates p.m.
Press pusher C to display calendar for 3 seconds.
If no key is pressed for 3 seconds in setting modes, any changes made will be saved and LED will return to normal display.
Time Setting
Press and hold pusher B to show the time; press pusher A to enter time setting mode.
Press pusher B to advance the hour; press and hold pusher B for fast advance.
Press pusher C to advance the minutes; press and hold pusher C for fast advance.
Press pusher A to exit time setting mode; or auto save and exit when no key operation for 3 seconds.
calendar Setting
Press and hold pusher C to show the date; press pusher A to enter date setting mode.
Press pusher B to advance the month; press and hold pusher B for fast advance.
Press pusher C to advance the date; press and hold pusher C for fast advance.
Press pusher A to exit date setting mode; or auto save and exit when no key operation for 3 seconds.
Simple Digital
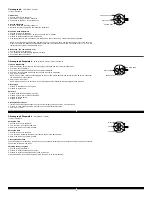
Normal Time Display
12-Hour format.
Press A once to show date.
Press A twice to show second.
Press A again to return to Normal Time Display.
Normal Time Setting
Press B to select the setting digit, and press A for increment of the blinking digit.
The setting sequence of B will be in the following sequence:
- 1st press: display the date
- 2nd press: set the month
- 3rd press: set the day
- 4th press: set the hour
- 5th press: set the minute
- The next depressing of the B-switch will return to normal display mode.
Battery
V373 or EQUIVALENT. (upc-191B ONLY)
Digital
BD3003
Display Modes
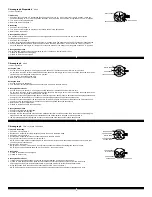
The digital portion of the module has (3) three display views which are selected by pressing A.
1. While in TIME view, whether in 12 or 24 hour display is irrelevant, press A once and the DATE view will appear.
2. To have alternating views between TIME and DATE press A a second time and each view will display for 1 second.
3. To return to TIME only view press A for a third time.
Setting Time/Date
1. Press C to enter SET mode. The YEAR will begin flashing, press A to change the year. This module features an auto calendar from
2000 to 2050.
2. Press C to advance to the MONTH setting. The month will begin flashing, press A to change the month.
3. Press C to advance to the DATE setting. The day will begin flashing, press A to change the date.
4. Press C to advance to the 12hr/24hr setting. The 12h characters will begin flashing, press A to change to 24h.
5. Press C to advance to the HOUR setting. The hour will begin flashing, press A to change the hour.
6. Press C to advance to the MINUTE setting. The minute will begin flashing, press A to change the minute.
7. Press C to advance to the SECONDS reset. The seconds will begin flashing, press A to reset to 00.
8. Press C to exit SET mode.
PM
SECOND
TIME DISPLAY MODE
A
B
C
HOUR
MINUTE
SHOWING DATE
DAY
MONTH
DATE
DATE
HOUR
MONTH
MINUTE
DAY
SECOND
PM
SHOWING DATE
TIME DISPLAY MODE
OLED Module
QMLG-082
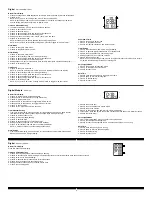
The display is normally off. To activate normal time display (hour, minute, second), press either A or B.
Normal Time Display
1. When the display is activated, press A to change mode. Mode sequence is time, calendar,
alarm 1, alarm 2, time zone 2.
2. Press B to toggle chime on/off.
NoTe: In any setting mode, if no pusher is operated for 8 seconds, settings will be saved and
the display will return to normal time display.
Time Setting
1. In normal time display, press and hold A for 3 seconds to enter setting mode; hour will be highlighted.
2. Press B to advance digit; press and hold B for fast advance.
3. Press A to set and advance to next setting value.
4. Setting sequence is hour, minute, second, 12/24 hour format.
5. After 12/24 hour format has been selected, press A to exit setting mode.
calendar Setting
1. Press A to change to calendar mode.
2. Press and hold A for 3 seconds to enter setting mode; year will be highlighted.
3. Press B to advance digit; press and hold B for fast advance.
4. Press A to set and advance to next setting value.
5. Setting sequence is year, month, date.
6. After date has been selected, press A to exit setting mode.
NoTe: Weekday is automatically updated upon exiting setting mode.
Alarm Mode
1. Press A to change to alarm 1 mode. Press A again to change to alarm 2 mode.
2. Press B to toggle alarm on/off.
3. Press and hold A for 3 seconds to enter setting mode; hour will be highlighted.
4. Press B to advance digit; press and hold B for fast advance.
5. Press A to set and advance to minute.
6. Press B to advance digit; press and hold B for fast advance.
7. After minute has been selected, press A to exit setting mode.
Time Zone 2 Setting
1. Press A to change to time zone 2.
2. Press and hold A for 3 seconds to enter setting mode; hour will be highlighted.
3. Press B to advance digit; press and hold B for fast advance.
4. Press A to set and advance to next setting value.
5. Setting sequence is hour, minute.
6. After minute has been selected, press A to exit setting mode.


