background image

- 9 -

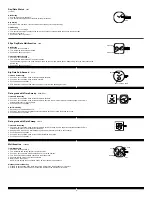
Digital

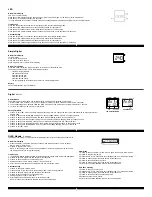
    FL288A

Normal Time Display
1. Press A to change mode. Mode sequence is normal time, alarm, timer, and chronograph.
2. Press B for EL.
3. Press C to toggle 12/24-hour format.
4. Press D to toggle alarm/chime on/off.
  NoTe:  At any point in any setting mode, press B to exit setting mode.

Time and calendar Setting
1. In normal time display, press and hold B; seconds will begin flashing.
2. Press C to set seconds to zero.
3. Press A to advance to next setting value.
4. Press C to increase digit, press and hold C for fast advance.
5. Press A to set and advance to next setting value.
6. Setting sequence is: seconds, minutes, hour, month, date, weekday.
7. Press B to exit setting mode.

Alarm Setting
1. Press A to change to alarm mode.
2. Press and hold B; minutes will begin flashing.
3. Press C to advance digit; press and hold C for fast advance.
4. Press A to advance to next setting value.
5. Setting sequence is: minutes, hour, month, date. For daily alarm, leave month and date set at 

“-”.

6. Press B to exit setting mode.
  NoTe:  Alarm will sound at preset time for 30 seconds. Press any pusher to silence alarm.

countdown Timer
1. Press A to change to timer mode.
2. Press C to start/stop the timer.
3. Press D to clear the countdown and reset the timer.
  NoTe:  Alarm will sound for 30 seconds when timer reaches zero. Press any pusher to silence alarm.

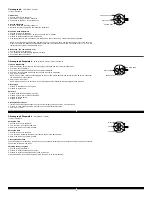
C

D

B

A

Timer Setting
1. Press and hold B to enter setting mode; seconds will begin flashing.
2. Press C to increase digit; press and hold C for fast advance.
3. Press A to set and advance to next setting value.
4. Setting sequence is: seconds, minutes, hour.
5. Press B to exit setting mode.

chronograph Mode
1. Press A to change to chronograph mode.
2. Press C to start/stop the chronograph.
3. Press D to reset to zero.

Split Time
1. Press D while the chronograph is running for split time.
2. Press D again to return to chronograph.
3. Press C to finalize timing.
4. Press D to reset to zero.

Digital

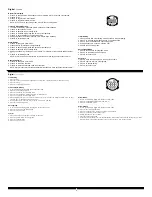
  QFO-018-AA-NY

Time Setting

1. Press A for EL.
2. Press B to change mode. Mode sequence is: normal time, chronograph, alarm, and time setting.
3. Press C to reset.
4. Press D to start/stop stopwatch.

Time and Date Setting

1. In normal time display, toggle B until the seconds flash.
2. Press D to set seconds to zero.
3. Press C to advance to next setting value.
4. Press D to increase digit, press and hold C for fast advance.
5. Press C to advance to next setting value.
6. When adjusting hours, it is a 12-hour format when “A” or “P” appears on indicator screen; it is a 24-hour 

format when “H” appears on indicator screen.

7. Setting sequence is: seconds, hour, minutes, month, date, and day.
8. Press B to exit setting mode.

chronograph

1. In normal time display, toggle B to change to chronograph mode.
2. Press D to start/stop the chronograph.
3. Press C to reset to zero.

Split Time

1. Press C while the chronograph is running for split time.
2. Press C again to return to chronograph.
3. Press D to finalize timing.
4. Press C to reset to zero.

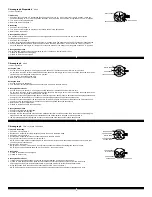
A

B

D

C

Alarm Mode

1.  In normal time display, toggle B to change to alarm mode.
2. Press D to enable/disable the alarm and chime.
3. Press B to exit alarm mode.

Alarm Setting

1.  In normal time display, toggle B to change to alarm mode.
2. Press C; hour will begin flashing.
3. Press D to advance digit; press and hold D for fast advance.
4. Press C to advance to next setting value.
5. Setting sequence is: hour, minutes.
6. Press B to exit setting mode.
7.  Snooze function: Press B to turn on snooze function, alarm tone will sound for 20 seconds for 5 minutes.

  NOTE: Alarm will sound at preset time for 20 seconds. Press C or D to silence alarm.

Summary of Contents for 1970

Page 1: ...eme heat and water may cause your watch to lose some of its water resistance Date Models Date Setting 1 Pull the crown out to position 2 2 Turn the crown either clockwise or counter clockwise and set the date for the previous day The direction that moves the date varies on different watch models Time Setting 1 Pull crown out to position 3 2 Turn counter clockwise to advance the time and continue u...

Page 2: ...tate clockwise to set date 2 Pull crown out to position 3 and rotate clockwise to set time Hand in lower window indicates am pm time and will automatically reset to 0 at midnight 3 Push crown back to position 1 Dual Time Setting 1 Set time zone 1 as indicated above 2 Pull crown to position 2 and rotate counter clockwise to set 24 hour hand to second time zone 3 Push crown back to position 1 Retrog...

Page 3: ...g the time be sure to check that the 24 hour hand is set properly Multifunction ISA 9238 1970 Time Setting 1 Pull crown out to position 2 2 Turn clockwise to set the hour minute and 24 hour hands 3 Push crown back to position 1 Date Setting 1 Pull crown out to position 2 2 Turn clockwise until desired date is set 3 Push crown back to position 1 Day Setting 1 Pull crown out to position 2 2 Turn clo...

Page 4: ...ngly with the hour and minute hands When setting the time be sure to check that the 24 hour hand is set properly 6 Return crown to position 1 Note When the crown is in position 2 do not press the pushers Otherwise the chronograph hands will move Chronograph 1 Press A to start stop the chronograph 2 Press B to reset to zero Split Time 1 Press B while the chronograph is running 2 Press B again to re...

Page 5: ...t the chronograph second hand to 12 00 zero position Each press of A advances the chronograph second hand one mark If A is held down for over 2 seconds the chronograph second hand advances continuously 3 Push B to set the chronograph 1 20 second hand to 12 00 zero position Each press of B advances the 1 20 second hand one mark If B is held down for over 2 seconds the 1 20 second hand advances cont...

Page 6: ...reaching zero Chronograph Mode 1 Press A to change to chronograph mode 2 Press C to start stop the chronograph 3 Press B to reset to zero Split Time 1 Press B while the chronograph is running for split time 2 Press B again to return to chronograph 3 Press C to finalize timing 4 Press B to reset to zero Digital Module QMLG 021 Normal Time Display 1 Press A to display month date and weekday 2 Press ...

Page 7: ...date 4 Press C to advance to the 12hr 24hr setting The 12h characters will begin flashing press A to change to 24h 5 Press C to advance to the HOUR setting The hour will begin flashing press A to change the hour 6 Press C to advance to the MINUTE setting The minute will begin flashing press A to change the minute 7 Press C to advance to the SECONDS reset The seconds will begin flashing press A to ...

Page 8: ...ct time zone 1 or time zone 2 3 Press A to set and advance to seconds 4 Press C to set seconds to zero 5 Press A to set and advance to next setting value 6 Press C to increase digit press and hold C for fast advance 7 Setting sequence is time zone selection seconds hour minute month date year 12 24 hour format hourly chime on off 8 Press D to exit setting mode Note Weekday is automatically updated...

Page 9: ...C to start stop the chronograph 3 Press D to reset to zero Split Time 1 Press D while the chronograph is running for split time 2 Press D again to return to chronograph 3 Press C to finalize timing 4 Press D to reset to zero Digital QFO 018 AA NY Time Setting 1 Press A for EL 2 Press B to change mode Mode sequence is normal time chronograph alarm and time setting 3 Press C to reset 4 Press D to st...

Reviews: