DMEGC AC Module Installation Manual
- 10 -
Step 3: Prepare the Microinverter
Before installing the PV module the microinverters must be lifted from the shipping position. On the ground, turn
the PV module so that the microinverter faces you.
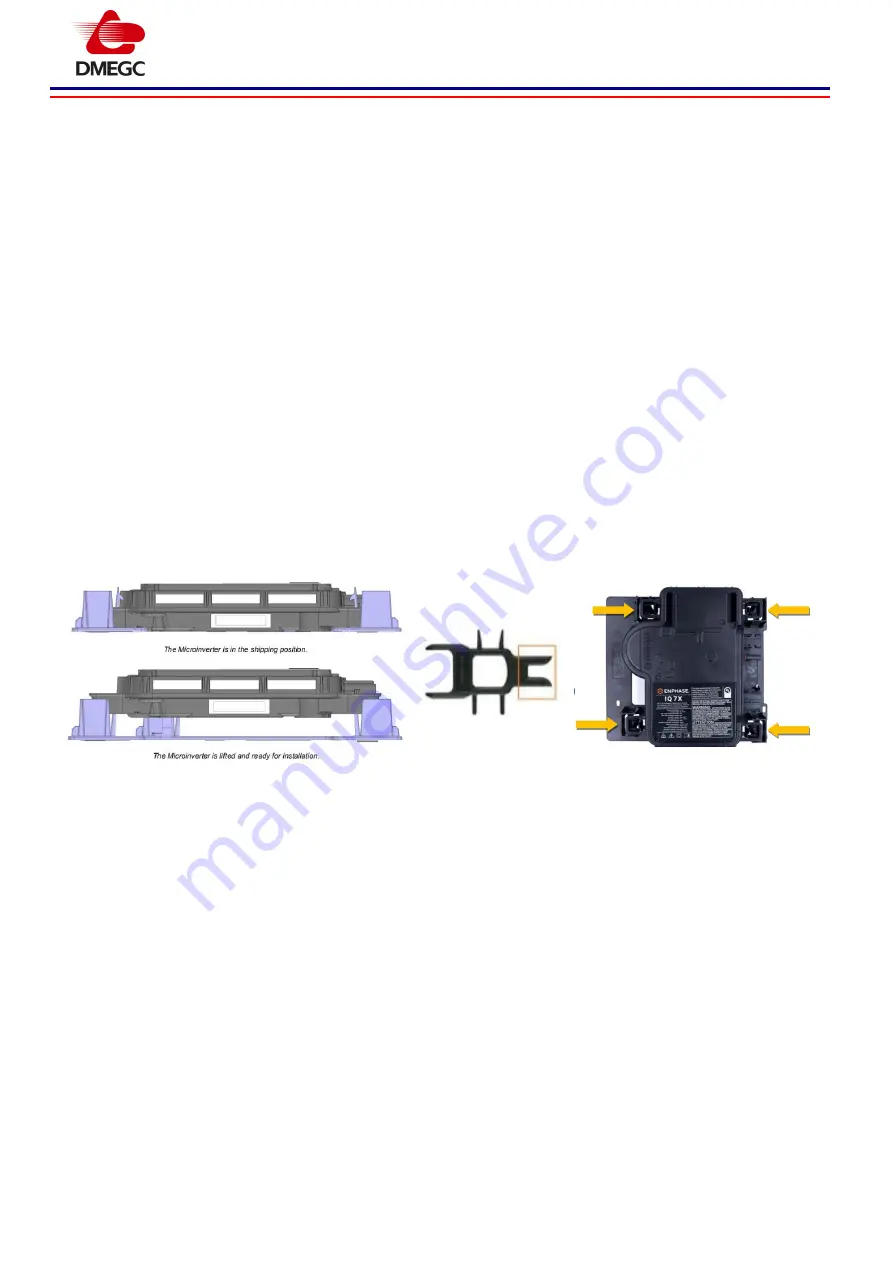
Using both hands, lift the microinverter up. You will hear four clicks as the microinverter locks into the
installation position (deployed position). Ensure that the four latches are locked, and the microinverter is not
tilted.
Place the PV modules on the roof. Do not place the PV modules in such a way that places pressure on the
microinverter.
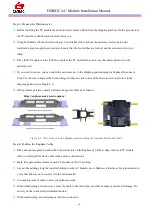
If you need to service, you can return the microinverter to the shipping position using theEnphase Disconnect
Tool. Use the tool to depress the four locking switches on each corner of the microinverter to return it to the
shipping position.(See Figure.4-1)
If the problem persists, contact Customer Support at Website as follows:
https://enphase.com/en-us/company/
Figure 4-1. How to move to the shipping position using the Enphase Disconnect Tool.
Step 4: Position the Enphase Cable
Plan each cable segment to allow the drop connectors on the Enphase Q Cable to align with each PV module.
Allow extra length for slack, cable turns, and any obstructions.
Mark the approximate centers of each PV module on the PV racking.
Lay out the cabling along the installed racking for the AC branch circuit. Make sure that the cable is positioned in
a way that allows you to connect it to the microinverter.
Cut each segment of cable to meet your planned needs.
When transitioning between rows, secure the cable to the rail to prevent cable damage or connector damage. Do
not rely on the connector to withstand tension.
When transitioning, do not damage at cable or connector.


