Installation guide
12
dnp Supernova™
Flex Classic
User guide
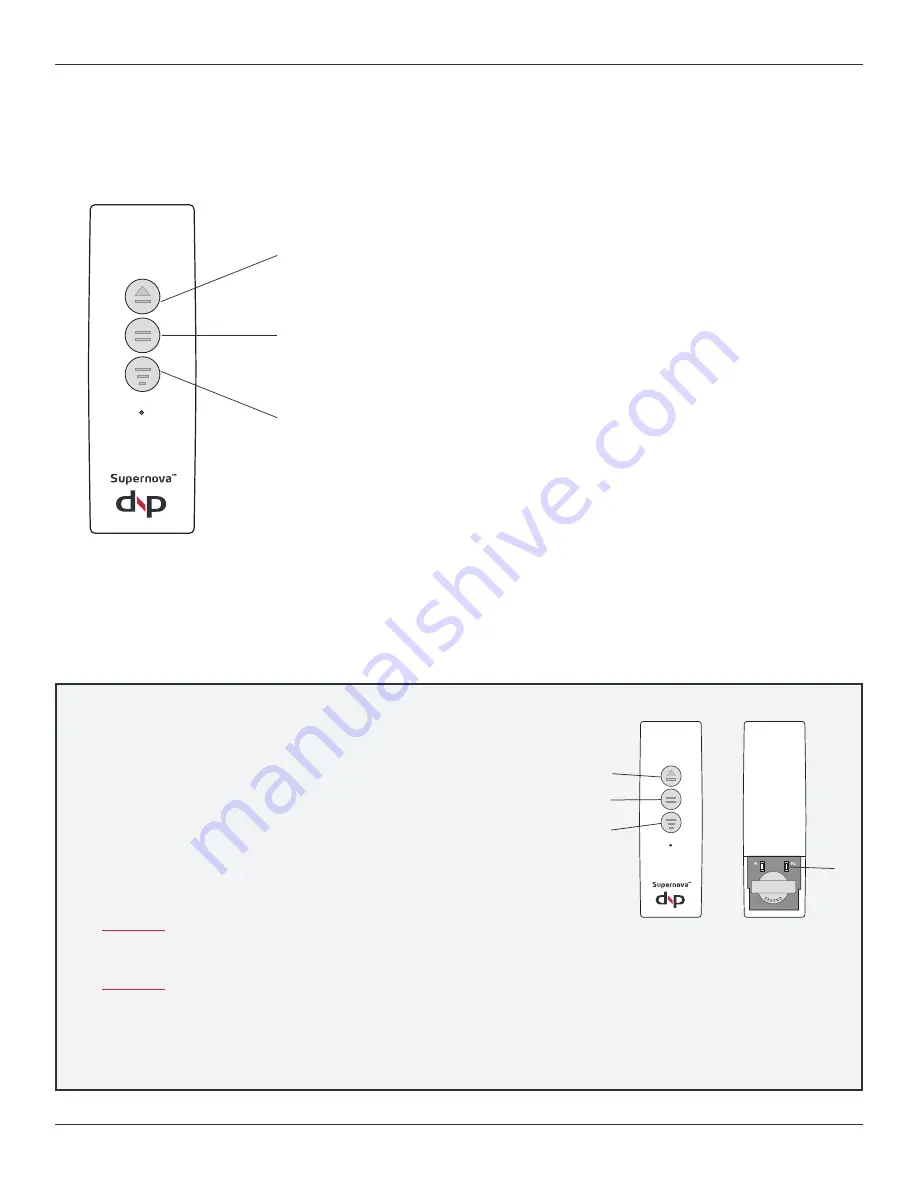
Using the remote control
Changing the screen stop positions
Top and bottom positions are set at the factory. Do NOT change the top position! Risk of damaging screen If not done correctly.
The factory positions can be changed using the remote control.
Upper button =
Move
the screen to top position
The screen will raise automatically and stop.
Middle button =
Stop
the screen
Use to immediately stop the screen.
Lower button =
Move
the screen to bottom position
The screen will lower automatically and stop.
To set a new BOTTOM position:
A.
Remove the battery cover
B.
Press the small right button (P2) shortly, until LED lits. If the button is
held too long (> 3 seconds), and a beep is heard, redo this step.
C.
Within 3 seconds after step B, press the Lower button (2) and release
(This step puts the screen in a mode to set the bottom position)
D.
Use the Upper button (3) and/or Lower button (2) to adjust the screen to the
desired position
(Tip! When the screen is moving up, press Upper button (3)
to stop the screen. When the screen is moving down, press Lower button (2)
to stop the screen).
CAUTION! Leave at least one revolution of the screen material on the roller -
otherwise there is risk of the screen material separating from the roller. This is
NOT covered by the dnp warranty.
CAUTION! Be careful not to lower the screen too far. If the screen is continuously
lowered it will eventually reverse on the roller. This may lead to permanent
damage of the screen material. This is NOT covered by the dnp warranty.
E.
When the screen is in the desired position, press and hold the Middle button (4)
untill a beep is heard. (This indicates the screen is set)
1
2
3
4


