background image

Dobinsons Springs and Suspension                                                                                  

www.dobinsonsprings.com


39.


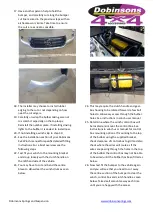
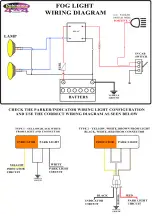
Plug the wires into the indicator, parker light 
plug and fog lights. Test all lights and adjust 
the position of the fog lights if required. 

40.


Check over all bolts to ensure they are tight. 

41.


Using the fastening hardware supplied fit the 
under bar protection kit.  


42.


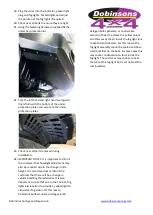
Trim the left hand and right hand mud guard 
liners flush with the bottom of the under 
protection plates and secure to the under 
protection plates.  


43.


Check over all parts removed during 
installation.  

44.


IMPORTANT NOTES: It is important to inform 
the customer that headlight adjustment may 
also be required due to the change in ride 
height. It is also important to inform the 
customer that there will be a change in 
vehicle handling characteristics. It is also 
important to note that due to their nature fog 
lights are required to provide a yellow light to 
allow clear fog vision. For this reason 
Dobinsons bullbars utilise a Halogen bulb. 

Halogen bulbs generate a considerable 
amount of heat to achieve the yellow colour 
and this causes the air inside the fog light lens 
to expand and contract. For this reason the 
fog light assembly cannot be sealed and has a 
small breather on the back. In some cases this 
may cause condensation to form inside the 
fog light. The customer may choose to seal 
the lens of the fog light but must not seal the 
rear breather.  


Summary of Contents for BU59-3545

Page 1: ...Fits Toyota Landcruiser 200 Series Mid 2015 on This Bullbar will take approximately 4 hours to install Tools required are Spanners and socket set Pneumatic hacksaw Screwdrivers Pliers and side cutters...

Page 2: ...is support 4 Remove all the fasters along the wheel arch edge of the bumper and the bottom of the bumper that attach the bumper to the vehicle Reach in behind the bumper and disconnect the fog lights...

Page 3: ...centralise the bracket and tighten all fasteners 9 The longer flat plates can be fitted later these are the outer bulbar winch supports as seen in the picture above It is best to leave these off for...

Page 4: ...ep it straight and align the template to the bumper fold edge and also align the inner bottom corner with the top of the recess in the bumper 14 Tape the template down mark the cut edge and remove the...

Page 5: ...ch handle on the left hand side of the vehicle 23 You may have to cut and bend the centre brace to allow clear the winch drum as seen below 24 This may require the clutch handle and gear box housing t...

Page 6: ...es on each side of the bullbar drilling through both the pinning holes predrilled in the bulbar bracket into the bulbar mounting plates Fit bolts and nyloc nuts to keep the bullbar in its position 35...

Page 7: ...headlight adjustment may also be required due to the change in ride height It is also important to inform the customer that there will be a change in vehicle handling characteristics It is also import...

Page 8: ...P E R E D G E A L I G N W I T H W H E L A R C H E D G E A L I G N W I T H B U M P E R T O G U A R D J O I N E D G E A L I G N ME N T MA R K S 2 0 0 S E R I E S T O Y O T A L A N D C R U I S E R MI D2...

Page 9: ...U MP E R R E C E S S T O P E D G E C U T C U T C U T A L I G NWI T HB U MP E R F O L DE D G E A L I G N ME N T MA R K S 2 0 0 S E R I E S T O Y O T A L A N D C R U I S E R MI D2 0 1 5 O N C H E C K S...

Page 10: ......

Page 11: ...dried regularly to prevent build up of dust and contaminants This is especially important in coastal and high dust areas The loops can simply be cleaned with most regular car cleaning items like a so...

Page 12: ...g of the buffing wheel for best results However if no instructions are provided the following guidelines can be used A Carefully dress the buff wheel with the compound across the rotating wheel for a...

Reviews: