279
Data Display/Edit/Management
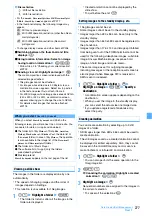
3
o
after editing
z
Save
The edited still image is saved as a new still image
in the same folder.
・
Select
As frame/stamp
to save as an image for
frame or stamp. For details about images that
can be used as a frame/stamp
・
Images that can be used as Deco-mail
pictograms are saved in the
Deco-mail pict
folder.
・
To send the image via mail:
a
on the still
image edit screen
INFORMATION
●
Editing of
Brightness/Tone
or
Effects
may cause the
image to be displayed smaller. Save as it is because the
image size is not changed. The image is saved with a
proper size.
●
After editing, the still image file size may become larger.
●
When available storage space is insufficient or the
number of saved items exceeds the limit, delete data
according to the instructions on the screen.
Using the edit menu
・
Changing the size may deteriorate the image quality.
1
1
on the edit menu screen
z
Change the
image size
■
Changing the size to the specified one:
1
-
9
or
0
If the aspect ratio of the specified size differs
from that of the still image, a size frame
appears. Press
%
or
&
to adjust the position
of the size frame, and press
o
to change the
area enclosed by the size frame to the specified
size.
・
To change the still image size to the specified
size by ignoring the aspect ratio (
Stretch
):
m
・
To change the still image size to the specified
size without changing the aspect ratio (
Fit
):
p
■
Enlarging/reducing an image:
a
(
z
&
to enlarge/reduce
You can enlarge/reduce the image by 5%
without changing the aspect ratio.
・
Press
m
to reduce the image by 20% or
press
p
to enlarge it by 20%.
・
Images can be enlarged up to a size of 864
horizontal or vertical dots and reduced
down to a size of 8 horizontal or vertical
dots.
b
o
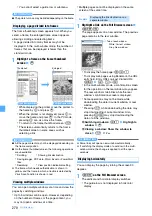
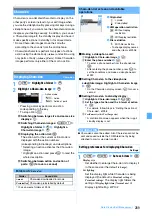
You can clip a part of a still image by specifying a size
or range.
・
When the original still image is smaller than 16 x 16,
clipping is unavailable.
1
2
on the edit menu screen
z
Clip the still
image
■
Clipping the image to the specified size:
a
1
-
9
/
0
b
O
to adjust the clipping frame position
・
To switch the vertical and horizontal sizes
of the clipping frame:
p
・
To change the clipping size:
t
・
To change to specifying a clipping range:
m
c
o
■
Specifying a range of clipping:
a
(
z
O
to adjust the position of
z
o
The position of the upper left corner of the
range frame is set and
appears at the
lower right corner.
b
O
to adjust the position of
z
p
The clipping range is determined and the
range frame is shown in solid line.
・
To change the position of the upper left
corner again, press
o
instead of
p
.
・
To move the range frame, use
O
after
pressing
p
.
c
o
1
3
on the edit menu screen
z
Change the
brightness and tone
■
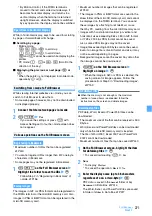
Adjusting the brightness:
a
1
z
&
to adjust the brightness
・
To maximize:
p
・
To minimize:
m
b
o
■
Changing the tone (monotone/sepia):
2
or
3
1
4
on the edit menu screen
z
1
-
6
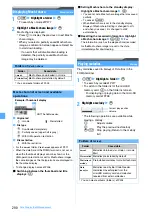
Soften
: Softens the image.
Spherical
: Swells the still image spherically from
the center.
Emboss
: Changes the color to leaden and
emphasizes concavity and convexity.
Spiral
: Makes the still image look as if it is spiraling
out from the center.
Shiny
: Attaches glistening marks.
Mosaic
: Makes the image look like a mosaic.
1
5
on the edit menu screen
z
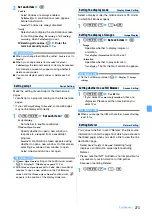
Reverse/rotate
the still image
・
Reverse up and down:
%
・
Reverse left and right:
&
・
Rotate 90 degrees to the left:
m
・
Rotate 90 degrees to the right:
p
2
o
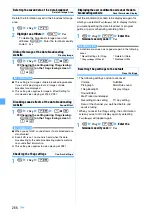
Changing the size
Clipping images to desired sizes
Changing brightness and tone
Applying special effects
Reversing/rotating
Next
▲
Summary of Contents for FOMA D905I
Page 1: ......
Page 446: ...444 MEMO...
Page 447: ...445 MEMO...
Page 448: ...446 MEMO...
Page 449: ...447 MEMO...
Page 450: ...448 MEMO...
Page 451: ...449 MEMO...
Page 452: ...450 MEMO...
Page 453: ...451 Index Quick Manual Index 452 Quick Manual 458...


