48
Voice/Videophone Calls
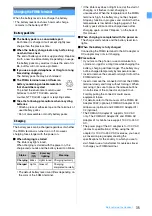
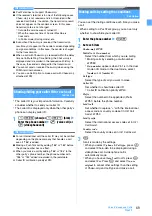
*5 Displayed when caller ID notification is set in Call Option
or Caller ID Setting of the phonebook.
*6 The first member’s name is displayed when you made a
PushTalk call to multiple parties without using group
calling.
*7 For redial, displayed when the multi-number is specified
in Call Option.
Setting Chaku-moji
Chaku-moji
When you make a voice or videophone call, you can
set a message (Chaku-moji) to be displayed on the
incoming screen of the other party’s terminal. This
allows the other party to know the purpose of your call
in advance.
・
For details about Chaku-moji and compatible models,
see the DoCoMo website or “Mobile Phone User’s
Guide [Network Services]”.
・
Senders are charged, but receivers are not charged.
・
Received Chaku-moji is recorded in the received call
history.
・
When All Lock or Personal Data Lock is active, you
can receive an incoming call with Chaku-moji
attached but the Chaku-moji does not appear on the
incoming screen. When you cancel All Lock, you can
check the message in the received call history.
Editing and setting for Chaku-moji
・
Up to 10 messages can be registered.
1
m
z
Settings & NW services
z
83
1
2
<New message>
■
Editing a registered message: Highlight a
Chaku-moji message
z
o
■
Using the history of sent messages:
m1
z
Highlight a Chaku-moji message
z
o
■
Deleting:
a
Highlight a Chaku-moji message
z
m2
・
To delete all:
m3
b
Yes
3
Enter a message (up to 10 one-byte or two-byte
characters)
・
Kanji, hiragana, katakana, alphabetic and
numeric characters, symbols, and pictograms
(except Deco-mail pictograms) can be entered.
4
p
・
When you have edited a registered Chaku-moji
message, a confirmation screen appears. Select
Yes
to overwrite.
1
m
z
Settings & NW services
z
83
2
z
1
-
4
Making a call by attaching Chaku-moji
・
Up to 10 messages can be recorded in the history of
sent messages. When the number of recorded
messages exceeds 10, the oldest message is deleted.
・
When the 2in1 service is subscribed, up to 10 sent
messages are recorded for each of Number A and
Number B. In total up to 20 messages are recorded.
1
Enter the phone number
z
m3
2
Select a Chaku-moji message
■
Creating a message:
1
z
Create a Chaku-
moji message
・
Follow the procedure from Step 3 in “Creating
a Chaku-moji message”.
■
Selecting a registered message:
2
z
Highlight a Chaku-moji message
z
o
■
Selecting from the history of sent messages:
3
z
Highlight a Chaku-moji message
z
o
・
In the dual mode of 2in1,
appears for a
message sent by Number B.
3
m
・
When the Chaku-moji is received by the other
party’s terminal,
Transmission completed
appears
and transmission fee is charged.
・
When the Chaku-moji is sent to an incompatible
terminal or is not received due to Message
Display Setting of the other party’s terminal,
Transmission failed
appears and transmission fee
is not charged.
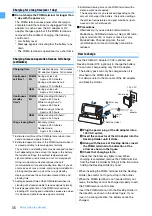
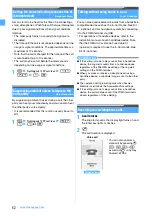
Creating a Chaku-moji message
Chaku-moji appears on the incoming
screen of the other party’s terminal.
When the call is answered, the
Chaku-moji is cleared.
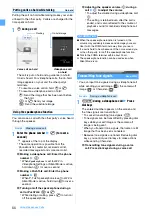
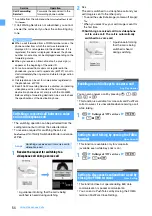
Making the Chaku-moji reception setting
Message Display Setting
Display all
: Displays Chaku-moji from any party.
Hide all
: Hides Chaku-moji.
Only from stored No.
: Displays Chaku-moji only
from a party registered in the phonebook.
Only with Caller ID
: Displays Chaku-moji only from
a party with the caller ID.
Summary of Contents for FOMA D905I
Page 1: ......
Page 446: ...444 MEMO...
Page 447: ...445 MEMO...
Page 448: ...446 MEMO...
Page 449: ...447 MEMO...
Page 450: ...448 MEMO...
Page 451: ...449 MEMO...
Page 452: ...450 MEMO...
Page 453: ...451 Index Quick Manual Index 452 Quick Manual 458...


