www.dogtek.com
8
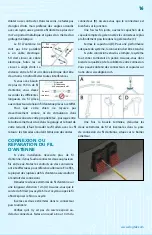
on the battery housing. A beep sound indicates that the collar is switched on.
•
Check that the waterproof gasket is in place on the groove of the battery cover.
•
Before re-tightening the 4 screws, force the strap against the battery cover by pulling it.
•
Using a screwdriver, moderately tighten the 4 screws.
NOTE:
During fence set up and pet training, you will put a greater than normal load on the battery. You may
need to replace this original battery after 30-60 days depending on how much testing and training you do.
Under normal circumstances battery life is about 6 months.
Power of the collar
If the control collar is not to be used for a long period of time, the battery should be removed from its housing.
If you want to take your dog of the property, you are advised to remove the receiver collar. You can also switch
the transmitter to Of and the blue indicator light will go out. (See Diagram #1)
ADJUSTING THE BOUNDARY RANGE:
WARNING ZONES AND STIMULATION ZONES
Using the transmitter, you can increase or decrease the width of the warning and impulse zone, depending
on the coniguration of your yard and how the antenna wire is laid.
TESTING THE PET FENCING SYSTEM
Before releasing your dog into his play area, you need to test the authorized zones.
Make sure your dog has
enough space to move freely within the deined limits.
The wider the zones, the lower the escape risks. Therefore,
you have to ind a good median between
zone width and freedom space.
Summary of Contents for EF-4000
Page 1: ......


