background image

11

TRANSMITTER 

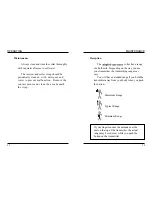
Intensity Selection Dial

The intensity selection dial is located on the top of the

transmitter.

In the fully counter clockwise position-”zero” setting-

no electrical stimulation occurs even when the transmitter
button is pressed (a satety feature).

Moving the dial from the zero setting in a clockwise

manner, electrical stimulation will begin at a lower setting.
Continuing clockwise will increase the stimulation level in
a liner progression-no steps or increments up to the highest
level (100).

Conversely, moving the dial counter-clockwise, the

level reduces in a downward linear progression until at the
“zero” setting (fully counter-clockwise).

This feature allows for subtle adjustment of the level

(upward of downward) while the transmitter button is held
down continuously - providing e-linear training.

10

TRANSMITTER 

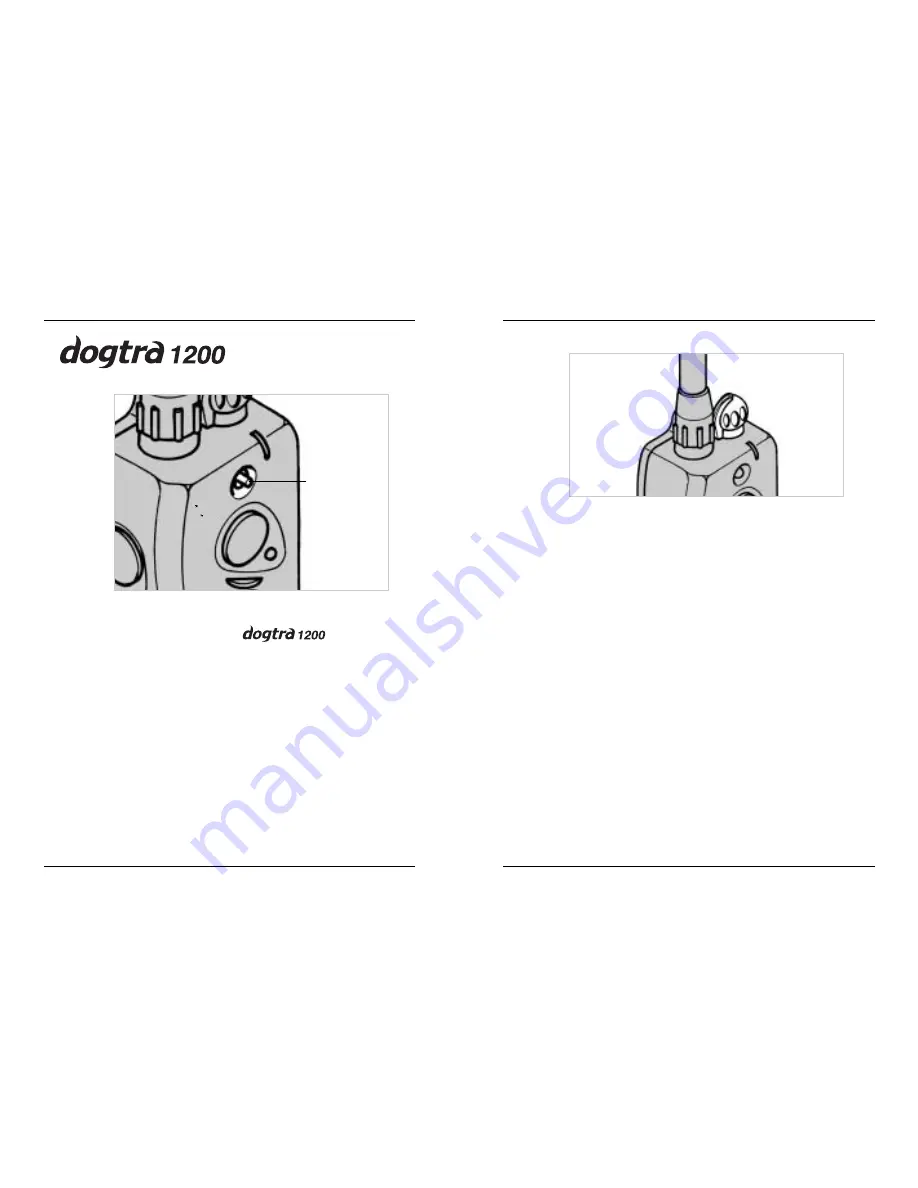
Selection Switch on the                  

Two-Dog

Models 

The two-dog models have a toggle switch on

the face of the transmitter located above the
“Nick” button. The toggle switch allows for
selection of either collar.

Set the toggle switch on the orange position

to  select the orange collar and the black position
to select the black collar.

Black

Orange

TWO-DOG MODELS

Collar
selection
switch

Summary of Contents for 1200 NC

Page 1: ...REMOTE CONTROLLED DOG TRAINING COLLARS OWNER S MANUAL www dogtra com Copyright c 2002 Dogtra Company 2004 ...

Page 2: ...R PACKAGE CONTENTS DESCRIPTION OF TRANSMITTER PARTS BUTTON FUNCTION DESCRIPTION OF COLLAR PARTS BATTERY CHARGER CHARGING THE BATTERIES TESTING YOUR COLLARS OPERATING INSTRUCTIONS ACCESSORIES WARRANTY AND REPAIR INFORMATION 3 5 6 7 8 14 18 23 24 27 30 36 37 1 CONTENTS ...

Page 3: ...se late corrections are very confusing to the dog remote collars offer three different kinds of stimulation Pressing the Nick button causes a very short single pulse of electrical stimulation It automatically shuts off in a fraction of a second no matter how long the button is held down The Nick is used as a substitute for leash corrections when the dog is off lead It is mild but motivating OVERVI...

Page 4: ...ent identity codes to prevent conflicts with other collars MAIN FEATURES MAIN FEATURES Pressing the Constant button causes the collar to emit electrical stimulation that stays on for up to twelve seconds as long as the button is held down Constant stimulation is used for low level applications for guiding dogs into the desired behavior or as a reserve high to stop unsafe behaviors such as chasing ...

Page 5: ...uit will activate A filtering system prevents unwanted reception from outside sources collars are intended for the sole use for training dogs Dogs should be in good health during any e collar training collars are not intended for use on dogs weighing less than 12 pounds or less than 6 months of age Discontinue use if signs of irritation begins to appear on the dog s skin around the neck caused by ...

Page 6: ...nsmitter to ensure that the signals are sent properly to the collar receiver and that maximum range is attained 2 Antenna 8 TRANSMITTER Antenna Indicator Light Nick Button Toggle Switch Constant Button Pager Button Intensity Selection Dial transmitter indicates optional switch for 2 dog models DESCRIPTION OF TRANSMITTER PARTS ...

Page 7: ...el 100 Conversely moving the dial counter clockwise the level reduces in a downward linear progression until at the zero setting fully counter clockwise This feature allows for subtle adjustment of the level upward of downward while the transmitter button is held down continuously providing e linear training 10 TRANSMITTER Selection Switch on the Two Dog Models The two dog models have a toggle swi...

Page 8: ... double blink while the button is pressed the battery needs to be recharged 12 TRANSMITTER Transmitter Battery Charging Receptacle Located on the backside of the transmitter the receptacle is covered by a rubber plug Insert one end of the battery charging cable into the receptacle to charge the battery See Battery Charging Procedure After charging is completed close the receptacle with its rubber ...

Page 9: ...ut motivating Constant Button Pressing the Constant button gives stimulation for up to twelve seconds at which time the collar will turn off The collar will reactivate when you push the button again 14 BUTTON FUNCTION The transmitter for has two buttons The top button gives Nick stimulation when pressed The bottom button gives Constant stimulation for as long as you press the button up to twelve s...

Page 10: ...ton on the side of the transmitter causes the collar to vibrate It s a great way of communicating with your dog using non electrical stimulation It is useful as an attention getter giving you added training finesse 16 BUTTON FUNCTION The transmitter for has three buttons two on the face of the transmitter and one on the side On the face of the transmitter the top button gives a pre measured Nick o...

Page 11: ...rn the collar off hold the button down for one full second until the red light goes off A delay has been built into the on off switch so the dog cannot turn the collar off by accident 18 COLLAR DESCRIPTION OF COLLAR PARTS Collar Power switch ON OFF Push button Contact Points Indicator Light Battery Charging Receptacle and Cover Collar Strap ...

Page 12: ...ur corrections will be inconsistant also 20 COLLAR Receiver Indicator Light LED Located on the front of the collar the indicator light comes on and blinks once every 2 seconds after the collar is turned on The blinking will change from a single flash to a double flash when the collar needs to be recharged When the Constant button on the transmitter is pushed the collar indicator light will glow st...

Page 13: ...er for the two dog unit combine both sets of battery charging cables as shown This enables you to charge the transmitter and both receivers at the same time BATTERY CHARGER Charging Cable 110 volt Charger Two dog unit only 22 COLLAR Receiver Battery Charging Receptacle On the inside of the collar next to the collar strap is a battery charging receptacle with a rubber cover plug Internal Antenna Th...

Page 14: ...ndicator light on the transmitter or receiver comes on momentarily but will not stay on when the Constant button is pushed 24 CHARGING THE BATTERIES uses Ni MH Nickel Metal Hydride batteries that do not set a memory and can be charged on a regular basis without harm to the battery Allow batteries to clrain completely every 4 months to maximize battery life 1 Charge the batteries for 14 hours befor...

Page 15: ...cedure 1 Attach the charging cables to both the transmitter and receiver s as shown on page 24 2 Plug the charger into a 110 volt wall outlet as if using the accessory field charger plug into a cigarette lighter Use 220 volt European charger for Europe When properly plugged in all indicator lights should glow red The receiver automatically turns off when you insert the charging cable into the batt...

Page 16: ...the Constant button 4 Watch the test light as you push the Constant button on the transmitter It should glow brightly As a safety feature the collar will automatically turn off after twelve seconds To reactivate release the button for one second and the collar will reset 5 Push the Nickt button The test light should light for just a moment 6 Change the intensity dial to level fifty and repeat the ...

Page 17: ... the contact points are held firmly against the dog s skin If the collar is too loose it can cause irritation from the contacts rubbing against the skin If the dog has a heavy coat move the receiver up and down to work the contact points down into the coat ATTENTION Avoid having the dog wear the collar with the contact points in the same place for more than two hours at a time Leaving the points o...

Page 18: ...ea beneath the strap 33 MAINTENANCE Reception The collar has a range of a half mile Depending on the way you use your transmitter the transmitting range may vary You will have extended range if you hold the transmitter away from your body when you push the button Maximum Range Typical Range Minimum Range If your finger touches the antenna near the dial on the top of the transmitter the actual rang...

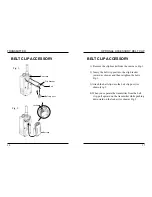
Page 19: ...ost into the clip bracket uward as shown and then retighten the bolts Fig 1 3 Attach the belt clip onto the belt clip post As shown Fig 2 4 When you separate the transmitter from the belt clip pull upward on the transmitter while pushing downward on the locker As shown Fig 2 BELT CLIP ACCESSORY Rear case Clip bracket Bolt Locker Belt clip post Belt clip ...

Page 20: ... is void if the unit has been altered or an unauthorized person has attempted work Batteries or the labor to replace them are not covered under warranty after the first year A copy of the sales receipt showing purchase date is required before warranty work is begun Write a note briefly explaining the problem and include your name address city state zip code daytime and evening phone numbers Return...

Page 21: ...For any questions concerning your dogtra products call us Toll Free at 1 888 811 9111 Out of Warranty Repair For repair work that is no longer covered by warranty the cost of repair will include parts labor and shipping Write a note briefly explaining the problem Include your name address city state zip code daytime phone number and evening phone number ...

Page 22: ...MEMO ...
Reviews: