


25
24
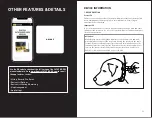
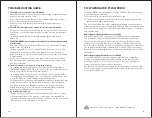
Geo-Fence Settings
- You can create an alarm for both exiting and
entering the Geo-Fence.
- You can select different alarm types.
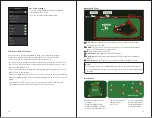
3) E-Fence (Auto-Correction)
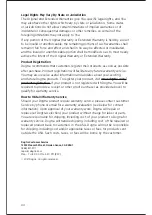
About the E-Fence
Set up the static E-Fence boundary to auto-correct your dog and get
notifications on your phone. When using the E-Fence, keep in mind:
- This device is GPS operated and cannot be used indoors.
- Do not use this as a permanent fence solution as your dog can still cross the
Outer Fence. Previous retriever training is needed to train your dog to come
back over the Outer Fence.
- The receiver will not emit stimulation when bringing your dog back over the
Outer Fence to the IN area.
- Make sure that Bluetooth is on to sync your receiver to the E-Fence boundary.
- Make sure that when the E-Fence boundary is updated, the receiver is synced
again.
- A smartphone or GPS connection is not needed to operate, but the track
information and application notification will not be received.
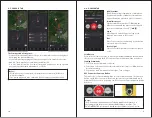
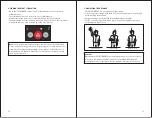
1
OUT:
When moving out of the boundaries, the e-collar emits Constant
correction for 5 seconds.
2
NEAR:
The receiver emits a Pager vibration for 5 seconds when within 5
yards of the Outer Fence or Inner Fence.
3
IN:
Safe area with no correction.
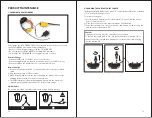
4
Outer Fence:
One large fence on the outskirts.
5
Near Area:
Automatically created within 5 yards of the Inner and Outer
Fence.
6
Inner Fence:
Up to 3 Inner Fences can be created in the Outer Fence.
Notes:
For the dog's safety, the stimulation will only last 5 seconds if the dog goes
out of the boundaries. Make sure your dog comes back in the boundary after
5 seconds.
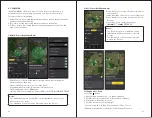
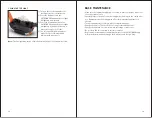
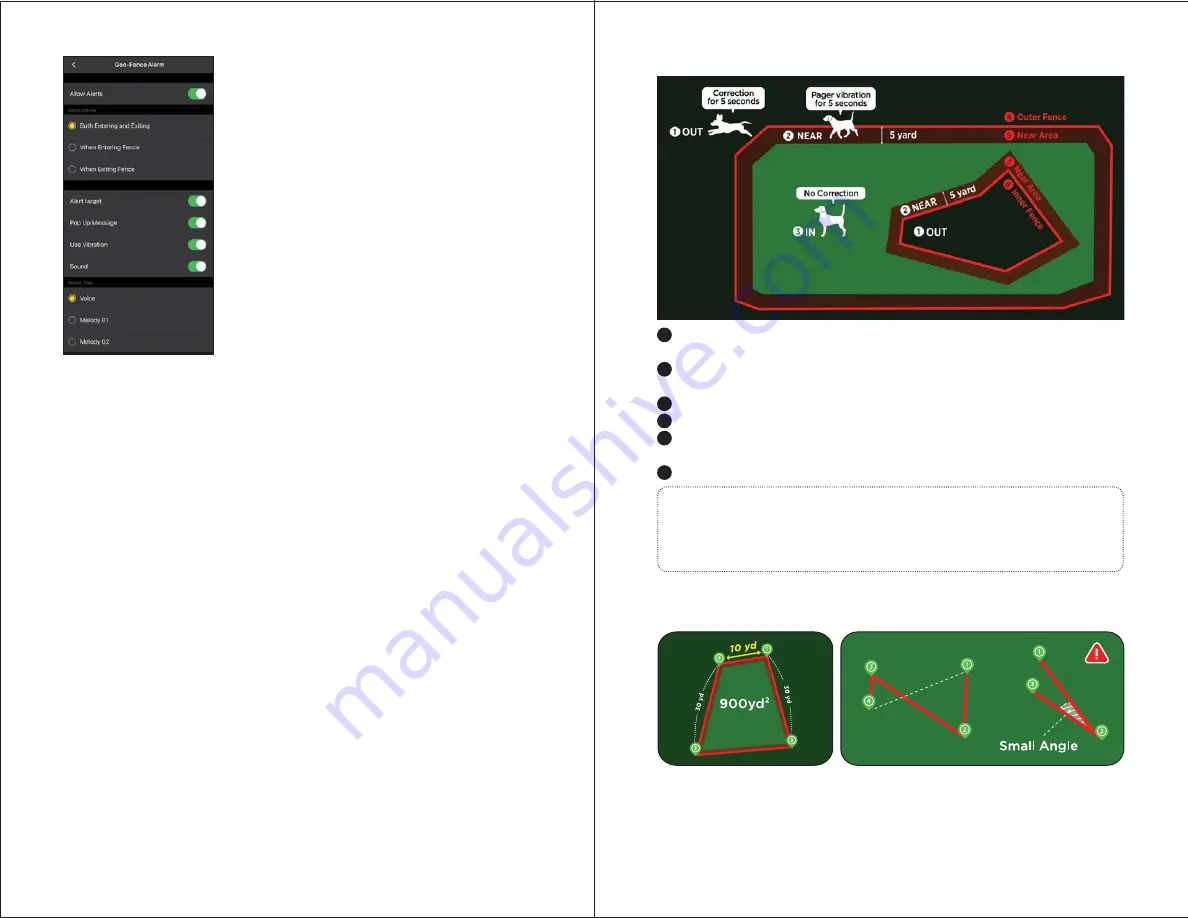
Restrictions:
The fence boundary
design cannot
cross over.
The fence boundary
design cannot have
sharp pointed areas
with small angles.
Boundary design requires
following:
- Minimum 900yd2 area.
- Minimum distance of 10 yd
between each Drop Point.