41
ENGLISH
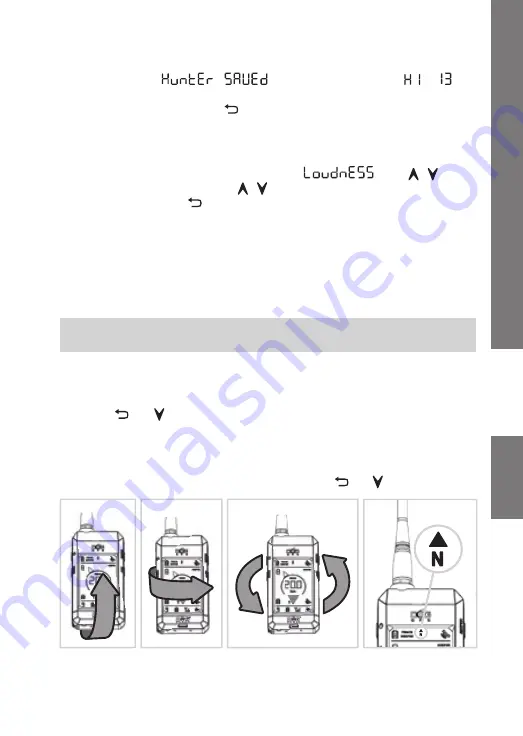
7.8 Digital compass calibration
For viewing the exact direction to the transmitter collar, it is crucial that the calibration
is carried out correctly. If the device does not indicate the correct direction even with
the maximum GPS accuracy (two bars on both signal indicators on the display),
the calibration may not have been carried out for a long time or was carried out
incorrectly.
7.7 Setting the sound volume
Receiver’s sound volume may set to five levels.
1.
Long press the
MENU
push button and select
using / arrows.
2.
Select sound volume level using / .
3.
By repeatedly pressing
return to the main screen.
Fig. 1
Fig. 2
Fig. 4
Fig 3
NOTE:
Carry out calibration in an open area, away from objects that emit
magnetic field – buildings, cars, overhead and underground power lines.
Calibration procedure
If you know the direction to the North magnetic pole, you may go straight to Point 2.
1.
To commence the calibration procedure simultaneously press both bottom push
buttons and for two seconds. Then rotate the device several times around
each of the three axes (see Figs. 1, 2 and 3). Finish calibration by pressing the back/
return push button. To refine calibration proceed as per Point 2.
2.
Find the North using the compass on the display and turn the receiver so that
the aerial points to the North (see Fig. 4). To commence the calibration procedure
simultaneously press the both bottom push buttons and for two seconds.
4.
Hold the
CODE
push button
on your receiver
again for 2 seconds.
5.
Move both receivers close to each other with the RF aerials parallel to each other.
6.
After pairing, the
message is displayed and
to is lit
on the display according to the selected position to which the receiver is paired.
7.
To exit the coding mode press on both receivers.


