background image

Chapter 10

Using Raspberry Pi to Drive a Multimedia Center


The Raspberry Pi is a great low cost solution to building your own mini media center. In
this chapter, you will learn about setting up Xbox Media Center (XBMC) on your Pi with
a  universal  remote  control  using  FLIRC  which  is  nothing  more  than  a  USB  dongle  that
can be plugged into the Pi.


What you’ll need?


A Raspberry Pi (Model-B)


Raspberry Pi power charger


Mouse and keyboard (wireless or wired)


Ethernet cable and working Internet connection


FLIRC


Universal remote (or spare one)


A PC or laptop (only for the initial setup)


Setting up XBMC Installer on the SD card for Pi

First  you  need  to  load  the  XBMC  (RaspBMC)  media  OS  on  the  Raspberry  Pi.  In  this
section, we are going to use a Windows PC; steps are almost same for Linux and Mac PC.

Download 

the 

SD 

card 

image 

file 

from 

the 

following 

link:

http://download.raspbmc.com/downloads/bin/installers/raspbmc-win32.zip

Now extract the Zip file ‘raspbmc-win32’ using WinRAR or WinZip tool.

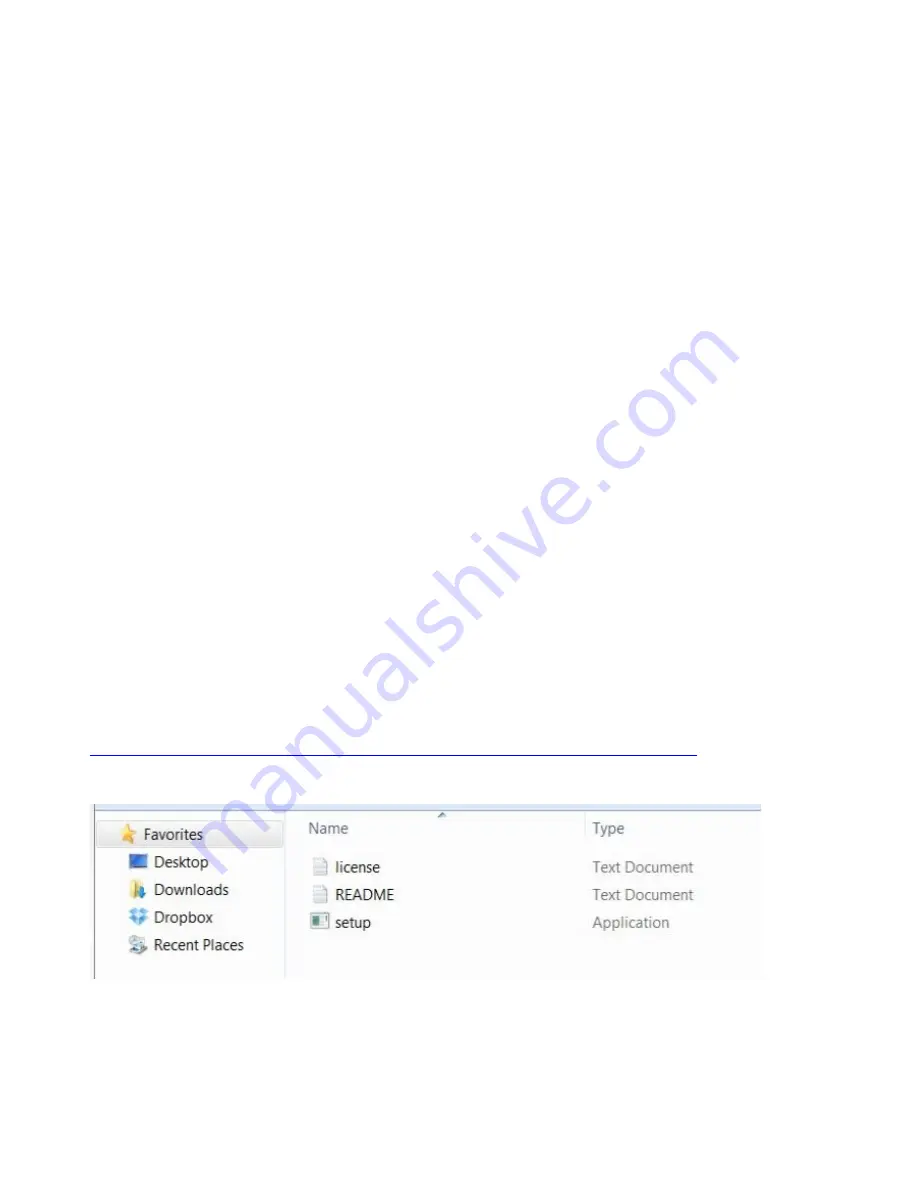
Run the file setup.exe file. This will install the SD card installer on your computer.

Summary of Contents for Rasberry PI

Page 1: ......

Page 2: ...RASPBERRY PI FOR BEGINNERS ...

Page 3: ...son shall copy the name of the book its title design matter and illustrations in any form and in any language totally or partially or in any distorted form Anybody doing so shall face legal action and will be responsible for damages CONNECT WITH US ON FACEBOOK Come and join our Facebook page where you will be the first to know everything about our upcoming titles On our page we will also share pro...

Page 4: ... Raspberry Pi Chapter 5 Other OSes for Pi Chapter 6 Programming Your Pi Using Scratch Chapter 7 Arduino and Raspberry Pi Chapter 8 Awesome Pi Uses Chapter 9 Raspberry Pi as Standard Productivity Computer Chapter 10 Using Raspberry Pi to Drive a Multimedia Center Chapter 11 Using Raspberry Pi for Time Lapse Photography Chapter 12 Using Raspberry Pi as FM Transmitter ...

Page 5: ......

Page 6: ...hip product has been developed by Raspberry Pi Foundation a charitable organization based in United Kingdom Features Raspberry Pi is a single board computer that is about the size of a credit card It uses a 32 bit capable ARM processor and Fedora from Linux as its default operating system OS It can be programmed with languages such as Python that will compile with ARM ...

Page 7: ...berry Pi for basic functions like watching HD videos working with spreadsheets and editing documents In other words you can do everything that a normal desktop computer is capable of doing In Chapter 2 we will learn about the different versions currently offered of the Raspberry Pi ...

Page 8: ......

Page 9: ......

Page 10: ...e between Model A and Model B Model A Model B Price 25 35 SoC Broadcom BCM2835 CPU 700 MHz ARM1176JF S Core GPU VideoCore IV OpenGL ES 2 0 1080p 30 Full HD HP H 264 Memory 256 MB 512 MB USB 2 0 ports 1 2 integrated Video outputs Composite RCA HDMI Audio outputs 3 5 mm jack HDMI Onboard storage SD MMC SDIO card slot Low level peripherals GPIO pins SPI I2 C UART Onboard network None 10 100 wired Eth...

Page 11: ...o Buy Raspberry Pi Foundation has made exclusive distribution arrangement with Farnell and RS one can buy any model of Raspberry Pi from these distributors Resellers do sell on Amazon and eBay Resellers sell Raspberry Pi with different offers so prices may vary Raspberry Pi Model A ...

Page 12: ...Raspberry Pi Model B ...

Page 13: ......

Page 14: ......

Page 15: ...rry Pi is designed to perform different functions Now let s take a look at the peripherals required to start using your Raspberry Pi SD card Raspberry Pi OS is stored on a SD card If you have purchased from RS you will get a SD card In case if you have purchased it from elsewhere you can purchase the SD card from Amazon or from any other nearest electronic gadgets outlet Requirements SDHC memory c...

Page 16: ... a separate HDMI capable to view the Pi on an HDMI monitor or television HDMI cable Important note Raspberry Pi does not support VGA analog output You can use a converter but we don t recommend using one because it may cause you issues later Using a straight HDMI to HDMI connection is best to avoid compatibility problems ...

Page 17: ...B extension in case you need more than one USB ports Since your Pi supports Bluetooth enabled wireless keyboard and mouse you can purchase them as well Wireless keyboard Internet connection Using your Pi you can connect to Internet in many ways You can enjoy wireless Internet via a USB Wi Fi dongle and if you would like to connect with high speed wired connection then you can use Ethernet cable ...

Page 18: ...ripherals with your Pi Operating system OS OS is the soul of your Raspberry Pi So to get your Raspberry Pi up and running you need to install Fedora which is the standard default Linux distribution used as the OS for Pi Most of the distributors sell Pi with preinstalled OS But if in case you want to install the OS yourself then read Chapter 4 ...

Page 19: ......

Page 20: ......

Page 21: ...ed on Windows or any other OS platform in your PC you can do it yourself easily and can save a few bucks So in this chapter you will learn about installing the OS on Raspberry Pi We are installing Fedora Remix distribution from Linux but before we install Fedora we need to download it from the Web Select a latest copy of Fedora Remix Fedora Remix 17 or 18 you can download it from http fedoraprojec...

Page 22: ... sure you format SD card using FAT32 file system Now run Win32 Disk Imager with administrator privileges and select the extracted image and the drive letter of the SD card Always choose the correct drive or else data on the drive will be destroyed Click on the Write button and wait till it finishes extracting data Depending on your host machine speed your writing time will vary but will not take a...

Page 23: ...and mouse Once your Pi boots up and black screen disappears start the final system configuration set passwords create user accounts and select your time zone graphical user interface GUI and fonts Fedora Remix booting up on the Pi You are ready to work on your Pi now In Chapter 5 we will learn about the other OSes that can be installed on Pi in similar way and their overview ...

Page 24: ......

Page 25: ......

Page 26: ...timized version of Debian and it contains LXDE Midori development tools and example source code for multimedia functions Raspbian is referred to as graphical face of the Raspberry Pi GUI is awesome Playing a game on Raspbian Arch Linux ARM Arch Linux ARM is a distribution from Arch Linux which aims for simplicity and full control to the end user It is not recommended for beginners Latest version o...

Page 27: ...evices but in recent years developers have developed ways to use Android on Raspberry Pi At present not much has been done toward implementing Android on Raspberry Pi but it is possible that Android would become the most successful OS on Pi in the near future ...

Page 28: ......

Page 29: ......

Page 30: ...du Getting started To get familiar with Scratch it s best to begin with easy preinstalled projects and resources that are part of the main application In this chapter we are going to discuss Aquarium which as it s named is actually a cool animated aquarium with fish and other water dwelling creatures So here we go Begin by clicking on the Scratch icon on your desktop or you can use the standard LX...

Page 31: ...atch Studio should appear similar to this screenshot below There are three different blocks or panels in the Scratch Studio On the left side there is a Blocks Panel The Blocks Panel contains the blocks used to program and build programs The various blocks are grouped into several categories such as sensing control motion sound etc Note that there is a Builder Panel in the center This is the panel ...

Page 32: ...blocks and sprites Adding sound Adding sound to animation enhances its quality and grabs attention from its viewer as well You can add sound to your animations using Sounds tab in Builder Panel You can import sound or use preinstalled effects Once you add sound effects you can listen to the sound by clicking the Play button Add a new block set to play the chosen sound over animation this will get ...

Page 33: ... output pins for communication and controlling of physical objects like LED servos buttons lights thermosensors photoreceptors etc It is powered via a USB connection Arduino Arduino using a similar programming language to C known as Arduino integrated development environment IDE The IDE allows you to write compile and then upload your completed code to the Arduino device This can be used for proto...

Page 34: ...cal aspects of our Pi After reading our earlier chapters you may be thinking Okay I have understood what Pi is but how can I use it What are its uses You can design and develop numerous projects with Pi For starters we are explaining some interesting uses of Raspberry Pi ...

Page 35: ...you have at home Processing Word documents spreadsheets PowerPoint etc Browsing Internet social networking sites and checking e mails Programming and coding in various languages Playing HD games Watching videos and hearing songs You can also do these things with Raspberry Pi Next we will convert our Pi to a standard productivity computer What do you need Hardware Raspberry Pi Model B Mini USB powe...

Page 36: ...are the software products required to convert your Pi into a PC In case it is preinstalled with these software products you need not download them Software Features LibreOffice 4 0 free Download link http www libreoffice org download LibreOffice is a comprehensive professional quality productivity suite like Microsoft Office from the Document Foundation available for free download It supports 30 l...

Page 37: ...important and common tasks that a standard PC can handle In case you need more tasks from your Pi you can get additional software products from Internet for use on your Raspberry Pi You can add CD or DVD or Blu ray drives to Raspberry Pi using USB slots in case you want to watch a movie or play HD games Besides Raspberry Pi is really a better option than normal computers because it is easy to hand...

Page 38: ......

Page 39: ......

Page 40: ... wireless or wired Ethernet cable and working Internet connection FLIRC Universal remote or spare one A PC or laptop only for the initial setup Setting up XBMC Installer on the SD card for Pi First you need to load the XBMC RaspBMC media OS on the Raspberry Pi In this section we are going to use a Windows PC steps are almost same for Linux and Mac PC Download the SD card image file from the follow...

Page 41: ...elect it as your writable media choose the correct path or else you will lose your data Now tick the I accept the license agreement checkbox and hit the Install button Wait while it is installed on your computer This will initiate set up of your SD card with the RaspBMC installer Now wait till it finishes installing speed will vary depending on your host PC configuration Once completed following w...

Page 42: ... the setup will start automatically The entire process should not take more than 15 minutes to download and install speed depends upon your LAN connection It will restart a number of times before XMBC GUI is installed so wait patiently Spend some time in familiarizing yourself with XBMC Let s now set up FLIRC Setting up the FLIRC software Now get back to your PC laptop or desktop do not unplug you...

Page 43: ...same way you do with any other Windows programs Once completed run the FLIRC software and you should see the following input screen ...

Page 44: ...s is currently disconnected Plug your FLIRC module Raspberry Pi into the PC using the USB connector Wait for some time it will install automatically on your computer Now status will be updated to connected ...

Page 45: ...with some of the basics This will include commands like Navigation Enter and Back Next step is to set up the remote control Get a remote control this can be any IR remote be it TV CD DVD satellite or universal remote or anything Once you are ready with your remote control hit the go button ...

Page 46: ...tton on the remote it will get associated with FLIRC After setting up all of the keys your basic XBMC will be ready for use Once you have completed the setup quit the program on your PC and remove the FLIRC module Raspberry Pi from your PC Putting Everything together Get back on to the Raspberry Pi Start by removing the mouse and keyboard and replacing it with the FLIRC USB module Next switch the ...

Page 47: ...board to your remote control is possible In the next section please take a look at some of the various commands Key Global Video playback Music visualization A Audio delay B Live TV Schedule recording timers Live TV Schedule recording timers C Contextual menu Playlist D E Live TV EPG TV guide Live TV EPG TV guide F Fast forward Fast forward Fast forward H Live TV channels window Live TV channels w...

Page 48: ...ewind Rewind S Shutdown menu Show preset T Toggle subtitles on and off U Move up V Teletext Visualization settings W Marked as watched unwatched X Stop Stop Stop Z Zoom aspect ratio Space Pause play Pause play Pause play Left Step back 30 s videos Previous channel group live TV Previous Right Step forward 30 s videos Next channel group live TV Next Up Step forward 10 min or next chapter videos Cha...

Page 49: ...nus Volume down Volume down Volume down plus Volume up Volume up Volume up equals Volume up Volume up Volume up backslash Toggle application windowed mode Toggle application windowed mode Toggle application windowed mode left bracket Step forward 10 min or next chapter right bracket Step backward 10 min or previous chapter END Exit XBMC only on home screen v 11 Eden CTR L END Exit XBMC only on hom...

Page 50: ...er Connect your USB module with monitor and speakers using HDMI and add songs to your XBMC use your remote control and FLIRC to control how audio and videos will play Your media center is ready In Chapter 11 we will learn about using Raspberry Pi for the purpose of time lapse photography ...

Page 51: ......

Page 52: ......

Page 53: ...spberry Pi power charger Raspberry Pi 5 0 MP camera Model A Mouse and keyboard wireless or wired Battery 3 200 mAh Universal remote or spare one A PC desktop or laptop to complete the initial setup Configuring Raspbian Install Raspbian on your SD card see Chapter 4 In order to enable support for the camera on Raspberry Pi we need to add two lines to boot config txt start_file start_x elf fixup_fil...

Page 54: ... camera using CSI monitor with HDMI keyboard and mouse with USB and connect to power supply Allow your Pi to boot We will now add capture script Capture script The command opt vc bin raspistill is used to capture still images You need to put this simple script script is taken from DesignSpark to run raspistill in a loop ROLL cat var tlcam series SAVEDIR var tlcam stills while true do filename ROLL...

Page 55: ...s to assemble Pi and place it into a handy windowsill First run Place the Raspberry Pi and the battery pack in a windowsill and properly attach the camera to the window with tape Allow it to boot up Wait for 12 hours and after 12 hours it will contain at least 5 518 JPEG files Remove it from the Pi and connect it to your PC You can now browse through the collected photographs This will find good u...

Page 56: ......

Page 57: ......

Page 58: ...default WAV file is set to 16 bit 22 5 kHz and mono mode Set WAV file to to use stdin Suppose you want to broadcast a song sound wav at 100 1 MHz then enter this command sudo a out sound wav 100 1 This command will tell a out to play sound wav and transmit it at 100 1 MHz FM If successful the command prompt will not display anything it will remain idle for some time and will appear to hang till it...

Page 59: ...in 10 50 meter range then you will hear whatever you are transmitting Raspberry Pi as FM transmitter That s all we need to learn at this moment Raspberry Pi is a very useful product if you have ideas you can turn it into reality with Raspberry Pi 2013 Dogwood Apps ...

Reviews: