126
999805802 - 03/2016
Anchoring on the structure - Lifting unit attached on one side
Original Operating Instructions
Platform SCP
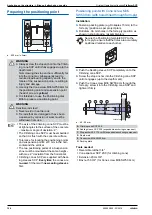
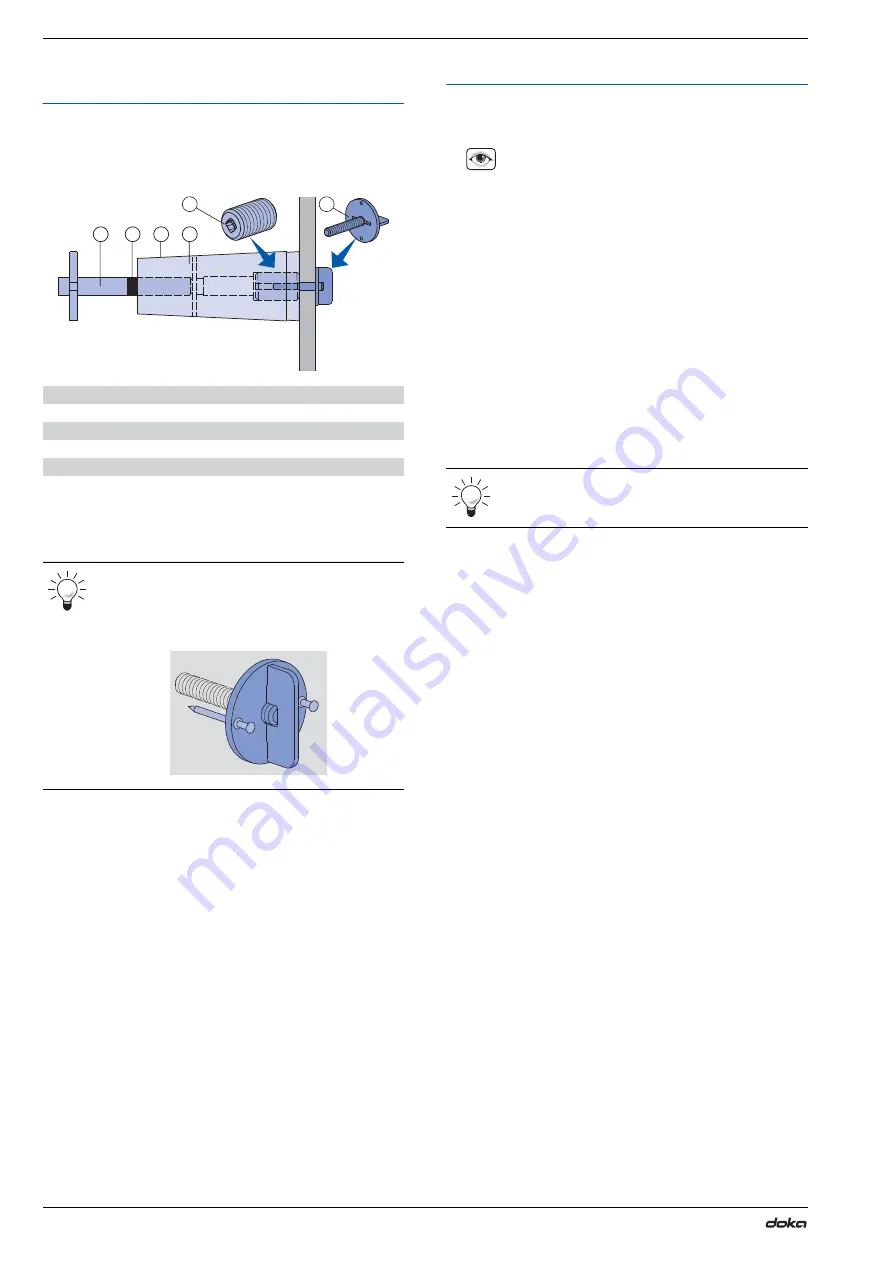
Positioning point with Positioning clamp
M36
(with hole drilled through form-ply)
Because the hole is drilled with a diameter of only
11
mm, the positioning point can be relocated at
smaller intervals than would be possible with the Cone
screw M36 SW50 9cm.
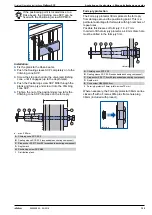
Installation:
➤
Drill a diam. 11
mm hole in the form-ply (position as
shown in shop drawing / assembly plan).
➤
Push the Sealing sleeve SCP completely on to the
Climbing cone SCP.
➤
Screw a Socket connector M36 all the way into the
Climbing cone SCP and tighten it.
➤
Screw the stop anchor into the Climbing cone SCP,
until it engages (up to the depth mark).
➤
Screw the pre-assembled unit onto the M10 wing
bolt (make sure that it seals against the formwork).
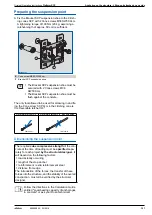
Tools needed:
▪
Reversible ratchet 3/4"
▪
Cone spanner SCP 20.0 (for climbing cone)
▪
Extension 20cm 3/4"
▪
Box nut 50 3/4" (for Cone screw M36
SW50
9cm)
▪
Reversible ratchet 1/2"
▪
Extension 1/2"
Pouring
➤
Before pouring, check all positioning points and sus-
pension points once again.
➤
Prevent the vibrator from touching the stop anchors.
➤
Do not place concrete from directly above the stop
anchors.
These measures prevent the anchors from working
loose during pouring and vibration.
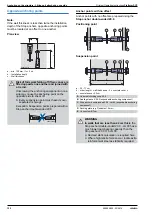
A
Climbing cone SCP 20.0
B
Sealing sleeve SCP 20.0 (expendable anchoring component)
C
Stop anchor 20.0 17.5cm 90 (expendable anchoring component)
D
Depth mark
K
Socket connector M36 of the Positioning clamp M36
L
M10 wing bolt of the Positioning clamp M36
Nail the M10 wing bolt onto the form-ply to
make it easier to mount the cone.
Shortened double-headed nails make it easier
to dismount the wing bolt.
98058-484-01
B
A
D
C
K
L
98058-484-02
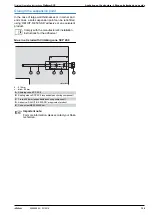
▪
The axis of the Climbing cone SCP must be
at right-angles to the surface of the con-
crete – maximum angle of deviation: 2°.
▪
The Climbing cone SCP must be embed-
ded so that it is flush with the concrete sur-
face.
▪
Tolerance for locating the positioning points
and suspension points: ±10
mm
in
the
hori-
zontal and the vertical.
▪
The sealing sleeve must have been com-
pletely pushed onto the Climbing cone
SCP.
▪
The depth mark on the stop anchor must be
right up against the Climbing cone SCP =
must be screwed in to the full depth.
▪
The two positioning points of a Suspension
shoe must be mounted at the same height
– with max. 2° deviation from the horizontal.
Mark the top edge of the formwork to make the
positions of the stop anchors easier to find
when the concrete has been poured.
Summary of Contents for Platform SCP
Page 2: ...2 999805802 03 2016 Original Operating Instructions Platform SCP ...
Page 3: ...Original Operating Instructions Platform SCP 3 999805802 03 2016 ...
Page 31: ...Original Operating Instructions Platform SCP Anchoring on the structure 31 999805802 03 2016 ...
Page 61: ...Original Operating Instructions Platform SCP Start up phases 61 999805802 03 2016 ...
Page 114: ...114 999805802 03 2016 Design variants Original Operating Instructions Platform SCP ...

