User Information
Ringlock
Scaffold
27
999817902 - 10/2022
Assembly of Facade Scaffold
Step 1
The ground must be checked for sufficient loadbearing
capacity and suitable sole board, e.g. wooden planks,
must be laid. The maximum spindle extension length
must not be exceeded and the maximum wall distance
of 30 cm must be observed in order to avoid a fall
between the wall and the scaffold. All scaffold compo-
nents must be checked for damage and replaced if nec-
essary before installation.
➤
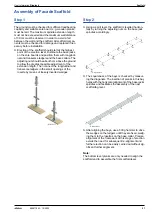
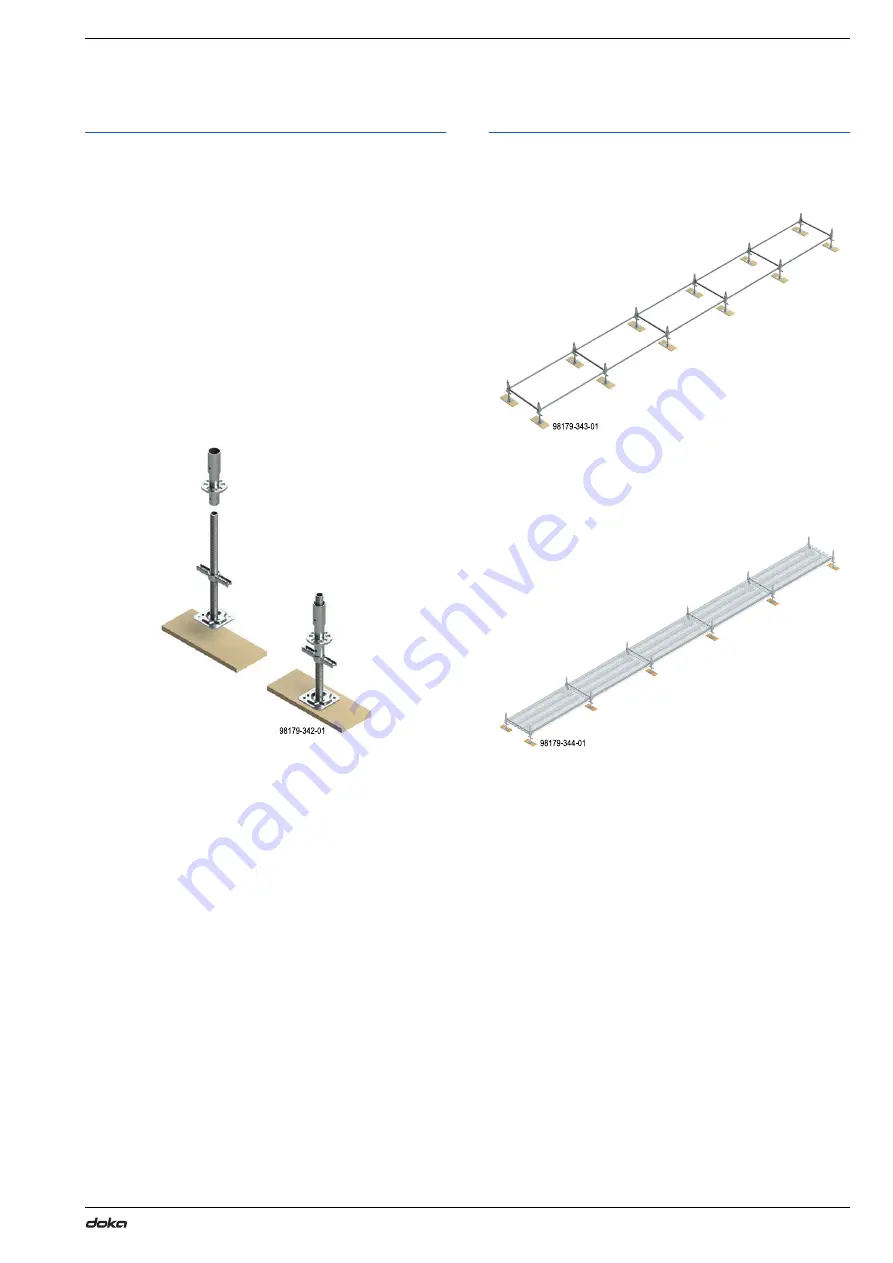
Erection of the scaffold should start at the highest
point of the erection level. Distribute the base jacks
on the sole boards and position them with longitudi-
nal and transverse ledgers and the base collars. The
adjusting nut should be about 5 cm above the ground
to allow the greatest possible adjustment of the
extension length. Then connect the longitudinal and
transverse ledgers in the small openings of the
rosette by means of loosely inserted wedges.
Step 2
➤
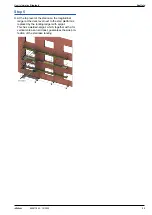
Using a spirit level, the scaffold is levelled horizon-
tally by turning the adjusting nuts on the base jack
spindles accordingly.
➤
The squareness of the bays is checked by measur-
ing the diagonals. The insertion of planks in this bay
helps with the horizontal alignment of the base jacks
spindles and facilitates the assembly of the next
scaffolding level.
➤
After aligning the bays, use a 500g hammer to drive
the wedges on the ledgers until they are fixed, wedg-
ing them to the rosettes on the base collar. Precise
alignment of the framework at this stage of erection
avoids the need for subsequent re-alignment and
further erection can be easily carried out without sig-
nificant further alignment.
Note:
The bottom level planks are only needed to align the
scaffold and to assemble the first scaffold level.

