15
Do not work with the chain saw without
Þ
rst checking
the chain brake!
- Start the engine as described (make sure you have a good
footing, and place the chain saw on the ground in such a
way that the guide bar is free of contact).
- Grasp the tubular handle
Þ
rmly with one hand and hold the
grip with the other.
-
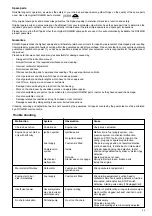
With the engine running at moderate speed, press the hand
guard (C/1) in the direction of the arrow with the back of
your hand until the chain brake engages. The chain should
stop immediately.
- Immediately release the throttle and release the chain
brake.
IMPORTANT: If the chain does not stop immediately
when you test the chain brake, do NOT use the chain
saw. Take the chain saw to a DOLMAR service center.
Checking the chain brake
D
C
1
Never work with the chain saw withoute suf
Þ
cient chain lubri -
ca tion. Otherwise the service life of the chain and guide bar
will be reduced. Before starting work check the oil level in the
tank and the oil feed.
Check the oil feed rate as described below:
- Start the chain saw.
- Hold the running chain saw approx. 15 cm above a trunk
or the ground (use an appropriate base).
If the lubrication is suf
Þ
cient, you will see a light oil trace be-
cause oil will be
ß
ung off the sawing device. Pay attention to the
direction the wind is blowing and avoid unnecessary exposure
to the oil spray!
Checking the chain lubrication
E
Adjusting the carburetor
(only for EU-countries)
Carburetor adjustment must only be done with the engine
warm, a clean air
Þ
lter and the saw chain properly tensioned
and mounted. Always have a DOLMAR service centre do
carburetor adjustment, since incorrect adjustment can
cause considerable damage to the engine.
Due to new emissions regulations, the adjustment range of
screws (
H
) and (
L
) has been limited.
This adjustment range
limitation (to about 180 degrees) prevents over-rich settings.
This ensures compliance with emissions regulations, optimum
engine performance and economical fuel consumption.
Factory setting of adjustment screws (H) and (L):
Screwed out almost all the way (counter-clockwise).
For proper adjustment, proceed as follows:
Checking adjustment screw (H)
Before starting, make sure that adjustment screw (
H
) is un-
screwed all the way (until you feel a stop).
Limitations do not
protect against too lean running
(insuf
Þ
cient fuel)
!
1.
Start engine and let it warm up (3-5 minutes)
2.
Set idle
3.
Check acceleration
4.
Set highest permissible speed.
5.
Check idle speed
2. Set idle
Set the idle speed per the technical speci
Þ
cations.
Turning the adjusting screw (
S
) in (clockwise) increases the
idle speed. Turning it out (counter-clockwise) lowers the idle
speed.
The chain or blade must not move in idle!
3. Check acceleration
When the throttle is pressed, the engine should go smoothly
from idle to high speed.
Unscrew adjustment screw (
L
) counter-clockwise in small
steps until acceleration is good.
4. Set the top speed
Set the top speed with a minimal adjustment to screw (
H
)
in accordance with the technical data.
Screwing in adjustment screw (
H
) clockwise increases
engine speed.
Never exceed the top speed under any
circumstances!
5. Checking the idle speed
After setting the maximum permissible speed, check the idle
speed (the saw chain or cutting tool must not turn in idle).
Repeat the adjustment procedure starting with step 2 above
until idle speed, acceleration, and speed are all good.


