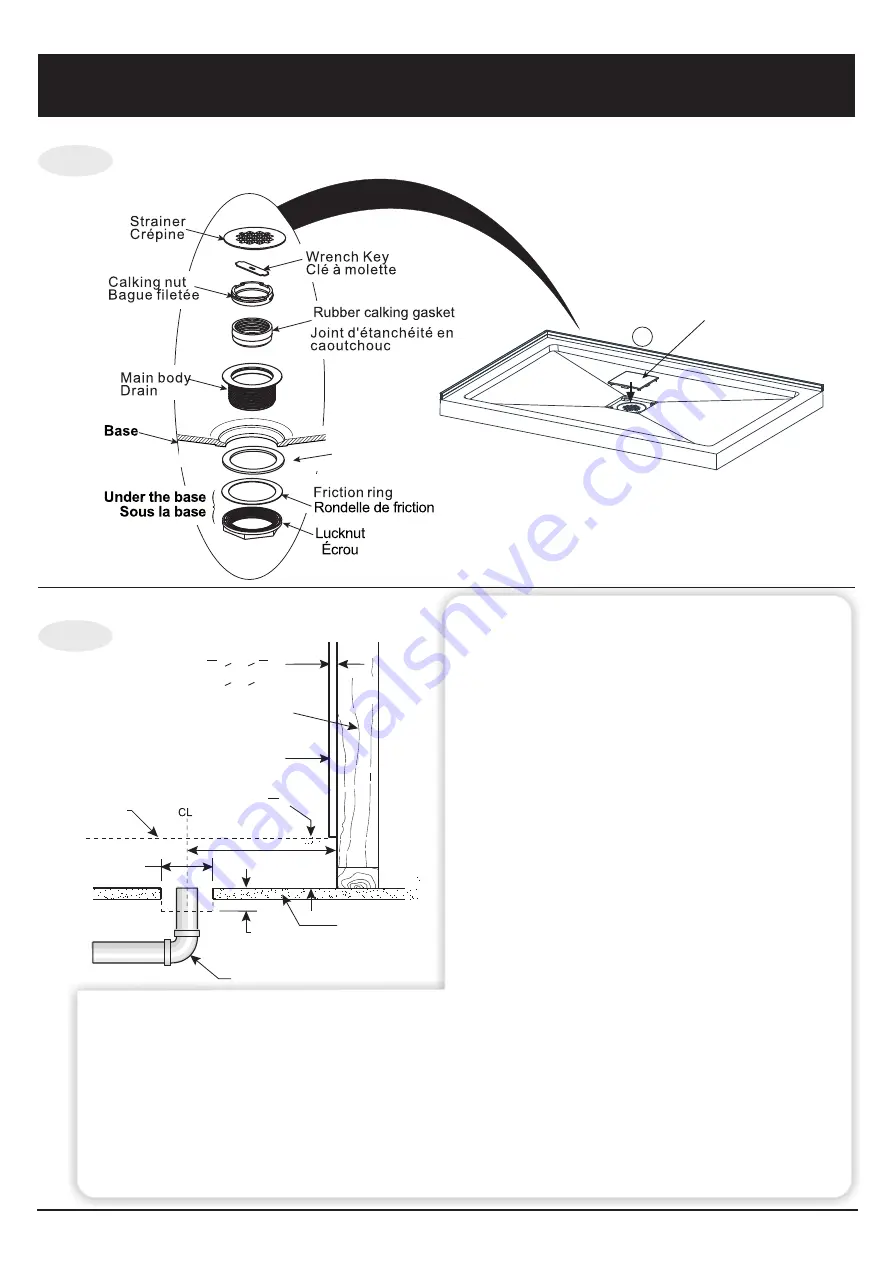
Fig. 3
2 1/4 "
(57 mm )
Drain
Sub floor
Faux plancher
3
"
(90mm)
16
9
5 "
(127 mm )
Drain pipe
Wall Stud (Framing)
Montant mural (Structure)
Finished wall
Revêtement de finition
Shower base
Base de douche
>
δ
>
“
8
3
“
8
7
>
δ
>
22mm
10mm
(
(
Fig. 4
Preparation of shower area
Pr paration de la zone d'installation de la douche
é
11
6
R1
Fig.4 To compensate for any irregularities
in your floor, the base must be shimmed
properly from underneath to provide a
level threshold for mounting purposes.
Any shims must support the entire base:
not only at one point. Verify this by
standing on the base, once shimmed,
and check for any spring or bounce in
the base.
Particularly near drain area.
Before final installation (wedge
retainer insertion (Fig.4) make
sure the base is level and that
water drains away properly without
"pooling" at any location. Use tape
around drain to seal temporarily and
pour 1-2 cups of water around
extremities of the tray to test drainage.
:
Fig.4:Pour compenser toutes les irrégularités dans votre plancher, la base doit être
installé proprement en dessous pour fournir un seuil de niveau à des fins de montage.
Toutes les cales doivent supporter la base, non seulement à un moment donné.
Vérifiez ceci en se tenant bedout sur la base, une fois calé, et vérifier tout ressort ou un
rebond dans la base, plus particulièrement près de la zone du drain.
Avant installation finale (insertion du coin de retenue (Fig.4) assurez-vous que la base
est de niveau et que l'eau s'écoule correctement. Utiliser un ruban adhésif autour du
drain pour sceller temporairement et versez 1-2 tasses d'eau autour des extrémités
afin de tester le drainage.
Rubber gasket
Joint en caoutchouc


