80
81
Remove the old locking
cylinder if necessary (not il-
lustrated).
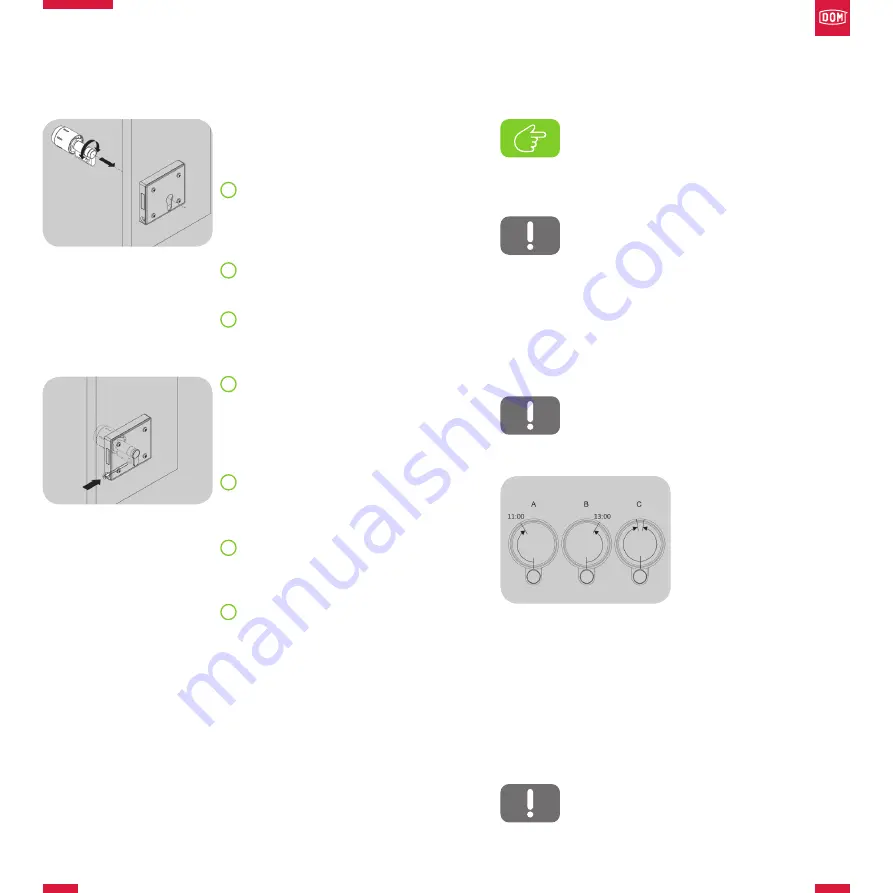
Carefully remove Pro cylin-
der with pre-assembled
outside knob from the
packaging.
Align the cam flush with the
cylinder body.
Carefully slide Pro cylinder
through the fitting.
Hold authorised transpon-
der in front of the knob if
necessary, in order to enga-
ge the cam and align the Pro
cylinder.
Fix the Pro cylinder with the
screw as soon as you feel
the correct position.
Check that the knob turns
freely without scraping on
the fitting.
Tighten the screw.
Fig. 32: Align cam
3
4
5
6
7
8
9
Fig. 33: Fix the Pro cylinder
Please note: The installation follows the same steps
as that of the Pro cylinder as described starting on
page 65. Observe the following information and fol-
low the installation description on page 65. Then
execute the functional test described here.
Caution: The figures starting on page 65 show the
installation situation with standard door handle.
When installing a
Pro cylinder EE
, the installation
sequence also applies for the installation situation
with panic bars according to DIN EN 1125 and and
handles or push pads according to DIN EN 179. The
order of installation remains the same and must be
adhered to under all circumstances. The informati-
on must always be observed. When in doubt, plea-
se contact the manufacturer.
Caution: After each installation, carry out a functio-
nal test. The knobs must return to their neutral po-
sition on their own after being rotated (cam flush).
A/B:
Turn the inside knob a
little more than a fourth of a
revolution in a clockwise or
counter-clockwise direction
(11 o‘clock or 1 o‘clock posi-
tion): The knob must return
to the neutral position on its
own in both cases (see Fig. C).
If the knob fails to turn back, realign the Pro cylinder
EE and check the lock for any defects.
C:
If you move the inside knob by approximately
one half-turn, the knob will remain in this position
for design reasons (dead centre area).
Caution: After installation, make sure the escape
door lock can be securely unlocked and opened ac-
cording to the specifications of the lock and fittings
manufacturers.
PRO CYLINDER EE
Fig. 34: Functional test


