EN
Installing and connecting the refrigerator
CRX1050, CRX1065, CRX1080
18
7.2
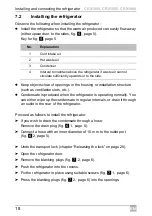
Installing the refrigerator
Observe the following when installing the refrigerator:
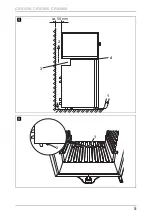
Install the refrigerator so that the warm air produced can easily flow away
(either upwards or to the sides, fig.
5
, page 5).
Key for fig.
5
, page 5
Keep objects clear of openings in the housing or installation structure
(such as ventilation slots, etc.).
Condensate is produced when the refrigerator is operating normally. You
can either wipe up the condensate in regular intervals, or drain it through
an outlet in the rear of the refrigerator.
Proceed as follows to install the refrigerator:
➤
If you wish to drain the condensate through a hose:
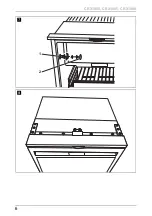
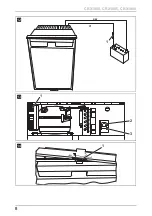
Remove the drain plug (fig.
6
1, page 5).
➤
Connect a hose with an inner diameter of 10 mm to the outlet port
(fig.
6
2, page 5).
➤
Undo the transport lock (chapter “Releasing the lock” on page 25).
➤
Open the refrigerator door.
➤
Remove the blanking plugs (fig.
7
2, page 6).
➤
Push the refrigerator into the recess.
➤
Fix the refrigerator in place using suitable screws (fig.
7
1, page 6).
➤
Press the blanking plugs (fig.
7
2, page 6) into the openings.
No.
Explanation
1
Cold intake air
2
Hot waste air
3
Condenser
4
Interval to maintain above the refrigerator if waste air cannot
circulate sufficiently upwards or to the side.
Summary of Contents for CRX 1050
Page 2: ......
Page 3: ...CRX1050 CRX1065 CRX1080 3 CRX 1050 1 2 3 5 4 6 7 1 1 2 3 5 4 6 7 CRX 1065 2...
Page 4: ...CRX1050 CRX1065 CRX1080 4 1 2 3 5 4 6 7 CRX 1080 3 1 2 3 4 6 5 7 8 4...
Page 5: ...CRX1050 CRX1065 CRX1080 5 1 4 3 2 ca 50 mm 5 2 1 6...
Page 6: ...CRX1050 CRX1065 CRX1080 6 1 2 7 8...
Page 8: ...CRX1050 CRX1065 CRX1080 8 1 rt sw b 2 3 1 c 1 Vent Lock d...
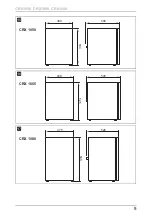
Page 9: ...CRX1050 CRX1065 CRX1080 9 380 534 500 CRX 1050 e CRX 1065 448 525 545 f CRX 1080 475 640 528 g...
Page 121: ......
Page 122: ......
Page 123: ......

