9
EN
CCF-T Refrigerator Preinstallation
q
r
w
e
7
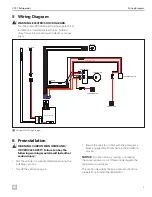
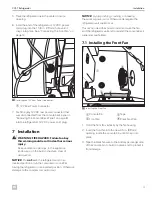
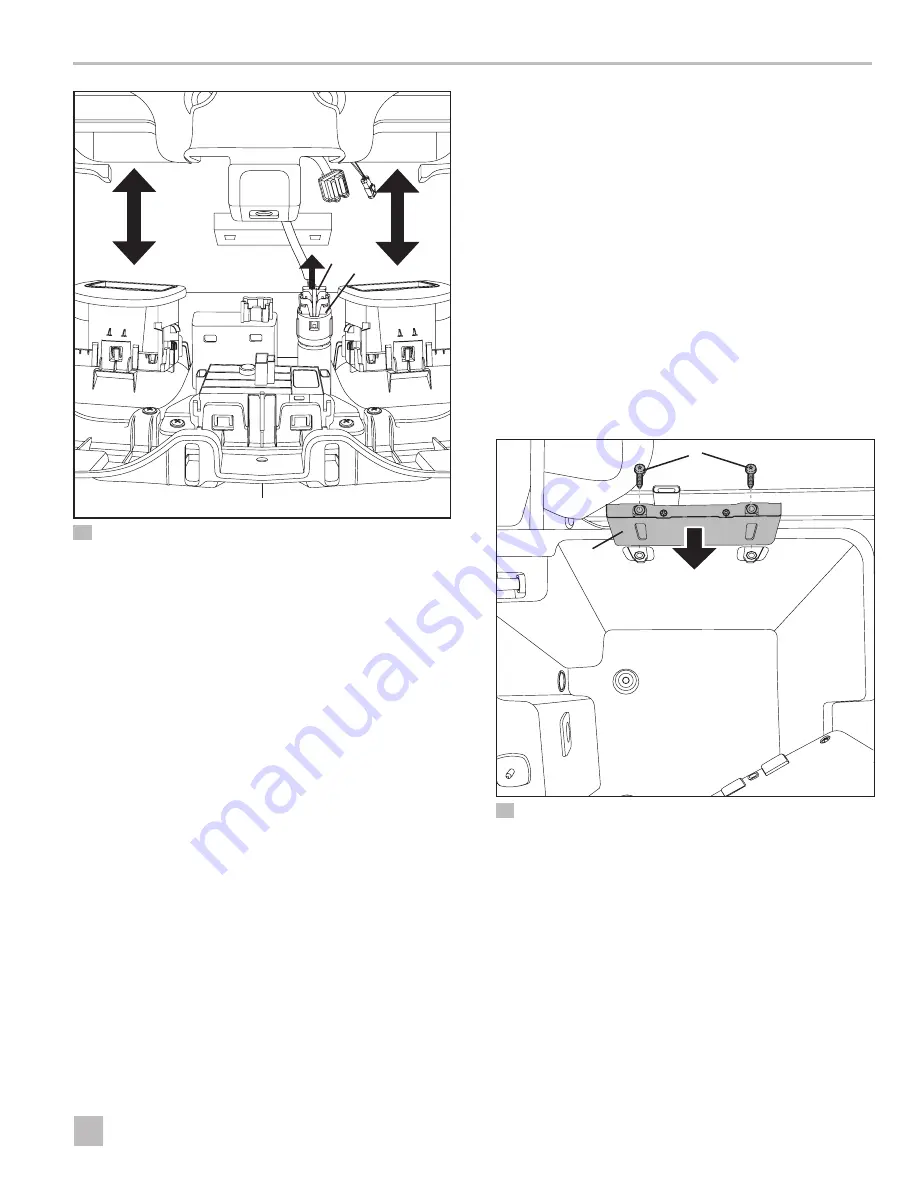
Removing the Electrical Connections
q
Center Console
e
12 V Rear Power
Connector
w
12 V Rear Power
Connector Red Tab
r
Console Back Panel
3. Remove the red tab from the 12 V rear power
connector.
4. Disconnect the 12 V rear power connector from the
console back panel.
5. Disconnect all remaining electrical connections from
the console back panel, and set the console back
panel aside.
6 .4 Testing the Refrigerator
I
The console lid should remain open during the pre-
installation and installation procedures.
1. Place the refrigerator unit upright on the floor, near
the rear of the console (second row area).
2. Insert the vehicle’s 12 V rear power connector into
the refrigerator unit’s 12 VDC power cord plug.
3. Start the vehicle engine.
4. Confirm the blue LED is illuminated on the
refrigerator unit’s ON/OFF button. If not, press and
hold the button for one second, and then release.
5. Listen for the condenser fan to start. See
“Troubleshooting” on page 15 if the condenser
fan does not start.
6. Turn the vehicle engine OFF.
7. Press and hold the ON/OFF button to turn the
refrigerator unit OFF.
8. Unplug the 12 VDC power cord.
9. Set the refrigerator unit away from the console.
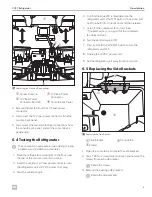
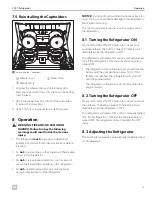
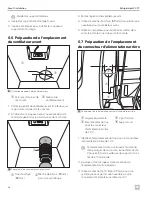
6 .5 Replacing the Side Brackets
q
w
e
8
Replacing the Side Brackets
q
Side Bracket
e
Console Bin
w
Screws
1. Open the console bin to locate the side brackets.
2. Use a T20 Torx screwdriver to loosen and remove the
screws from each side bracket.
I
Retain the screws.
3. Remove the existing side brackets.
I
Retain the side brackets.
Summary of Contents for GM CCF-T
Page 46: ...46 EN CCF T Refrigerator...
Page 47: ...47 EN CCF T Refrigerator...

