6
If you wish to switch off the unit or to defreeze it, turn
the thermostat control (A) in the anti-clockwise
direction as far as it will go (a slight resistance will be
felt) or remove the plug from the mains-socket.
NB: Plug is provided according to specific
regulations in each country and may be different to
that shown.
5.2. Operating from 12 Volt
vehicle battery
Make sure the voltage shown on the data plate of the
appliance matches the voltage of the vehicle battery
(12V).
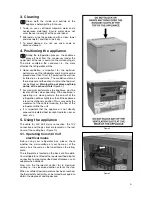
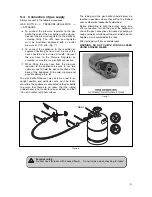
12V DC voltage appliances are equipped with
connectors that can be plugged into cigarette lighters
(Figure 4.). For some types of vehicle, you may need
to remove the red plastic ring located on the end of
the connector. To do so, turn the plastic ring in an anti-
clockwise direction and pull it off. The appliance can
then be connected to the cigarette lighter. In 12V
operation, the appliance runs uninterrupted without
temperature control.
For 12V operation, make sure, if the engine is not
running, that the appliance connector is removed from
the cigarette lighter (12V appliance). Otherwise, the
appliance will discharge the vehicle battery when in
operation.
5.3. Operating from LP bottled gas
Connection to the gas cylinder is described in
sections 9.3. and 9.4.
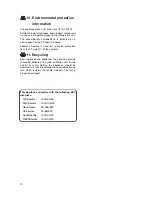
After opening the valve of the gas cylinder and checking
for gas leaks (Figure 5) turn thermostat (B) to maximum
position, press down the gas safety valve and at the same
time, press the piezo-ignition button (C) several times in
quick succession. If the flame does not ignite, repeat the
process. (Air in the appliance gas line prior to connection
to the gas cylinder must be purged. Only then can the
gas be lit.)
The control knob has 4 positions:
: high flame (MAX) = gas supply maximum (high
ambient temperature ~32 °C);
: medium flame (MID)= gas supply medium
(normal ambient temperature ~ 25°C);
: low flame (MIN) = gas supply minimum
(low ambient temperature ~ 16°C);
: off-position = gas supply to burner is shut off.
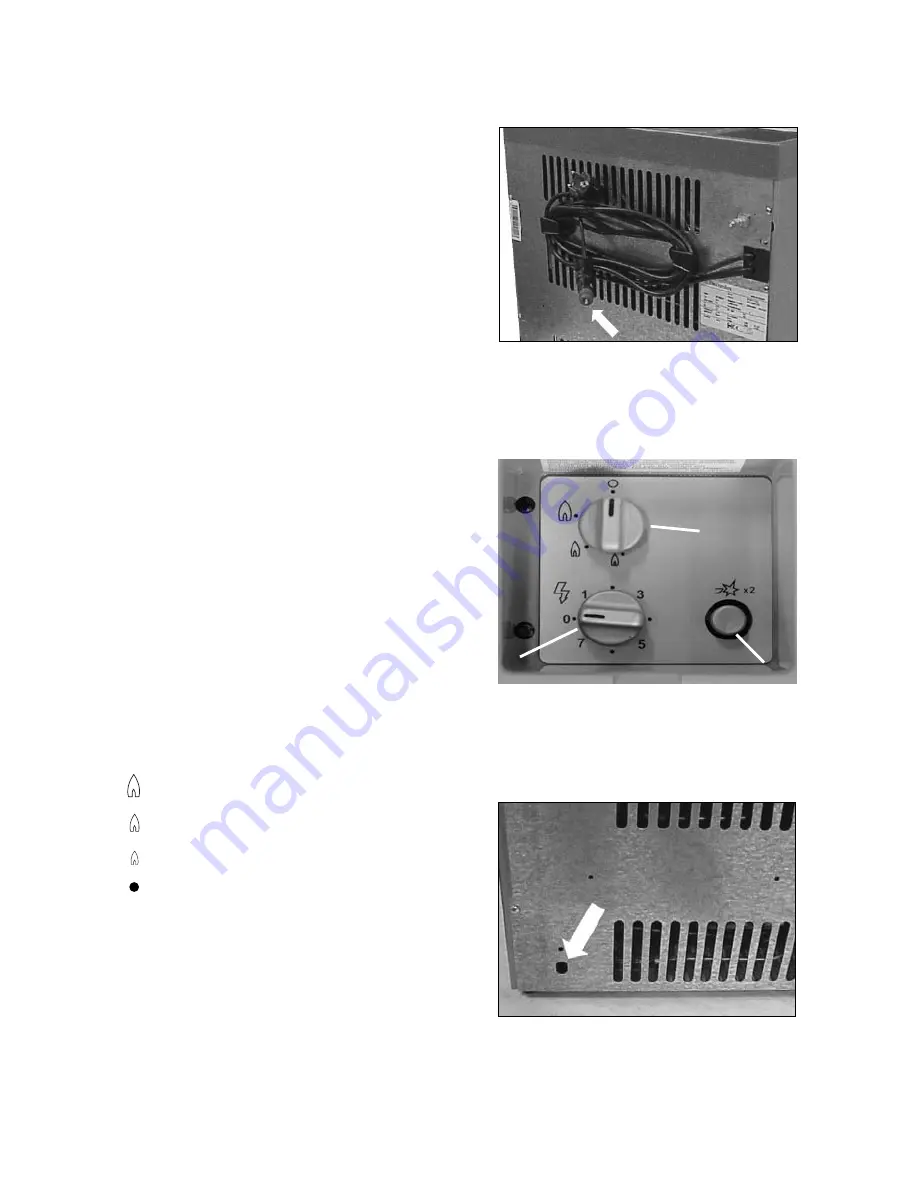
Ignition of the flame can be verified through the flame-
view opening (Figure 6). After you have the flame
alight keep the safety gas valve pressed down for a
further 10 seconds.
Figure 4.
Figure 5.
Figure 6.
B
A
C
Summary of Contents for RC 1600 EGP
Page 11: ...11...


