background image

Most kinds of frozen food can be stored in the frozen food
compartment for about a month. This period of time may
vary, however, and it is important to follow the instructions
on the individual packings.

ICE-MAKING

Fill the ice tray just below the brim with drinking water and
put the tray on the freezer shelf.

It is possible to make ice faster by turning the control knob
temporarily to its highest value but do not forget to turn it
back to its regular setting afterwards as the refrigerator
might otherwise become too cold.

DEFROSTING

Frost will gradually accumulate on the refrigerating sur-
faces. It must not be allowed to grow too thick as it acts as
an insulator and adversely affects refrigerator performance.

Check the formation of frost regularly every week and when
it is about 3 mm thick it will be necessary to defrost the
refrigerator.

To defrost the refrigerator, turn it off and remove the ice tray
and all food items. Normally the temperature of items of
fozen foods would rise unduly during defrosting and so they
should be consumed within 24 h or discarded.

Do not try to accelerate defrosting by using any kind of
heating appliance as the plastic surfaces of the refrigerator
might then be damaged. Neither should any sharp objects
be used to scrape off the ice.

The defrost water runs from a collector channel down a
tube to a drip tray at the rear of the refrigerator where it
evaporates. When all the ice has melted, wipe the refrigera-
tor dry and restart it.

Place the food items back inside but wait until the refri-
gerator is cold before making ice cubes.

CLEANING THE REFRIGERATOR

Clean the inside of the refrigerator regularly to keep it fresh
and hygienic.

Soak a cloth in a solution consisting of a teaspoon of bicar-
bonate of soda to half a litre of warm water. Wring out the
cloth and use it to clean the interior of the refrigerator and
its fittings.

Never use detergents, scouring powder, strongly scented
products or wax polish to clean the interior of the refrigera-
tor as they may damage the surfaces and leave a strong
odour.

The exterior of the refrigerator should be wiped clean now
and again, using a damp cloth and a small quantity of deter-
gent. But not the door gasket, which should only be cleaned
with soap and water and then thoroughly dried.

The cooling unit behind the refrigerator should be cleaned
with a brush from time to time, but make sure that the
refrigerator is switched off when doing this.

TURNING OFF THE REFRIGERATOR

If the refrigerator is not to be used for some time:

Shut off any on-board valve in the gas line to the refrige-
rator.

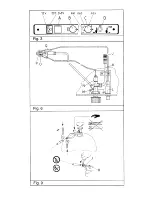
Set the voltage selector (A), fig. 3, to 0.

Set the gas valve (C) to

.

Empty the refrigerator. Defrost and clean it as described
earlier. Leave the doors of the refrigerator and the frozen
food compartment ajar. Use the travel catch to hold in
this position.

IF THE `FRIDGE FAILS TO WORK

Check the following points before calling a service
technician:

1. That the STARTING THE REFRIGERATOR instructions

have been followed.

2. The refrigerator is level.

3. If it is possible to start the refrigerator on any of the con-

nected sources of energy.

4. If the refrigerator fails to work on gas, check:

That the gas bottle is not empty.

That all LP-gas valves are open.

5. If the refrigerator fails to work on 12 V, check:

That the 12 V supply is connected to the refrigerator.

That the fuse on the 12 V supply is intact.

That the 12 V switch is on.

6. If the refrigerator fails to work on 230 V, check:

That the 230 V supply is connected to the refrigerator.

That the fuse is intact.

If the refrigerator is not cold enough it may be because:

1. The ventilation is inadequate owing to reduced area of the

ventilation passages (partial blockage of grilles from wire
mesh etc).

2. The evaporator is frosted up.

3. The temperature control setting is incorrect.

4. The gas pressure is incorrect - check the pressure regula-

tor at the gas container.

5. The ambient temperature is too high.

6. To much food is loaded at the same time.

7. The door is not properly closed or the magnetic sealig

strip is defective.

8. More than one source of energy is used at the same time.

If the refrigerator still does not work properly, call a service
technician.

MAINTENANCE

Concerning gas- and electric installations, only authorized
experts are allowed to carry out maintenance and repair
works. Besides, it is recommendable to contact an authori-
zed service if it comes to repair works.

According to the valid regulations G607 of DVGW, the gas

The sealed cooling system must not be opened, since
is under high pressure.

9

Summary of Contents for RM 4203

Page 1: ... 1 English Page 7 Svenska Sida 31 Dansk Side 37 Norsk Side 43 Français Page 13 Italiano Pagina 19 Español Pagina 25 Nederlands Pag 49 Suomi Sivu 55 RM 4203 Typ C60 70 821 2652 01 T B Rev 09 2005 MANUAL World Fridge ...

Page 2: ...STUNGSSCHILD Kontrollieren Sie am Leistungsschild siehe unten daß Sie das richtige Modell bekommen haben und daß Netzspan nung und Gasanschlussdruck den vorgeschriebenen Wer ten entsprechen in BRD 230 Volt 30 bzw 50 mbar Das Leistungsschild ist im Inneren des Kühlschrankes angebracht und enthält u a folgende Angaben Modellbezeichnung Produktnummer Seriennummer Diese Daten werden bei evtl Kontakten...

Page 3: ...opf C noch 10 15 Sekunden einge drückt 7 Danach loslassen und kontrollieren daß die Flamme weiterbrennt Der Gasbetrieb wird ausgeschaltet indem man den Knopf C auf stellt 230 V Betrieb Bevor Sie den Kühlschrank in Betrieb nehmen prüfen Sie bitte daß die Spannung des Hausanschlusses oder des Campingplatzes mit der auf dem Typenschild angegebenen Spannung übereinstimmt Dann gehen Sie wie folgt vor G...

Page 4: ...mit einem Tuch aufgenommen werden Nach dem Abtauen wird der Schrank mit einem Lappen trocken gewischt wieder angeschaltet und die Lebensmittel hinein gelegt Mit der Eiswürfelbereitung sollten Sie jedoch bis zum nächsten Tag warten PFLEGEANLEITUNG Den Kühlschrank zuerst ausschalten und abtauen wie zuvor beschrieben Lose Teile Etageren Tragroste usw ausbauen spülen und trocknen Einen Lappen mit lauw...

Page 5: ...ng Innerhalb der gesetzlichen Garantiezeit 6 Monate werden Schäden und Mängel am Gerät unentgeltlich behoben Ab dem 7 Monat wird jedoch eine Anfahrpauschale erhoben Der Kühlschrank hat zusätzlich eine Europagarantie ge mäß der im Schrank eingelegten Drucksache KUNDENDIENST UND ERSATZTEILE Kundendienst und Ersatzteile können vom Händler oder einer Kundendienststelle der Fa Electrolux europaweit bez...

Page 6: ...ftungsgitter angebracht werden kleinster freier Quer schnitt 250 cm2 Gitter die für diese Anwendung speziell entwickelt wurden können von DOMETIC bezogen werden Modell A 1620 In den Seitenwänden des Kühlschrankes sind vier Kunstoff buchsen mit Schrauben zur Befestigung des Kühlschrankes vorgesehen Fig 4 Die Seitenwände der Nische und oder zur Kühlschrankbefestigung angebrachte Leisten müssen entsp...

Page 7: ... des Gas und Wasserfaches DVGW und vom Deut scher Verband Flüssiggase DVFG herausgegeben Es wird empfohlen den Kühlschrank mit Sicherheits schlauch und stecker nach DIN 3383 Teil 3 anzuschlies sen Installation in Fahrzeugen Der Gasanschluß zum Kühlschrank muß starr erfolgen Schlauchanschluß ist unzulässig Er darf nur von einem zugelassenen Fachmann ausgeführt werden Der Anschluß erfolgt mittels ei...

Page 8: ...ed DATA PLATE Check the data plate inside the refrigerator to ensure that you have received the right model The right gas pressure is 30 mbar The right voltage is 230 volts The data plate contains e g the following details Model designation Product number Serial number Since these details will be needed if you have to get in touch with service personnel it is a good idea to make a note of them her...

Page 9: ...unning otherwise your battery will soon be discharged If applicable turn off the gas operation Depress the voltage selector A to position 12 V WINTER OPERATION Please check that the ventilation grilles or the flue outlet are not blocked by snow leaves etc DOMETIC ventilation grilles A 1620 fig 11 can be fitted with winter covers modell WA 120 to protect the cooling unit against cold air The covers...

Page 10: ...ty of deter gent But not the door gasket which should only be cleaned with soap and water and then thoroughly dried The cooling unit behind the refrigerator should be cleaned with a brush from time to time but make sure that the refrigerator is switched off when doing this TURNING OFF THE REFRIGERATOR If the refrigerator is not to be used for some time Shut off any on board valve in the gas line t...

Page 11: ...g min 0 16 kg Cooling medium Ammonia R 717 INSTALLATION INSTRUCTIONS REPOSITIONING THE HINGES The door hinges can be moved to the opposite side in the following way Unscrew the upper hinge pin taking care not to lose the set of washers and bushes Lift the door from the lower hinge pin Unscrew the pin and mount it on the opposite side hinge Unscrew the travel catch and mount it on the opposite side...

Page 12: ...which simplifies the installation If there is no outer grille at floor level where leaking gas can escape a 40 mm hole should be made in the floor of the recess to drain the gas The hole should be fitted with wire mesh and an angled plate to protect it from stones mud etc LP GAS CONNECTION The refrigerator is designed for operation on liquified petro leum gas LPG the pressure of which must be for ...

Page 13: ...your plug in the United Kingdom proceed as follows The wire which is coloured GREEN AND YELLOW must be connected to the terminal in the plug which is marked with the letter E or by the earth symbol or coloured green or green and yellow The wire which is coloured BLUE must be connected to the terminal which is marked with the letter N or coloured black The wire which is coloured BROWN must be conne...

Page 14: ......

Page 15: ......

Page 16: ......

Reviews: