background image

2. CONTROLS

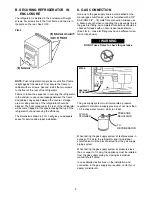
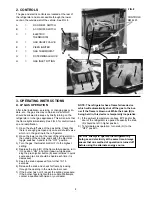
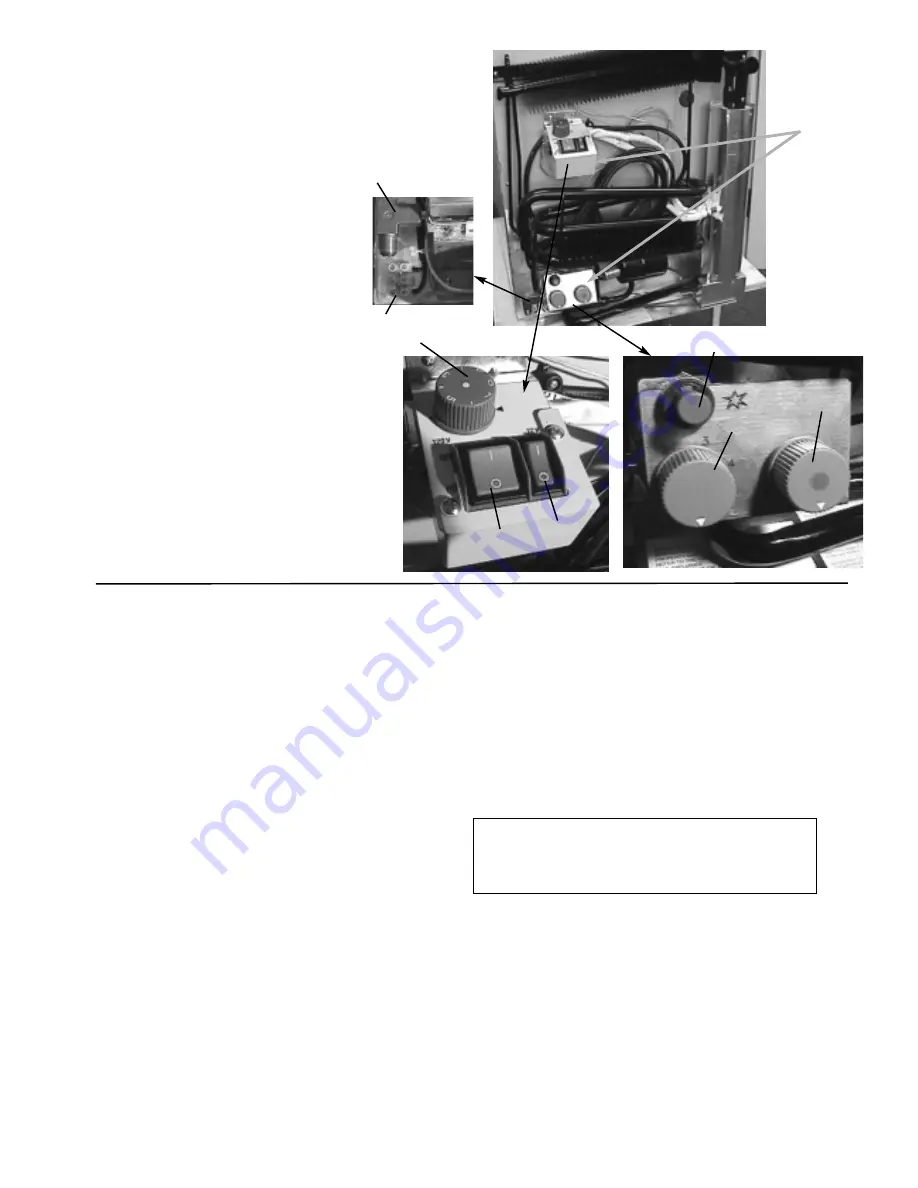
The gas and electric controls are located at the rear of

the refrigerator and are accessible through the lower

vents in the outside wall of the vehicle. See FIG. 8.

A

=

DC ON/OFF SWITCH

B

=

AC ON/OFF SWITCH    

C

=

ELECTRIC 

THERMOSTAT

D

=

GAS ON/OFF VALVE

E

=

PIEZO IGNITER

F

=

GAS THERMOSTAT

G

=

DC TERMINAL BLOCK

H

=

GAS INLET FITTING

3. OPERATING INSTRUCTIONS

A. LP GAS OPERATION

After initial installation, servicing, or changing gas cylin-

ders, etc., the gas line may contain some air which

should be allowed to escape by briefly turning on the

refrigerator or other gas appliances. This will ensure that

the flame lights immediately. See FIG. 8 for control locati-

on and identification.
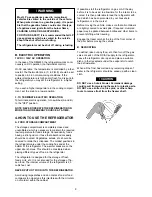
1) Open the shutoff valve of the gas bottle. Check that 

there is enough gas.Open any on-board shutoff valve

which is in the gas line to the refrigerator.

2) Open the lower vent at the rear of the refrigerator on 

the outside of the vehicle, and switch the electrical 

toggle switches  A and B to the "OFF" position.

3) Turn the gas  thermostat control (F) to the highest 

setting.

4) Depress the knob (D) of the flame failure device, turn 

it to position “ON”, and hold it down while depres-

sing the piezo igniter button (E) several times in quick

succession (a click should be heard each time it is 

depressed).

5) Keep the knob depressed for a further 10-15 

seconds.

6) Release the knob and check for flame by looking 

through the opening in the metal burner cover.

7) If the burner has not lit, repeat the lighting procedure.

If the burner fails to light within a couple of attempts, 

contact a qualified technician or your dealer.

NOTE: The refrigerator has a flame failure device

which will automatically shut off the gas to the bur-

ner if the flame is blown out. While the knob (D) is

being held in, this device is temporarily inoperative.

8) If the ambient temperature is above 80°F and/or the 

door of the refrigerator is opened frequently the knob 

(F) should be left in higher position.

9) To terminate gas operation, turn knob (D) to the 

"OFF" position.

8

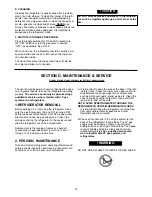
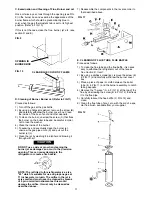
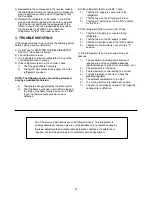
DO NOT attempt to operate the refrigerator by

both gas and electricity at the same time. Always

ensure that one method of operation is turned off

before using the alternate energy source.

FIG. 8

CONTROLS

RM 4223

B

A

C

F

D

E

H

G

Summary of Contents for RM 4223

Page 1: ...age Refer to this manual For assistance or additional informati on consult a qualified installer service agency or the gas supplier AVIS Cet appareil doit être réparé seulement par un réparateur autorisé Modification de l appareil pourrait être extrèmement dangeruse et pourrait causer mal ou mort FOR YOUR SAFETY Do not store or use gasoline or other flammable vapors and liquids in the vicinity of ...

Page 2: ...r recreational vehicle Louver ope nings must have a minimum dimension of 1 4 inch for air supply or venting of combustion products Proper installation requires one fresh air intake and one upper exhaust vent The ventilation kits shown in this instruction manual have been certified for use with the refrigerator model listed in the Table For Certified Vent System Kits see Section B The ventilation k...

Page 3: ...0 L Bottom 0 M Rear 9 32 N See NOTE P See NOTE NOTE Clearance M is between the rearmost part of the refrigerator and the wall behind the refrigerator NOTE Clearance N is the distance between the bot tom of the lower vent to the top of upper side vent For ventilation height refer to Section A Installation Item 5 Ventilation Heights See FIG 2 Surfaces directly above and sides adjacent to the flue ou...

Page 4: ...ide Vents MM 539 537 641 5 524 5 491 602 5 530 5 497 610 6 Depth D Dimensions Requirement with Plastic Vent System is Dependant on Vehicle Side Wall Thickness If the Vehicle Side Wall Thickness is less than 1 5 inches 38mm the Recessed Depth Dimensions will be required to be Increased Proportionally to the Vehicle Wall Thicknes A INSTALLATION The refrigerator must be installed in a substantial enc...

Page 5: ...hed at the manual gas shutoff valve which is furnished with a 3 8 SAE UNF 5 8 18 male flare connection Always use a backup wrench when connecting the gas supply line to the gas inlet fitting All completed connections should be checked for leaks with a noncorrosive leak detector See FIG 6 Gas inlet fitting may have a different orien tation than shown The gas supply system must incorporate a pressur...

Page 6: ...G The terminal block for connecting the 12V supply cable to the battery is positioned at the lower lefthand corner of the rear side G FIG 8 From this terminal the connection to the battery should be made using ring type clamps with tightening bolts to ensure good contact with the battery terminals Polarity is not important therefore it does not matter which wire leads to which battery terminal DO ...

Page 7: ...PORTANCE OF LEVELING A REFRIGERATOR In an absorption refrigerator system ammonia is lique fied in the finned condenser coil at the top of the refrige rator The liquid ammonia then flows into the evaporator inside the freezer section and is exposed to a circula ting flow of hydrogen gas which causes the ammonia to evaporate creating a cold condition in the freezer The tubing in the evaporator secti...

Page 8: ...t control F to the highest setting 4 Depress the knob D of the flame failure device turn it to position ON and hold it down while depres sing the piezo igniter button E several times in quick succession a click should be heard each time it is depressed 5 Keep the knob depressed for a further 10 15 seconds 6 Release the knob and check for flame by looking through the opening in the metal burner cov...

Page 9: ... Avoid using large dishes and do not stack food or food containers too closely as this interferes with the circulati on of cold air within the cabinet If possible start the refrigerator on gas or AC the day before it is to be used to allow time for the interior to be cooled It is then preferable to load the refrigerator with food which has been precooled in your household refrigerator or in the ma...

Page 10: ...ator make sure the electrical supply AC and DC is turned OFF before leads are disconnected Shut off the gas supply Disconnect and cap the gas supply line Loosen the screws anchoring the refrigerator to the enclosure and slide the refrigerator out of the compartment Replacement is the reverse of removal Check all connections for gas leaks Refer to Section A Item 1 through 13 of Installation Instruc...

Page 11: ...to the precision opening This can cause damage to the refrigerator or create a fire hazard NOTE The jet fitted to this refrigerator is a size 43 which is suitable for use on propane gas at 11 inches water column The orifice in the jet is very small and must never be cleaned by means of a pin or similar instrument as this would damage the orifice It must only be cleaned as described above 7 Reassem...

Page 12: ...lame failure device B in FIG 8 If not the thermocouple may be loose or defective 12 E If the refrigerator fails to work DC check 1 That the DC supply is connected to the refrigerator 2 That the fuse on the DC supply is intact 3 That the DC switch is set to the ON position A in FIG 8 F If the refrigerator fails to work on AC check 1 That the AC supply is connected to the refrigerator 2 That the fus...

Reviews: