11
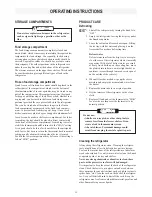
STORAGE COMPARTMENTS
Food storage compartment
The food storage compartment is completely closed and
unventilated, which is necessary to maintain the required low
temperature for food storage. Consequently, foods having
a strong odour or those that absorb odours easily should be
covered. Vegetables, salads etc. should be covered to retain
their crispness. The coldest positions in the refrigerator are
under the cooling fins and at the bottom of the refrigerator.
The warmer areas are on the upper door shelves. This should
be considered when placing different types of food in the
refrigerator.
Frozen food storage compartment
Quick frozen soft fruits and ice cream should be placed in the
coldest part of the compartment, which is at the bottom of
the aluminium liner. Frozen vegetables, may be stored in any
part of the compartment. This compartment is not designed
for deep or quickfreezing of food. Meat or fish, whether raw
or prepared, can be stored in the frozen food storage com-
partment provided they are precooled first in the refrigerator.
They can be stored about three times longer in the frozen
food compartment as compared to the fresh food compart-
ment. To prevent food from drying out, keep it in covered
dishes, containers, plastic bags or wrapped in aluminium foil.
Ice cubes can be made in the freezer compartment. For faster
ice making, the tray should be placed in direct contact with
the bottom of the freezer compartment. Ice making is acceler-
ated if the thermostat knob
B
is turned to the “MAX” setting.
It is a good idea to do this a few hours before the anticipated
need for ice, but be sure to turn the thermostat back to normal
setting, usually about mid-setting when the ice is formed.
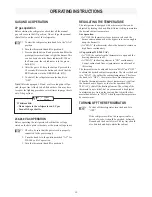
Food in the lower compartment may be frozen if the setting is
left on “MAX” position.
PRODUCT CARE
Defrosting
Shut off the refrigerator by turning the knob
A
to
“OFF”.
Empty the refrigerator, leaving the drip tray under
the finned evaporator.
Leave the cabinet and freezer doors open. Filling
the ice tray with hot water and placing it on the
freezer shelf can reduce defrosting time.
Defrost water
Defrost water runs from the drip tray to a recepta
-
cle at the rear of the refrigerator where it normally
evaporates. With a lot of defrost water as a result
of heavy frosts build up on the cooling fins, move
the plastic drain tube into a water tight bucket or
container, (access through louvered service panel
on the outside of the vehicle).
When all frost has melted, wipe up the excess
moisture and empty the accumulated water from
the bucket.
Replace the drain tube to its original position.
Dry the interior of the refrigerator with a clean
cloth.
Replace all food and set the thermostat to “MAX”
for a few hours, then reset the thermostat to its
normal position.
Cleaning the refrigerator
Always keep the refrigerator clean. Cleaning the refrigera-
tor is usually done after it is defrosted or put into storage.
To clean the interior liner of the refrigerator, use lukewarm
weak soda solution. Use only warm water to clean the finned
evaporator, gasket, ice tray and shelves.
Never use strong chemicals or abrasives to clean these
parts, as the protective surfaces will be damaged.
It is important to keep the area at the back of the refrigerator
clean. Check the lower vent, upper vent and area between
these openings for any obstructions such as bird/insect nests,
spider webs, etc. Clean the coils on the back of the refrigera-
tor. Use a soft bristled brush to dust off the coils. Keep the
refrigerator area free from combustible material, gasoline and
other flammable vapours or liquids.
1.
2.
3.
4.
5.
6.
7.
OPERATING INSTRUCTIONS
Do not store explosive substances in the refrigerator,
such as cigarette lighter gas, gasoline, ether or the
like.
WARNING
!
Do not use:
A knife or an ice pick, or other sharp tools to
remove frost from the freezer shelves. It can
create a leak in the ammonia system.
A hot air blower. Permanent damage could
result from warping the metal or plastic parts.
•
•
CAUTION
Summary of Contents for RM2453 and
Page 15: ...15 Appendix B wiring diagram...
Page 16: ......

