background image

6

SECURING ThE REFRIGERATOR

After the refrigerator is put in place, (ensuring a combustion 

seal at the front frame), the refrigerator is to be secured in the 

enclosure with six screws (not included).

Please note that failure to follow the sequence in securing the 

refrigerator in the enclosure can cause leakage between the 

frame and cabinet. Any space between the counter, storage 

area or ceiling and top of the refrigerator greater than 40 

mm should be blocked. The heat produced at the rear of the 

refrigerator will become trapped in this space, making the 

top of the refrigerator hot and reduce the efficiency of the 

refrigerator.
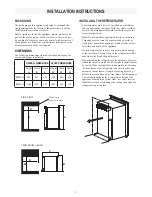
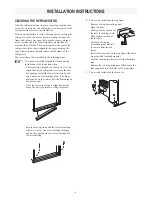
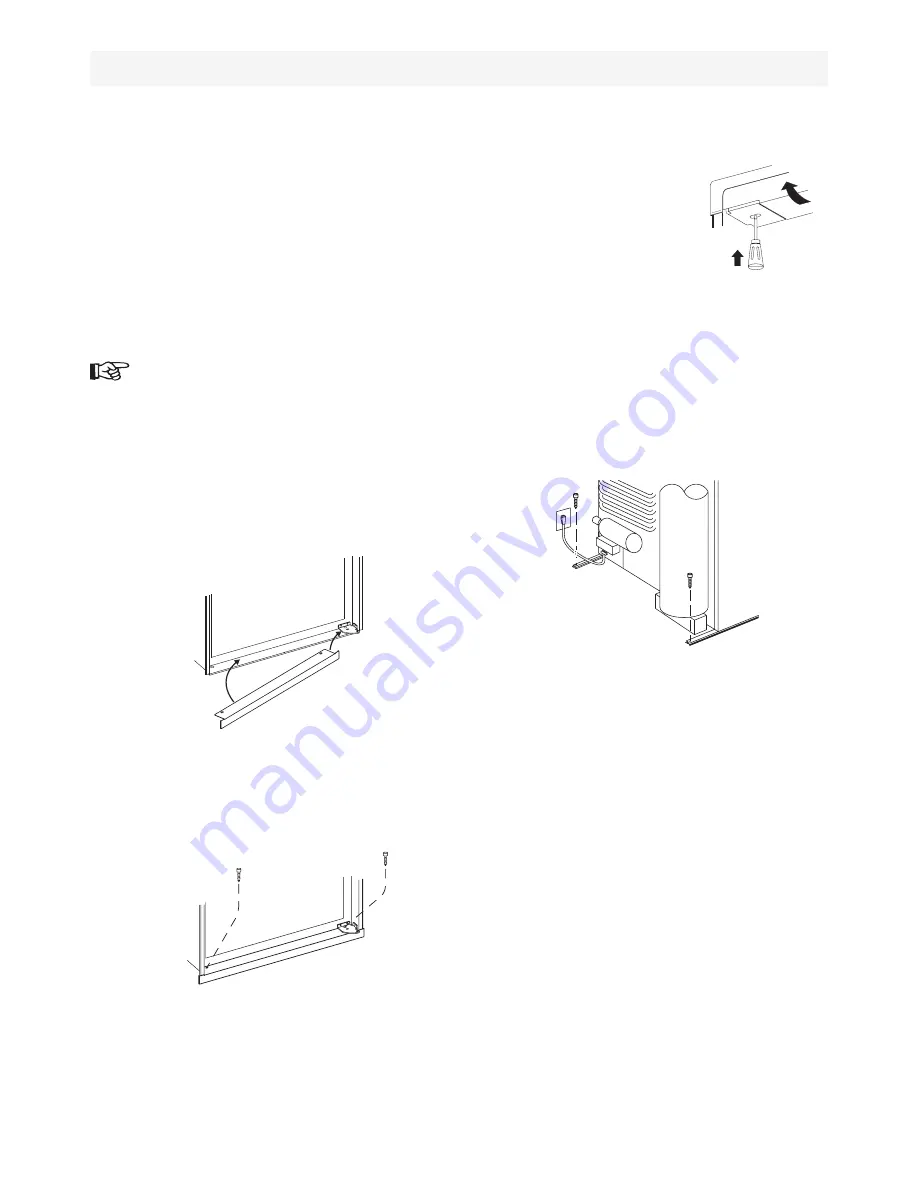
The screws have to be installed in the following order:

Two screws installed through the front base and 

installation of the lower front strip. 

The front strip (shipped as a loose part ) is to be 

attached after the refrigerator is set into the cut-

out opening. Install the lower front strip by slid-

ing it under the bottom hinge plate. (The hinge 

plate can be on the right or left side depending on 

the door swing.) 
Once the lower front strip is slipped under the 

hinge, the part is possible to swing into place. 


Secure the refrigerator and the lower front strip 

with two screws: One screw through the hinge, 

and on the opposite side one screw through the 

lower front strip.  


1.

-

-

-

INSTALLATION INSTRUCTIONS

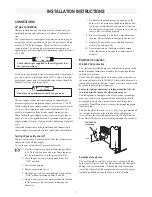
Two screws installed in the top frame. 

Remove the top decoration panel. 
Open the door. 
Gently push the tabs out of 

the hole in the hinge with 

a flat blade screwdriver 

(both sides). 

Carefully tilt the top 

decoration panel and lift 

to remove from the top 

frame. 

Install the two screws in the top frame (the holes 

are accessible from underneath).
Seal the opening for the screws with aluminium 

tape.
Replace the top decoration panel. Make sure the 

tabs snap back into the holes in the hinge plate. 

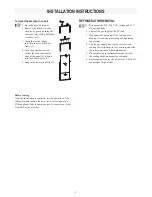
Two screws installed in the rear base.  


2.

-
-
-

-

-

-

-

3.

1

2

Summary of Contents for RM2453 and

Page 1: ...a ble vapors and liquids in the vicinity of this or any other appliance Improper installation adjustment alteration service or maintenance can cause injury or property damage Refer to this manual For...

Page 2: ...nomical operation the refrigerator must be installed and used as described in these instructions Follow the instructions in this manual The refrigerator is quality guaranteed However we are not respon...

Page 3: ...completely block it resulting in a loss of cooling Note Any time the vehicle is parked for several hours with the refrigerator operating the vehicle must be levelled to prevent this loss of cooling W...

Page 4: ...and used without modification An opening toward the outside at floor level in the refrigera tor compartment must be provided for ventilation of heavier than air fuel gases The lower vent of the recom...

Page 5: ...ip is ap plied to the rear surface of the front frame for this purpose The sealing should provide a complete isolation of the appliance s combustion system from the vehicle interior Note Be careful no...

Page 6: ...ed after the refrigerator is set into the cut out opening Install the lower front strip by slid ing it under the bottom hinge plate The hinge plate can be on the right or left side depending on the do...

Page 7: ...buttons C and D Apply a non corrosive commercial bubble solution to the burner jet Be careful not to damage the burner jet 1 2 3 4 5 6 Installation instructions No bubbles should appear at the openin...

Page 8: ...led on the tow vehicle or in the caravan The relay will automatically shut off the 12 V DC power to the refrigerator when the ignition is turned off CHANGING DOOR SWING The refrigerator is equipped wi...

Page 9: ...al Check all connections for gas leaks 1 2 3 4 5 6 To mount the door panel snap in Open the door 90 degrees Remove the door decoration strip 2 by gently pushing the four tabs away with a flat blade sc...

Page 10: ...ator on LP gas Turn off the gas bottle WARNING REGULATING THE TEMPERATURE The refrigerator is equipped with a thermostat that can be adjusted by turning the knob B to different setting to maintain the...

Page 11: ...igerator leaving the drip tray under the finned evaporator Leave the cabinet and freezer doors open Filling the ice tray with hot water and placing it on the freezer shelf can reduce defrosting time D...

Page 12: ...ably clean and free of soot Heavy soot formation indicates improper functioning of the burner The flue and burner both require cleaning in the following manner Unplug the refrigerator power cord from...

Page 13: ...240 volt power cord to the outlet and reconnect or turn on the 12 volt DC power Check LP gas safety shutoff 13 14 15 16 17 Maintenance service Electrode Burner tube 1 8 to 3 16 3 5 mm Troubleshooting...

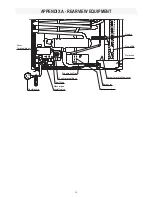
Page 14: ...s DC 12 Volts DC Reigniter Heater Cover Terminal block Flexible cord Inlet fitting Manual gas shutoff valve 12 volt terminal block Evaporation Tray Burner jet Drain water hose Screw for protection cov...

Page 15: ...15 Appendix B wiring diagram...

Page 16: ......

Reviews: