12
If the refrigerator will not be in operation for a period of weeks,
it should be emptied, defrosted, cleaned and the doors left
ajar. The ice tray should also be dried and kept outside the
cabinet.
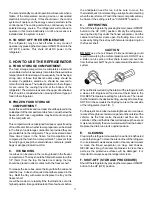
The handle of the travel
latch is designed to
keep the refrigerator
doors open slightly al-
lowing air to circulate,
preventing odors and
mildew. The doors can
be secured in the
vented position by
pushing the square but-
ton "A" (FIG. 9) until
the notch seized the
catch "B" (FIG. 9). To release the door, simply pull the
handle.
G. CLIMATE CONTROL
During the summer months of high temperatures and
humidity, the metal frame between the freezer and fresh
food compartments may have water droplets forming. The
number of water droplets will increase if the vehicle isn't
air conditioned during these months.
This refrigerator comes standard with a 12 volt (DC)
SECTION D. MAINTENANCE & SERVICE
1. REFRIGERATOR REMOVAL
Before working on the refrigerator, make sure the AC voltage
and DC voltage leads are disconnected. Shut off the gas
supply. Disconnect the gas supply line. Cap the gas supply
line, loosen the screws anchoring the refrigerator to the
enclosure and slide the refrigerator out of the compartment.
Replacement is the reverse of removal. Check all connec-
tions for gas leaks. Refer to
Section A, Item 1 to 12 of
Installation Instructions.
2. PERIODIC MAINTENANCE
To keep your Dometic refrigerator operating efficiently and
safely, periodic inspection and cleaning of several compo-
nents once or twice a year is recommended.
A. It is important to keep the area at the back of the
refrigerator clean. Check the lower vent, upper vent and
area between these openings for any obstructions such
as bird/insect nests, spider webs, etc. Clean the coils on
the back of the refrigerator. Use a soft bristled brush to
dust off the coils.
It is important to keep the refrigerator area free from
combustible material, gasoline and other flammable
vapors or liquids.
B. Check all connections in the LP gas system (at the back
of the refrigerator) for gas leaks. The LP gas supply must
be turned on. Apply a noncorrosive bubble solution to all
LP gas connections. The appearance of bubbles indi-
cates a leak and should be repaired immediately by a
QUALIFIED SERVICEMAN WHO IS FAMILIAR WITH
LP GAS SYSTEMS AND REFRIGERATORS.
DO NOT USE A FLAME TO CHECK FOR GAS LEAKS.
C. Check the AMES control system by connecting/discon-
necting 120 volt AC power, start/stop the engine, etc.
Compare the operation with the operation described in
Section C. Operation Instructions.
NOTE: The following maintenance is required once or twice
climate control that will evaporate the water droplets when
they form.
To have this climate control on, you position the switch
(See "G", Fig. 10) located beneath the top decorative
strip that houses the control panel to ON. The climate
control can be left on continuously or only used when
temperatures require it.
NOTE: The climate control will draw 12 volts DC power
continuously when in the ON position. It should be turned
OFF when a charging source is not available.
Most LP gas appliances used in recreational ve-
hicles are vented to the outside of the vehicle. When
parked close to a gasoline pump, it is possible that
the gasoline fumes could enter this type of appli-
ance and ignite from the burner flame, CAUSING A
FIRE OR AN EXPLOSION.
FOR YOUR SAFETY, when refueling, shut off all LP
gas appliances which are vented to the outside.
FIG. 9
A
B

